Content from The QuTech Software Maturity Model (QSMM)
Last updated on 2025-07-01 | Edit this page
QSMM
We frame our effort in this course in the context of the QuTech Software Maturity Model (QSMM). A software maturity model consists of structured levels that describes how well the behaviors, practices and processes of software development an organization can reliably and sustainably produce required outcomes. QSMM is a software maturity model specifically tailored for QuTech, based on TNO guidelines. QSMM consists of two sub-models:
- the software product maturity model
- the software development process maturity model
The purpose of this episode is to explain how software developed by researchers should fit into these models.
Software Product Maturity
This consists of the following levels:
| Category | Type | Purpose | Example |
|---|---|---|---|
| 1 | Prototype | Software developed for a specific analysis or to implement a concept (to generate feedback). | Small software product, a single (one-off) component created by one developer also being the primary user. The software may be reused by the developer but is not intended to be used by others and is not managed/maintained for the long term. |
| 2 | Proven | Software for engineering feasibility demonstrations (prove that a technology works) or developed as part of a research project or output of a research project. | Small software product consisting of 1 or few components that are used by a limited number of internal users (e.g., a project or research group). Long term maintenance is more important because the software is distributed wider and has a lifespan longer than the setting in which it was developed. |
| 3 | Mature | Strategic, business/research objectives driven systems internally used over a longer period. | Small projects delivering reliable software products that are used by a group of users and is often mission critical. When successful, the user base of an internal product may optionally be extended to external users. The software may also be used in hackathons. Long term maintenance is needed but organized within the user-group. |
| 4 | Commercial-like | Products (operational environment, external facing) | Large projects with complex, public facing software products developed within separate software development teams. Long term software maintenance is done, often by different software engineers than the original developers. |
Software Development Process Maturity
This consists of the following levels:
| Level | Name | Description |
|---|---|---|
| 1 | Undefined | Undefined level, no policies or procedures established for the software process. Ad hoc unpredictable software development. Poorly controlled and reactive. Success is effort of individuals (local heroes). |
| 2 | Repeatable | Repeatable level, basic project management established for software development (to track cost, functionality, and time). Development process decisions made are often reactive and based on intuition or experience instead of executing a predefined plan. The process is at least documented sufficiently such that repeating the same steps may be attempted. |
| 3 | Mature | Mature level. Software development process for management and engineering is documented. At this level, the software development process is defined clearly while at organizational level the processes are not standardized. |
| 4 | Defined | Defined level. Software development process for management and engineering are integrated in the organization. Projects tailor their processes from organization’s standards. The processes are qualitative measured and scored. |
| 5 | Managed | Managed level. The quality of the software process is quantitatively measured, so it can be evaluated and adjusted when necessary. |
| 6 | Optimizing | Optimizing level - continuous process improvement (based on data collected as described in the managed level, as well as investing in innovation). |
Goals for Research-Developed Software
- Most software developed by researchers will fall in the Category 1 and 2 in the Software Product Maturity levels. Goal is to make it possible to transition this to Category 3 and 4 if ever needed
- With respect to process maturity:
- Goal of this course is to make researches aware of development process levels, and the way they should be used
- Level 1 development should only apply to ad-hoc projects, typically developed over at most few days.
- For any other software development activities, researches should strive for at least Level 2, ideally Level 3 practices.
Group exercise
- List all libraries, software products that are used within your research group
- Categorize the components into home made and commercial
- Why do you pay for a certain commercial product?
- What level are the homemade libraries in? what level should they be in?
Content from Version Control
Last updated on 2025-07-07 | Edit this page
Overview
Questions
- What is version control and why should I use it?
- How do I get set up to use Git?
- Where does Git store information?
Objectives
- Understand the benefits of an automated version control system.
- Understand the basics of how automated version control systems work.
- Configure
gitthe first time it is used on a computer. - Understand the meaning of the
--globalconfiguration flag. - Create a local Git repository.
- Describe the purpose of the
.gitdirectory.
Motivation
Jimmy and Alfredo have been hired by Ratatouille restaurant (a special restaurant from Euphoric State University) to investigate if it is possible to make the best recipes archive ever. Before even starting, they make a plan of how they want to accomplish this task, and come up with the following requirements:
- The want to be able to work on recipes at the same time, with minimal coordination, and make sure they do not overwrite each other’s changes.
- The want to be able to look back at the history of a recipe, and see who has added what to that recipe.
- They also would like to be able, at any time, to go back to an older version of any recipe.
A colleague suggests using version control to manage
their work. Alfredo and Luigi look at what version control systems are
available, and end up choosing Git, since it is widely used
- it is pretty much the de-facto standard in this area. Throughout this
course we will follow Luigi and Alfredo on their journey learning and
using Git.
Automatic Version Control
What Is Automatic Version Control?
Automatic version control is a system that tracks changes to files over time, allowing multiple people to collaborate, revert to previous versions, and maintain a history of modifications. It is commonly used in software development to manage source code, but it can also be used for documents, configurations, and other digital assets.
Using version control has many benefits, the most important being:
Nothing that is committed to version control is ever lost, unless you work really, really hard at losing it. Since all old versions of files are saved, it’s always possible to go back in time to see exactly who wrote what on a particular day, or what version of a program was used to generate a particular set of results.
As we have this record of who made what changes when, we know who to ask if we have questions later on, and, if needed, revert to a previous version, much like the “undo” feature in an editor.
When several people collaborate in the same project, it’s possible to accidentally overlook or overwrite someone’s changes. The version control system automatically notifies users whenever there’s a conflict between one person’s work and another’s.
Teams are not the only ones to benefit from version control: lone researchers can benefit immensely. Keeping a record of what was changed, when, and why is extremely useful for all researchers if they ever need to come back to the project later on (e.g., a year later, when memory has faded).
Version control is the lab notebook of the digital world: it’s what professionals use to keep track of what they’ve done and to collaborate with other people. Every large software development project relies on it, and most programmers use it for their small jobs as well. And it isn’t just for software: books, papers, small data sets, and anything that changes over time or needs to be shared can and should be stored in a version control system.
We’ll start by exploring how version control can be used to keep track of what one person did and when. Even if you aren’t collaborating with other people, automated version control is much better than this situation:
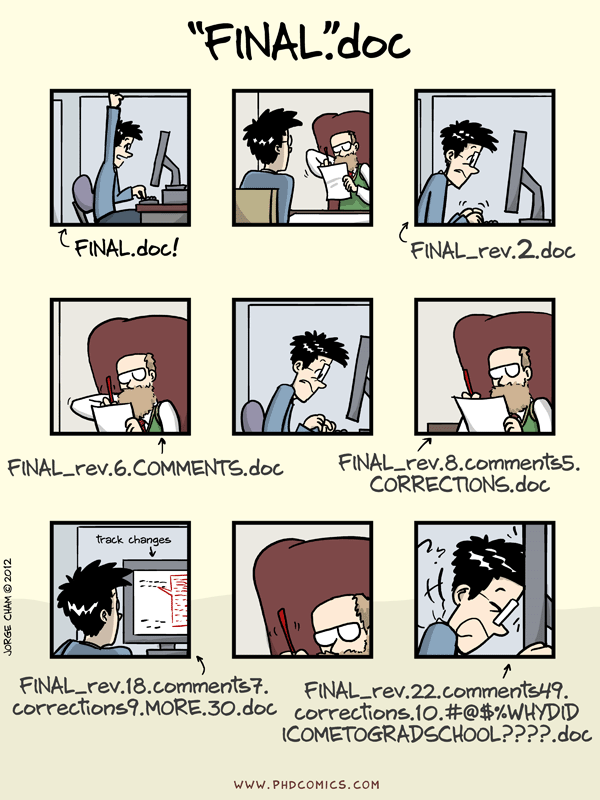
We’ve all been in this situation before: it seems unnecessary to have multiple nearly-identical versions of the same document. Some word processors let us deal with this a little better, such as Microsoft Word’s Track Changes, Google Docs’ version history, or LibreOffice’s Recording and Displaying Changes.
Version control systems start with a base version of the document and then record changes you make each step of the way. You can think of it as a recording of your progress: you can rewind to start at the base document and play back each change you made, eventually arriving at your more recent version.

Once you think of changes as separate from the document itself, you can then think about “playing back” different sets of changes on the base document, ultimately resulting in different versions of that document. For example, two users can make independent sets of changes on the same document.

Unless multiple users make changes to the same section of the document - a conflict - you can incorporate two sets of changes into the same base document.

It is the version control system that keeps track of these changes for us, by effectively creating different versions of our files. It allows us to decide which changes will be made to the next version (each record of these changes is called a commit), and keeps useful metadata about them. The complete history of commits for a particular project and their metadata make up a repository. Repositories can be kept in sync across different computers, facilitating collaboration among different people.
The Long History of Version Control Systems
Automated version control systems are nothing new. Tools like RCS, CVS, or Subversion have been around since the early 1980s and are used by many large companies. However, many of these are now considered legacy systems (i.e., outdated) due to various limitations in their capabilities. More modern systems, such as Git and Mercurial, are distributed, meaning that they do not need a centralized server to host the repository. These modern systems also include powerful merging tools that make it possible for multiple authors to work on the same files concurrently.
Paper Writing
Imagine you drafted an excellent paragraph for a paper you are writing, but later ruin it. How would you retrieve the excellent version of your conclusion? Is it even possible?
Imagine you have 5 co-authors. How would you manage the changes and comments they make to your paper? If you use LibreOffice Writer or Microsoft Word, what happens if you accept changes made using the
Track Changesoption? Do you have a history of those changes?
Recovering the excellent version is only possible if you created a copy of the old version of the paper. The danger of losing good versions often leads to the problematic workflow illustrated in the PhD Comics cartoon at the top of this page.
Collaborative writing with traditional word processors is cumbersome. Either every collaborator has to work on a document sequentially (slowing down the process of writing), or you have to send out a version to all collaborators and manually merge their comments into your document. The ‘track changes’ or ‘record changes’ option can highlight changes for you and simplifies merging, but as soon as you accept changes you will lose their history. You will then no longer know who suggested that change, why it was suggested, or when it was merged into the rest of the document. Even online word processors like Google Docs or Microsoft Office Online do not fully resolve these problems.
Key Points
- Version control is like an unlimited ‘undo’.
- Version control also allows many people to work in parallel.
Introducing Git
In this section we will move away from the general discussion on version control systems, and focus on one modern such system - namely Git - which over the past ten years has emerged as the de-facto standard in this area. One of the main goals of this course is to make you very comfortable with using git, which we believe will greatly help you towards the goal of making robust and reproducible research software. If you want to know more about how git has emerged as the dominant version control system, there are a few interesting articles on its history here, here, and here
Setting Up Git
Prerequisites
- In this episode we use Git from the Unix Shell. Some previous experience with the shell is expected, but isn’t mandatory.
- It is also assumed that you have already installed Git on your system. If this is not the case, please do this now, by following the download/installation instructions here
When we use Git on a new computer for the first time, we need to configure a few things. Below are a few examples of configurations we will set as we get started with Git:
- our name and email address,
- what our preferred text editor is,
- and that we want to use these settings globally (i.e. for every project).
On a command line, Git commands are written as
git verb options, where verb is what we
actually want to do and options is additional optional
information which may be needed for the verb. So here is
how Alfredo sets up git on his new laptop:
BASH
$ git config --global user.name "Alfredo Linguini"
$ git config --global user.email "a.linguini@ratatouille.fr"
Please use your own name and email address instead of Alfredo’s. This user name and email will be associated with your subsequent Git activity, which means that any changes pushed to Git platforms, such as GitHub, BitBucket, GitLab or any other Git host server after this lesson will include this information.
For this lesson, we will be interacting with TU Delft GitLab instance and so the email address used should be your TUD email.
Line Endings
As with other keys, when you press Enter or ↵ or on Macs, Return on your keyboard, your computer encodes this input as a character. Different operating systems use different character(s) to represent the end of a line. (You may also hear these referred to as newlines or line breaks.) Because Git uses these characters to compare files, it may cause unexpected issues when editing a file on different machines. Though it is beyond the scope of this lesson, you can read more about this issue in the Pro Git book.
You can change the way Git recognizes and encodes line endings using
the core.autocrlf command to git config. The
following settings are recommended:
On macOS and Linux:
And on Windows:
Alfredo also has to set his favorite text editor, following this table:
| Editor | Configuration command |
|---|---|
| Atom | $ git config --global core.editor "atom --wait" |
| nano | $ git config --global core.editor "nano -w" |
| BBEdit (Mac, with command line tools) | $ git config --global core.editor "bbedit -w" |
| Sublime Text (Mac) | $ git config --global core.editor "/Applications/Sublime\ Text.app/Contents/SharedSupport/bin/subl -n -w" |
| Sublime Text (Win, 32-bit install) | $ git config --global core.editor "'c:/program files (x86)/sublime text 3/sublime_text.exe' -w" |
| Sublime Text (Win, 64-bit install) | $ git config --global core.editor "'c:/program files/sublime text 3/sublime_text.exe' -w" |
| Notepad (Win) | $ git config --global core.editor "c:/Windows/System32/notepad.exe" |
| Notepad++ (Win, 32-bit install) | $ git config --global core.editor "'c:/program files (x86)/Notepad++/notepad++.exe' -multiInst -notabbar -nosession -noPlugin" |
| Notepad++ (Win, 64-bit install) | $ git config --global core.editor "'c:/program files/Notepad++/notepad++.exe' -multiInst -notabbar -nosession -noPlugin" |
| Kate (Linux) | $ git config --global core.editor "kate" |
| Gedit (Linux) | $ git config --global core.editor "gedit --wait --new-window" |
| Scratch (Linux) | $ git config --global core.editor "scratch-text-editor" |
| Emacs | $ git config --global core.editor "emacs" |
| Vim | $ git config --global core.editor "vim" |
| VS Code | $ git config --global core.editor "code --wait" |
It is possible to reconfigure the text editor for Git whenever you
want to change it. To keep the presentation uniform, we will use
nano as our default editor for this workshop.
Git (2.28+) allows configuration of the name of the branch created
when you initialize any new repository. Alfredo decides to use that
feature to set it to main so it matches the cloud service
he will eventually use.
Default Git branch naming
Source file changes are associated with a “branch.” For new learners
in this lesson, it’s enough to know that branches exist, and this lesson
uses one branch. By default, Git will create a branch called
master when you create a new repository with
git init (as explained in the next section). This term
evokes the racist practice of human slavery and the software development
community has moved to adopt more inclusive language.
In 2020, most Git code hosting services transitioned to using
main as the default branch. As an example, any new
repository that is opened in GitHub and GitLab default to
main. However, Git has not yet made the same change. As a
result, local repositories must be manually configured have the same
main branch name as most cloud services.
For versions of Git prior to 2.28, the change can be made on an
individual repository level. The command for this is in the next
episode. Note that if this value is unset in your local Git
configuration, the init.defaultBranch value defaults to
master.
The five commands we just ran above only need to be run once: the
flag --global tells Git to use the settings for every
project, in your user account, on this computer.
Let’s review those settings with the list command:
If necessary, you change your configuration using the same commands to choose another editor or update your email address. This can be done as many times as you want.
Proxy
In some networks you need to use a proxy. If this is the case, you may also need to tell Git about the proxy:
To disable the proxy, use
Git Help and Manual
Always remember that if you forget the subcommands or options of a
git command, you can access the relevant list of options
typing git <command> -h or access the corresponding
Git manual by typing git <command> --help, e.g.:
While viewing the manual, remember the : is a prompt
waiting for commands and you can press Q to exit the
manual.
More generally, you can get the list of available git
commands and further resources of the Git manual typing:
Key Points
- Use
git configwith the--globaloption to configure a user name, email address, editor, and other preferences once per machine.
Creating a Git Repository
Once Git is configured, we can start using it.
We will help Alfredo with his new project, create a repository with all his recipes.
First, let’s create a new directory in the Desktop
folder for our work and then change the current working directory to the
newly created one:
Then we tell Git to make recipes a repository -- a place where Git can
store versions of our files:
It is important to note that git init will create a
repository that can include subdirectories and their files—there is no
need to create separate repositories nested within the
recipes repository, whether subdirectories are present from
the beginning or added later. Also, note that the creation of the
recipes directory and its initialization as a repository
are completely separate processes.
It is also important to understand that the Git repositories that you
will create and use in this episode and the next one are all
local - meaning they only exists on your computer, and can
only be used by you. In the next workshop we will show you how to
transition from a local repository to an online one - which will enable
you to collaborate with multiple colleagues working on the same
project.
If we use ls to show the directory’s contents, it
appears that nothing has changed:
But if we add the -a flag to show everything, we can see
that Git has created a hidden directory within recipes
called .git:
OUTPUT
. .. .gitGit uses this special subdirectory to store all the information about
the project, including the tracked files and sub-directories located
within the project’s directory. If we ever delete the .git
subdirectory, we will lose the project’s version control history.
We can now start using one of the most important git commands, which
is particularly helpful to beginners. git status tells us
the status of our project, and better, a list of changes in the project
and options on what to do with those changes. We can use it as often as
we want, whenever we want to understand what is going on.
OUTPUT
On branch main

No commits yet

nothing to commit (create/copy files and use "git add" to track)
If you are using a different version of git, the exact
wording of the output might be slightly different.
Places to Create Git Repositories
Along with tracking information about recipes (the project we have
already created), Alfredo would also like to track information about
desserts specifically. Alfredo creates a desserts project
inside his recipes project with the following sequence of
commands:
BASH
$ cd ~/Desktop    # return to Desktop directory
$ cd recipes      # go into recipes directory, which is already a Git repository
$ ls -a           # ensure the .git subdirectory is still present in the recipes directory
$ mkdir desserts # make a sub-directory recipes/desserts
$ cd desserts    # go into desserts subdirectory
$ git init        # make the desserts subdirectory a Git repository
$ ls -a           # ensure the .git subdirectory is present indicating we have created a new Git repository
Is the git init command, run inside the
desserts subdirectory, required for tracking files stored
in the desserts subdirectory?
No. Alfredo does not need to make the desserts
subdirectory a Git repository because the recipes
repository will track all files, sub-directories, and subdirectory files
under the recipes directory. Thus, in order to track all
information about desserts, Alfredo only needed to add the
desserts subdirectory to the recipes
directory.
Additionally, Git repositories can interfere with each other if they
are “nested”: the outer repository will try to version-control the inner
repository. Therefore, it’s best to create each new Git repository in a
separate directory. To be sure that there is no conflicting repository
in the directory, check the output of git status. If it
looks like the following, you are good to go to create a new repository
as shown above:
OUTPUT
fatal: Not a git repository (or any of the parent directories): .gitCorrecting git init Mistakes
Jimmy explains to Alfredo how a nested repository is redundant and
may cause confusion down the road. Alfredo would like to go back to a
single git repository. How can Alfredo undo his last
git init in the desserts subdirectory?
Background
Removing files from a Git repository needs to be done with caution. But we have not learned yet how to tell Git to track a particular file; we will learn this in the next episode. Files that are not tracked by Git can easily be removed like any other “ordinary” files with
Similarly a directory can be removed using
rm -r dirname. If the files or folder being removed in this
fashion are tracked by Git, then their removal becomes another change
that we will need to track, as we will see in the next episode.
Solution
Git keeps all of its files in the .git directory. To
recover from this little mistake, Alfredo can remove the
.git folder in the desserts subdirectory by running the
following command from inside the recipes directory:
But be careful! Running this command in the wrong directory will
remove the entire Git history of a project you might want to keep. In
general, deleting files and directories using rm from the
command line cannot be reversed. Therefore, always check your current
directory using the command pwd.
Key Points
-
git initinitializes a repository. - Git stores all of its repository data in the
.gitdirectory.
Command Line or Graphical Tools?
It is possible to use Git from either the command line
(e.g. GitBash) or through a variety of visual tools, such
as Sourcetree,
TortoiseGit,
SmartGit.
Furthermore, most modern integrated development environments such as
PyCharm and
VSCode
provide integrated visual Git tools.
Knowing how to use Git from the command line has definite benefits:
- Helps novice users become more comfortable with Git’s underlying structure and commands
- Gives more precise control at the low level (through command-line options)
- Equips users with the skills to troubleshoot and solve problems that may not be easily addressed with a GUI
- When searching for online resources on specific Git workflows, most information is available as command line instructions; same applies for help/instructions provided by AI Assistants such as ChatGPT, Gemini, or Claude
- GUI tools may change their menus/“look and feel” with new releases, while Git commands/options are much more stable
On the other hands, it is important to understand that visual Git tools can greatly improve the overall developer experience as well as increase productivity:
- Graphical Git tools offer an intuitive interface, making it easier for beginners to grasp basic concepts like branching, or viewing the repository’s history
- Certain advanced Git workflows, such as merging and solving conflicts become much more efficient and less error-prone when performed in a visual environment.
Given all these considerations, one of the goals of this course is to make participants comfortable with using Git from the command line, in order to provide them with a solid foundation upon which they can further expand their Git knowledge. At the same time, we are encouraging participants to explore Git visual tools. For the more advanced Git workflows (e.g. reviewing changes, merging, conflict resolution) we also explain how these workflows can be performed using the Git visual tools provided by the PyCharm development environment.
Challenge
Using PyCharm, open the folder containing the Git repository you created earlier in this episode. Locate the Git visual controls. Are they intuitive? Do you already recognize any workflows you could perform from Pycharm? We will cover some of these visual workflows in the following episodes.
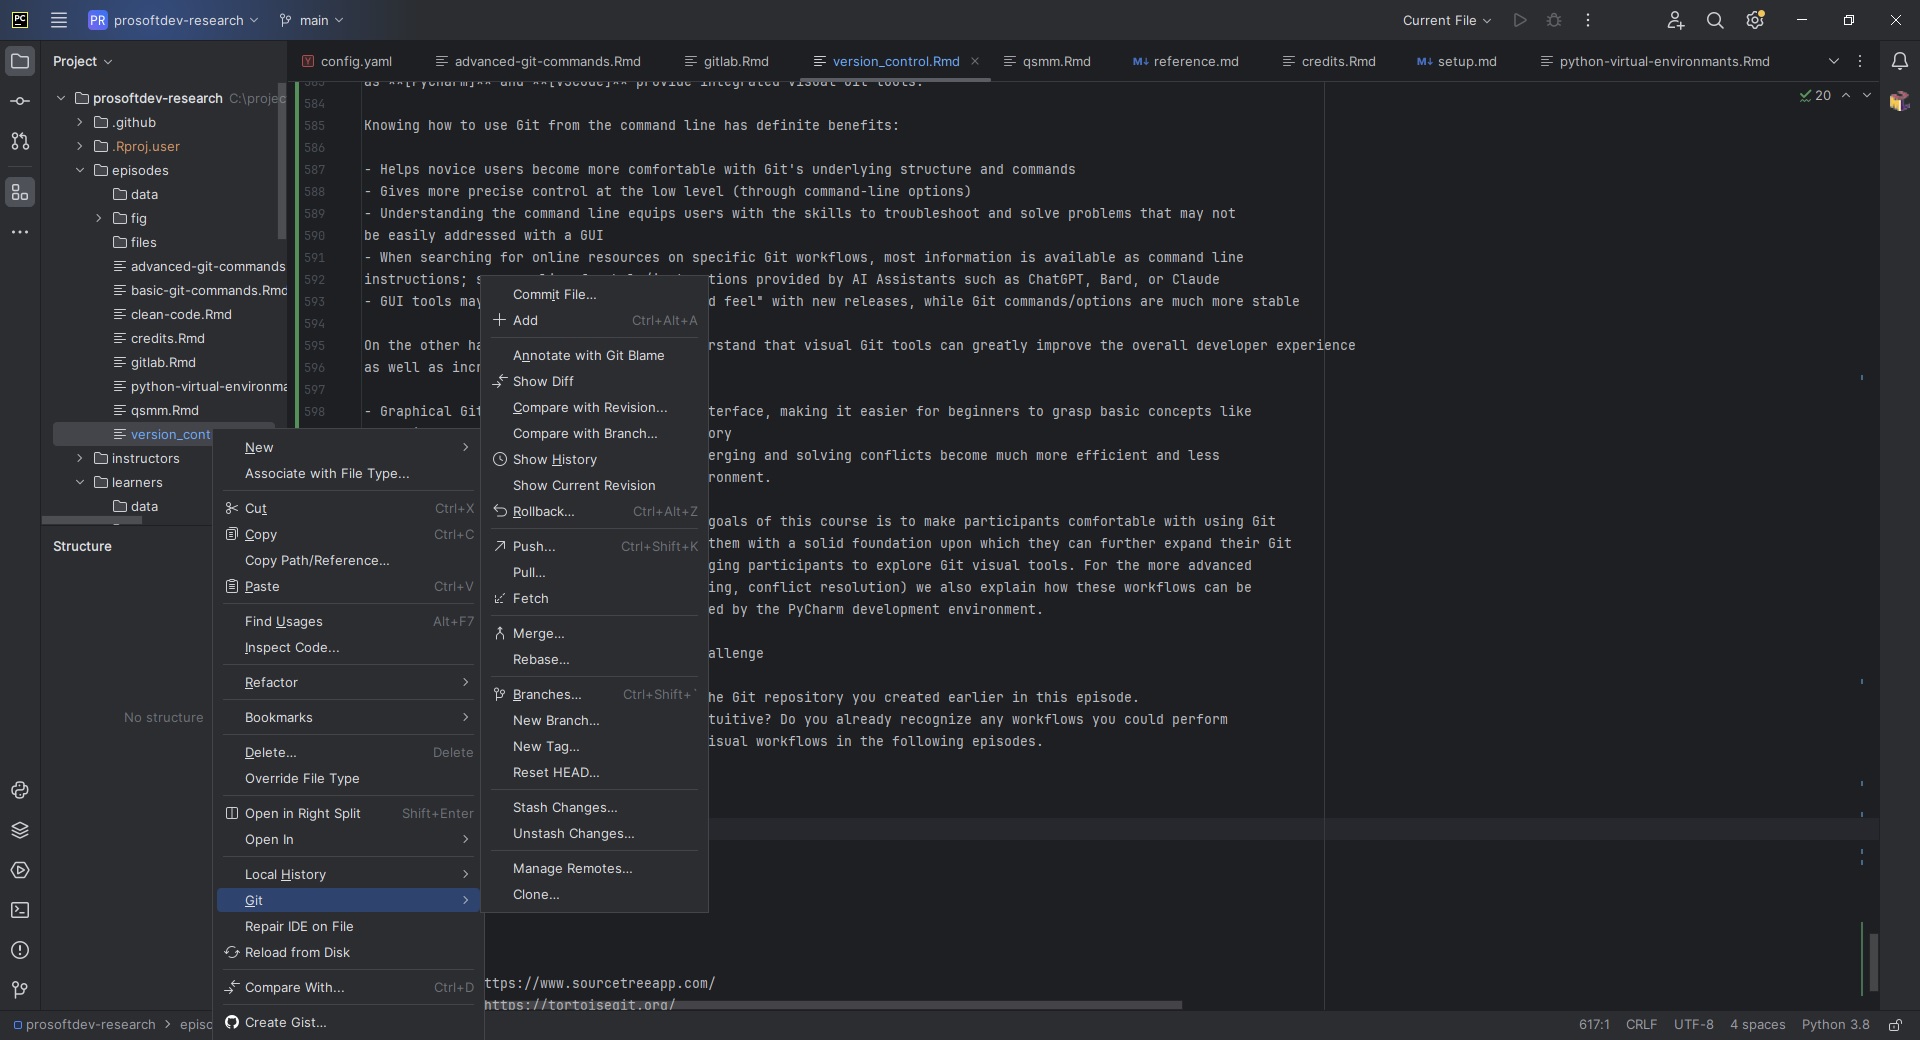
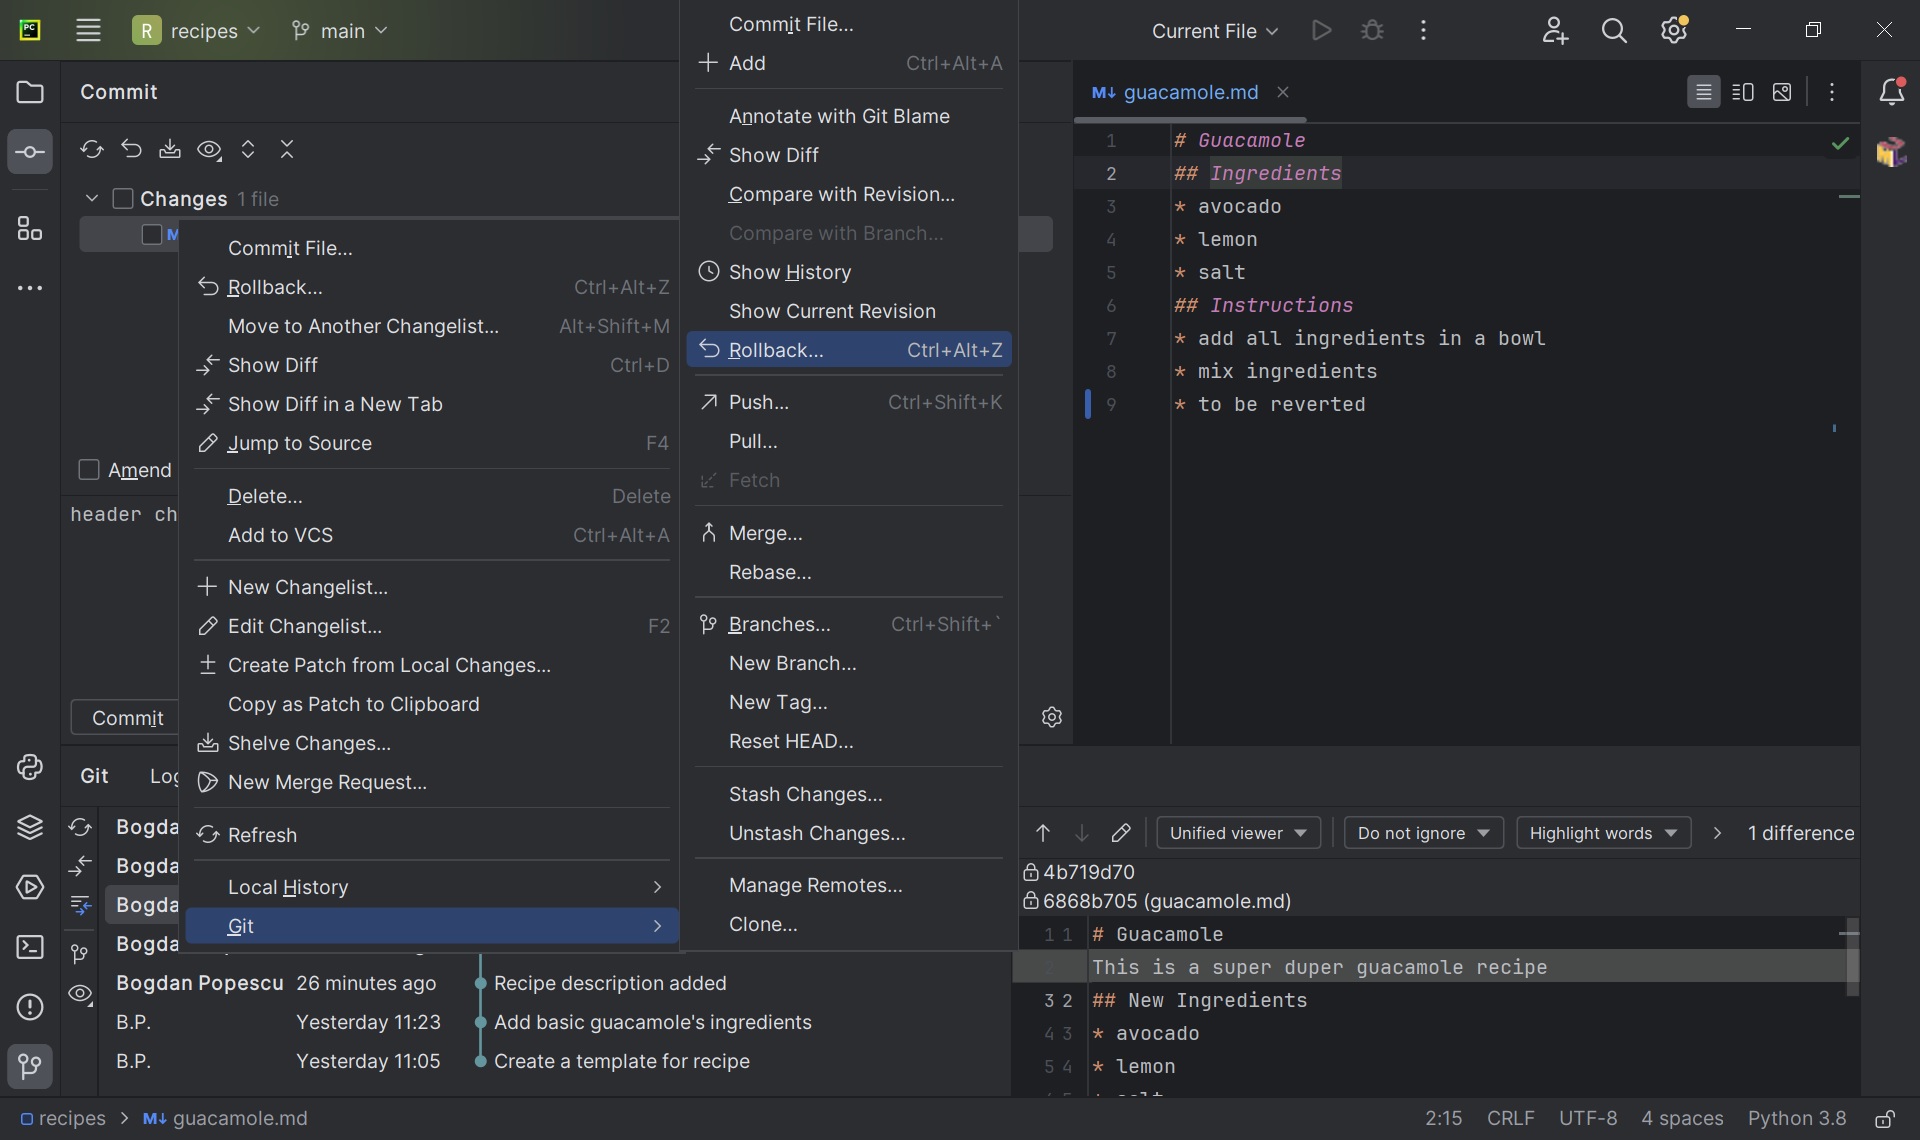
Accessing the Git visual tools in PyCharm is done by right-clicking
on a file/folder in the left navigation panel, then selecting
Git from the pop-up menu.
Key Points
- Use git from the command line for maximum control over workflows.
- Using visual tools for some of the advanced Git workflows will increase productivity and reduce errors.
Content from Basic Git Commands
Last updated on 2025-07-07 | Edit this page
Overview
Questions
- How do I record changes in Git?
- How do I record notes about what changes I made and why?
- How can I identify old versions of files?
- How do I review my changes?
- How can I recover old versions of files?
- How can I tell Git to ignore files I don’t want to track?
Objectives
- Go through the modify-add-commit cycle for one or more files.
- Explain where information is stored at each stage of that cycle.
- Distinguish between descriptive and non-descriptive commit messages.
- Explain what the HEAD of a repository is and how to use it.
- Compare various versions of tracked files.
- Restore old versions of files.
- Configure Git to ignore specific files.
The Modify-Add-Commit Cycle
In this episode we will continue working with the
recipes repository you have created in the previous
episode. First let’s make sure we’re still in the right directory. You
should be in the recipes directory.
Let’s create a file called guacamole.md that contains
the basic structure to have a recipe. We will use nano to
edit the file, but feel free to use another text editor if you prefer.
In particular, this does not have to be the core.editor you
set globally earlier. But remember, the steps to create create or edit a
new file will depend on the editor you choose (it might not be
nano).
Type the text below into the guacamole.md file:
OUTPUT
# Guacamole
## Ingredients
## Instructions
Save the file and exit your editor. Next, let’s verify that the file
was properly created by running the list command (ls):
OUTPUT
guacamole.mdguacamole.md contains three lines, which we can see by
running:
OUTPUT
# Guacamole
## Ingredients
## Instructions
If we check the status of our project again, Git tells us that it’s noticed the new file:
OUTPUT
On branch main

No commits yet

Untracked files:
   (use "git add <file>..." to include in what will be committed)

	guacamole.md

nothing added to commit but untracked files present (use "git add" to track)
The “untracked files” message means that there’s a file in the
directory that Git isn’t keeping track of. We can tell Git to track a
file using git add:
and then check that the right thing happened:
OUTPUT
On branch main

No commits yet

Changes to be committed:
  (use "git rm --cached <file>..." to unstage)

	new file:   guacamole.md
Git now knows that it’s supposed to keep track of
guacamole.md, but it hasn’t recorded these changes as a
commit yet. To get it to do that, we need to run one more command:
OUTPUT
[main (root-commit) f22b25e] Create a template for recipe
 1 file changed, 1 insertion(+)
 create mode 100644 guacamole.md
When we run git commit, Git takes everything we have
told it to save by using git add and stores a copy
permanently inside the special .git directory. This
permanent copy is called a commit
(or revision) and its short
identifier is f22b25e. Your commit may have another
identifier.
We use the -m flag (for “message”) to record a short,
descriptive, and specific comment that will help us remember later on
what we did and why. If we just run git commit without the
-m option, Git will launch nano (or whatever
other editor we configured as core.editor) so that we can
write a longer message.
Good commit
messages start with a brief (<50 characters) statement about the
changes made in the commit. Generally, the message should complete the
sentence “If applied, this commit will”
If we run git status now:
OUTPUT
On branch main
nothing to commit, working tree clean
it tells us everything is up to date. If we want to know what we’ve
done recently, we can ask Git to show us the project’s history using
git log:
OUTPUT
commit f22b25e3233b4645dabd0d81e651fe074bd8e73b
Author: Alfredo Linguini <a.linguini@ratatouille.fr>
Date:   Thu Aug 22 09:51:46 2023 -0400

    Create a template for recipe
git log lists all commits made to a repository in
reverse chronological order. The listing for each commit includes the
commit’s full identifier (which starts with the same characters as the
short identifier printed by the git commit command
earlier), the commit’s author, when it was created, and the log message
Git was given when the commit was created.
Where Are My Changes?
If we run ls at this point, we will still see just one
file called guacamole.md. That’s because Git saves
information about files’ history in the special .git
directory mentioned earlier so that our filesystem doesn’t become
cluttered (and so that we can’t accidentally edit or delete an old
version).
Modifying tracked files
Now suppose Alfredo adds more information to the file. (Again, we’ll
edit with nano and then cat the file to show
its contents; you may use a different editor, and don’t need to
cat.)
OUTPUT
# Guacamole
## Ingredients
* avocado
* lemon
* salt
## Instructions
When we run git status now, it tells us that a file it
already knows about has been modified:
OUTPUT
On branch main
Changes not staged for commit:
  (use "git add <file>..." to update what will be committed)
  (use "git restore <file>..." to discard changes in working directory)

	modified:   guacamole.md

no changes added to commit (use "git add" and/or "git commit -a")
The last line is the key phrase: “no changes added to commit”. We
have changed this file, but we haven’t told Git we will want to save
those changes (which we do with git add) nor have we saved
them (which we do with git commit). So let’s do that now.
It is good practice to always review our changes before saving them. We
do this using git diff. This shows us the differences
between the current state of the file and the most recently saved
version:
OUTPUT
diff --git a/guacamole.md b/guacamole.md
index df0654a..315bf3a 100644
--- a/guacamole.md
+++ b/guacamole.md
@@ -1,3 +1,6 @@
 # Guacamole
 ## Ingredients
+* avocado
+* lemon
+* salt
 ## Instructions
The output is cryptic because it is actually a series of commands for
tools like editors and patch telling them how to
reconstruct one file given the other. If we break it down into
pieces:
- The first line tells us that Git is producing output similar to the
Unix
diffcommand comparing the old and new versions of the file. - The second line tells exactly which versions of the file Git is
comparing;
df0654aand315bf3aare unique computer-generated labels for those versions. - The third and fourth lines once again show the name of the file being changed.
- The remaining lines are the most interesting, they show us the
actual differences and the lines on which they occur. In particular, the
+marker in the first column shows where we added a line.
After reviewing our change, it’s time to commit it:
OUTPUT
On branch main
Changes not staged for commit:
  (use "git add <file>..." to update what will be committed)
  (use "git restore <file>..." to discard changes in working directory)

	modified:   guacamole.md

no changes added to commit (use "git add" and/or "git commit -a")
Whoops: Git won’t commit because we didn’t use git add
first. Let’s fix that:
OUTPUT
[main 34961b1] Add basic guacamole's ingredient
 1 file changed, 3 insertions(+)
Git insists that we add files to the set we want to commit before actually committing anything. This allows us to commit our changes in stages and capture changes in logical portions rather than only large batches. For example, suppose we’re adding a few citations to relevant research to our thesis. We might want to commit those additions, and the corresponding bibliography entries, but not commit some of our work drafting the conclusion (which we haven’t finished yet).
To allow for this, Git has a special staging area where it keeps track of things that have been added to the current changeset but not yet committed.
Staging Area
If you think of Git as taking snapshots of changes over the life of a
project, git add specifies what will go in a
snapshot (putting things in the staging area), and
git commit then actually takes the snapshot, and
makes a permanent record of it (as a commit). If you don’t have anything
staged when you type git commit, Git will prompt you to use
git commit -a or git commit --all, which is
kind of like gathering everyone to take a group photo! However,
it’s almost always better to explicitly add things to the staging area,
because you might commit changes you forgot you made. (Going back to the
group photo simile, you might get an extra with incomplete makeup
walking on the stage for the picture because you used -a!)
Try to stage things manually, or you might find yourself searching for
“git undo commit” more than you would like!

Let’s watch as our changes to a file move from our editor to the staging area and into long-term storage. First, we’ll improve our recipe by changing ‘lemon’ to ‘lime’:
OUTPUT
# Guacamole
## Ingredients
* avocado
* lime
* salt
## InstructionsOUTPUT
diff --git a/guacamole.md b/guacamole.md
index 315bf3a..b36abfd 100644
--- a/guacamole.md
+++ b/guacamole.md
@@ -1,6 +1,6 @@
 # Guacamole
 ## Ingredients
 * avocado
-* lemon
+* lime
 * salt
 ## Instructions
So far, so good: we’ve replaced one line (shown with a -
in the first column) with a new line (shown with a + in the
first column). Now let’s put that change in the staging area and see
what git diff reports:
There is no output: as far as Git can tell, there’s no difference between what it’s been asked to save permanently and what’s currently in the directory. However, if we do this:
OUTPUT
diff --git a/guacamole.md b/guacamole.md
index 315bf3a..b36abfd 100644
--- a/guacamole.md
+++ b/guacamole.md
@@ -1,6 +1,6 @@
 # Guacamole
 ## Ingredients
 * avocado
-* lemon
+* lime
 * salt
 ## Instructions
it shows us the difference between the last committed change and what’s in the staging area. Let’s save our changes:
OUTPUT
[main 005937f] Modify guacamole to the traditional recipe
 1 file changed, 1 insertion(+)
check our status:
OUTPUT
On branch main
nothing to commit, working tree clean
and look at the history of what we’ve done so far:
OUTPUT
commit 005937fbe2a98fb83f0ade869025dc2636b4dad5 (HEAD -> main)
Author: Alfredo Linguini <a.linguini@ratatouille.fr>
Date:   Thu Aug 22 10:14:07 2023 -0400

    Modify guacamole to the traditional recipe

commit 34961b159c27df3b475cfe4415d94a6d1fcd064d
Author: Alfredo Linguini <a.linguini@ratatouille.fr>
Date:   Thu Aug 22 10:07:21 2023 -0400

    Add basic guacamole's ingredients

commit f22b25e3233b4645dabd0d81e651fe074bd8e73b
Author: Alfredo Linguini <a.linguini@ratatouille.fr>
Date:   Thu Aug 22 09:51:46 2023 -0400

    Create a template for recipe
Word-based diffing
Sometimes, e.g. in the case of the text documents a line-wise diff is
too coarse. That is where the --color-words option of
git diff comes in very useful as it highlights the changed
words using colors.
Paging the Log
When the output of git log is too long to fit in your
screen, git uses a program to split it into pages of the
size of your screen. When this “pager” is called, you will notice that
the last line in your screen is a :, instead of your usual
prompt.
- To get out of the pager, press Q.
- To move to the next page, press Spacebar.
- To search for
some_wordin all pages, press / and typesome_word. Navigate through matches pressing N.
Limit Log Size
To avoid having git log cover your entire terminal
screen, you can limit the number of commits that Git lists by using
-N, where N is the number of commits that you
want to view. For example, if you only want information from the last
commit you can use:
OUTPUT
commit 005937fbe2a98fb83f0ade869025dc2636b4dad5 (HEAD -> main)
Author: Alfredo Linguini <a.linguini@ratatouille.fr>
Date:   Thu Aug 22 10:14:07 2023 -0400

   Modify guacamole to the traditional recipe
You can also reduce the quantity of information using the
--oneline option:
OUTPUT
005937f (HEAD -> main) Modify guacamole to the traditional recipe
34961b1 Add basic guacamole's ingredients
f22b25e Create a template for recipe
You can also combine the --oneline option with others.
One useful combination adds --graph to display the commit
history as a text-based graph and to indicate which commits are
associated with the current HEAD, the current branch
main, or other
Git references:
OUTPUT
* 005937f (HEAD -> main) Modify guacamole to the traditional recipe
* 34961b1 Add basic guacamole's ingredients
* f22b25e Create a template for recipe
Directories
Two important facts you should know about directories in Git.
- Git does not track directories on their own, only files within them. Try it for yourself:
Note, our newly created empty directory cakes does not
appear in the list of untracked files even if we explicitly add it
(via git add) to our repository. This is the
reason why you will sometimes see .gitkeep files in
otherwise empty directories. Unlike .gitignore, these files
are not special and their sole purpose is to populate a directory so
that Git adds it to the repository. In fact, you can name such files
anything you like.
- If you create a directory in your Git repository and populate it with files, you can add all files in the directory at once by:
Try it for yourself:
Before moving on, we will commit these changes.
To recap, when we want to add changes to our repository, we first
need to add the changed files to the staging area (git add)
and then commit the staged changes to the repository
(git commit):

Choosing a Commit Message
Which of the following commit messages would be most appropriate for
the last commit made to guacamole.md?
- “Changes”
- “Changed lemon for lime”
- “Guacamole modified to the traditional recipe”
Answer 1 is not descriptive enough, and the purpose of the commit is unclear; and answer 2 is redundant to using “git diff” to see what changed in this commit; but answer 3 is good: short, descriptive, and imperative.
Committing Changes to Git
Which command(s) below would save the changes of
myfile.txt to my local Git repository?
- Would only create a commit if files have already been staged.
- Would try to create a new repository.
- Is correct: first add the file to the staging area, then commit.
- Would try to commit a file “my recent changes” with the message myfile.txt.
Committing Multiple Files
The staging area can hold changes from any number of files that you want to commit as a single snapshot.
- Add some text to
guacamole.mdnoting the rough price of the ingredients. - Create a new file
groceries.mdwith a list of products and their prices for different markets. - Add changes from both files to the staging area, and commit those changes.
First we make our changes to the guacamole.md and
groceries.md files:
OUTPUT
# Guacamole
## Ingredients
* avocado (1.35)
* lime (0.64)
* salt (2)OUTPUT
# Market A
* avocado: 1.35 per unit.
* lime: 0.64 per unit
* salt: 2 per kg
Now you can add both files to the staging area. We can do that in one line:
Or with multiple commands:
Now the files are ready to commit. You can check that using
git status. If you are ready to commit use:
OUTPUT
[main cc127c2]
 Write prices for ingredients and their source
 2 files changed, 7 insertions(+)
 create mode 100644 groceries.md
Key Points
-
git statusshows the status of a repository. - Files can be stored in a project’s working directory (which users see), the staging area (where the next commit is being built up) and the local repository (where commits are permanently recorded).
-
git addputs files in the staging area. -
git commitsaves the staged content as a new commit in the local repository. - Write a commit message that accurately describes your changes.
Exploring History
As we saw in the previous episode, we can refer to commits by their
identifiers. You can refer to the most recent commit of the
working directory by using the identifier HEAD.
We’ve been adding small changes at a time to
guacamole.md, so it’s easy to track our progress by
looking, so let’s do that using our HEADs. Before we start,
let’s make a change to guacamole.md, adding yet another
line.
OUTPUT
# Guacamole
## Ingredients
* avocado
* lime
* salt
## Instructions
An ill-considered change
Now, let’s see what we get.
OUTPUT
diff --git a/guacamole.md b/guacamole.md
index b36abfd..0848c8d 100644
--- a/guacamole.md
+++ b/guacamole.md
@@ -4,3 +4,4 @@
 * lime
 * salt
 ## Instructions
+An ill-considered change
which is the same as what you would get if you leave out
HEAD (try it). The real goodness in all this is when you
can refer to previous commits. We do that by adding ~1
(where “~” is “tilde”, pronounced [til-duh])
to refer to the commit one before HEAD.
If we want to see the differences between older commits we can use
git diff again, but with the notation HEAD~1,
HEAD~2, and so on, to refer to them:
OUTPUT
diff --git a/guacamole.md b/guacamole.md
index df0654a..b36abfd 100644
--- a/guacamole.md
+++ b/guacamole.md
@@ -1,3 +1,6 @@
 # Guacamole
 ## Ingredients
+* avocado
+* lime
+* salt
 ## Instructions
 +An ill-considered change
We could also use git show which shows us what changes
we made at an older commit as well as the commit message, rather than
the differences between a commit and our working directory that
we see by using git diff.
OUTPUT
commit f22b25e3233b4645dabd0d81e651fe074bd8e73b
Author: Alfredo Linguini <a.linguini@ratatouille.fr>
Date:   Thu Aug 22 10:07:21 2023 -0400

    Create a template for recipe

diff --git a/guacamole.md b/guacamole.md
new file mode 100644
index 0000000..df0654a
--- /dev/null
+++ b/guacamole.md
@@ -0,0 +1,3 @@
+# Guacamole
+## Ingredients
+## Instructions
In this way, we can build up a chain of commits. The most recent end
of the chain is referred to as HEAD; we can refer to
previous commits using the ~ notation, so
HEAD~1 means “the previous commit”, while
HEAD~123 goes back 123 commits from where we are now.
We can also refer to commits using those long strings of digits and
letters that both git log and git show
display. These are unique IDs for the changes, and “unique” really does
mean unique: every change to any set of files on any computer has a
unique 40-character identifier. Our first commit was given the ID
f22b25e3233b4645dabd0d81e651fe074bd8e73b, so let’s try
this:
OUTPUT
diff --git a/guacamole.md b/guacamole.md
index df0654a..93a3e13 100644
--- a/guacamole.md
+++ b/guacamole.md
@@ -1,3 +1,7 @@
 # Guacamole
 ## Ingredients
+* avocado
+* lime
+* salt
 ## Instructions
+An ill-considered change
That’s the right answer, but typing out random 40-character strings is annoying, so Git lets us use just the first few characters (typically seven for normal size projects):
OUTPUT
diff --git a/guacamole.md b/guacamole.md
index df0654a..93a3e13 100644
--- a/guacamole.md
+++ b/guacamole.md
@@ -1,3 +1,7 @@
 # Guacamole
 ## Ingredients
+* avocado
+* lime
+* salt
 ## Instructions
+An ill-considered change
All right! So we can save changes to files and see what we’ve
changed. Now, how can we restore older versions of things? Let’s suppose
we change our mind about the last update to guacamole.md
(the “ill-considered change”).
git status now tells us that the file has been changed,
but those changes haven’t been staged:
OUTPUT
On branch main
Changes not staged for commit:
  (use "git add <file>..." to update what will be committed)
  (use "git restore <file>..." to discard changes in working directory)
    modified:   guacamole.md

no changes added to commit (use "git add" and/or "git commit -a")
We can put things back the way they were by using
git restore:
OUTPUT
# Guacamole
## Ingredients
* avocado
* lime
* salt
## Instructions
As you might guess from its name, git restore restores
an old version of a file. By default, it recovers the version of the
file recorded in HEAD, which is the last saved commit. If
we want to go back even further, we can use a commit identifier instead,
using -s option:
OUTPUT
# Guacamole
## Ingredients
## InstructionsOUTPUT
On branch main
Changes not staged for commit:
  (use "git add <file>..." to update what will be committed)
  (use "git restore <file>..." to discard changes in working directory)
    modified:   guacamole.md

no changes added to commit (use "git add" and/or "git commit -a")
Notice that the changes are not currently in the staging area, and
have not been committed. If we wished, we can put things back the way
they were at the last commit by using git restore to
overwrite the working copy with the last committed version:
OUTPUT
# Guacamole
## Ingredients
* avocado
* lime
* salt
## Instructions
It’s important to remember that we must use the commit number that
identifies the state of the repository before the change we’re
trying to undo. A common mistake is to use the number of the commit in
which we made the change we’re trying to discard. In the example below,
we want to retrieve the state from before the most recent commit
(HEAD~1), which is commit f22b25e. We use the
. to mean all files:

So, to put it all together, here’s how Git works in cartoon form:

The fact that files can be reverted one by one tends to change the way people organize their work. If everything is in one large document, it’s hard (but not impossible) to undo changes to the introduction without also undoing changes made later to the conclusion. If the introduction and conclusion are stored in separate files, on the other hand, moving backward and forward in time becomes much easier.
Recovering Older Versions of a File
Jennifer has made changes to the Python script that she has been working on for weeks, and the modifications she made this morning “broke” the script and it no longer runs. She has spent ~ 1hr trying to fix it, with no luck…
Luckily, she has been keeping track of her project’s versions using
Git! Which commands below will let her recover the last committed
version of her Python script called data_cruncher.py?
$ git restore$ git restore data_cruncher.py$ git restore -s HEAD~1 data_cruncher.py$ git restore -s <unique ID of last commit> data_cruncher.pyBoth 2 and 4
The answer is (5)-Both 2 and 4.
The restore command restores files from the repository,
overwriting the files in your working directory. Answers 2 and 4 both
restore the latest version in the repository of the
file data_cruncher.py. Answer 2 uses HEAD to
indicate the latest, whereas answer 4 uses the unique ID of the
last commit, which is what HEAD means.
Answer 3 gets the version of data_cruncher.py from the
commit before HEAD, which is NOT what we
wanted.
Answer 1 results in an error. You need to specify a file to restore.
If you want to restore all files you should use
git restore .
Reverting a Commit
Jennifer is collaborating with colleagues on her Python script. She
realizes her last commit to the project’s repository contained an error,
and wants to undo it. Jennifer wants to undo correctly so everyone in
the project’s repository gets the correct change. The command
git revert [erroneous commit ID] will create a new commit
that reverses the erroneous commit.
The command git revert is different from
git restore -s [commit ID] . because
git restore returns the files not yet committed within the
local repository to a previous state, whereas git revert
reverses changes committed to the local and project repositories.
Below are the right steps and explanations for Jennifer to use
git revert, what is the missing command?
________ # Look at the git history of the project to find the commit IDCopy the ID (the first few characters of the ID, e.g. 0b1d055).
git revert [commit ID]Type in the new commit message.
Save and close.
The command git log lists project history with commit
IDs.
The command git show HEAD shows changes made at the
latest commit, and lists the commit ID; however, Jennifer should
double-check it is the correct commit, and no one else has committed
changes to the repository.
Understanding Workflow and History
What is the output of the last command in
BASH
$ cd recipes
$ echo "I like tomatoes, therefore I like ketchup" > ketchup.md
$ git add ketchup.md
$ echo "ketchup enhances pasta dishes" >> ketchup.md
$ git commit -m "My opinions about the red sauce"
$ git restore ketchup.md
$ cat ketchup.md # this will print the content of ketchup.md on screen
OUTPUT
ketchup enhances pasta dishesOUTPUT
I like tomatoes, therefore I like ketchupOUTPUT
   I like tomatoes, therefore I like ketchup
   ketchup enhances pasta dishes
OUTPUT
Error because you have changed ketchup.md without committing the changes
The answer is 2.
The changes to the file from the second echo command are
only applied to the working copy, The command
git add ketchup.md places the current version of
ketchup.md into the staging area. not the version in the
staging area.
So, when git commit -m "My opinions about the red sauce"
is executed, the version of ketchup.md committed to the
repository is the one from the staging area and has only one line.
At this time, the working copy still has the second line (and
git status will show that the file is modified). However,
git restore ketchup.md replaces the working copy with the
most recently committed version of ketchup.md. So,
cat ketchup.md will output
OUTPUT
I like tomatoes, therefore I like ketchupChecking Understanding of
git diff
Consider this command: git diff HEAD~9 guacamole.md.
What do you predict this command will do if you execute it? What happens
when you do execute it? Why?
Try another command, git diff [ID] guacamole.md, where
[ID] is replaced with the unique identifier for your most recent commit.
What do you think will happen, and what does happen?
Getting Rid of Staged Changes
git restore can be used to restore a previous commit
when unstaged changes have been made, but will it also work for changes
that have been staged but not committed? Make a change to
guacamole.md, add that change using git add,
then use git restore to see if you can remove your
change.
After adding a change, git restore can not be used
directly. Let’s look at the output of git status:
OUTPUT
On branch main
Changes to be committed:
  (use "git restore --staged <file>..." to unstage)
        modified:   guacamole.md
Note that if you don’t have the same output you may either have forgotten to change the file, or you have added it and committed it.
Using the command git restore guacamole.md now does not
give an error, but it does not restore the file either. Git helpfully
tells us that we need to use git restore --staged first to
unstage the file:
Now, git status gives us:
OUTPUT
On branch main
Changes not staged for commit:
  (use "git add <file>..." to update what will be committed)
  (use "git git restore <file>..." to discard changes in working directory)
        modified:   guacamole.md

no changes added to commit (use "git add" and/or "git commit -a")
This means we can now use git restore to restore the
file to the previous commit:
OUTPUT
On branch main
nothing to commit, working tree clean
Key Points
-
git diffdisplays differences between commits. -
git restorerecovers old versions of files.
Ignoring Things
What if we have files that we do not want Git to track for us, like backup files created by our editor or intermediate files created during data analysis? Let’s create a few dummy files:
and see what Git says:
OUTPUT
On branch main
Untracked files:
  (use "git add <file>..." to include in what will be committed)

	a.png
	b.png
	c.png
	receipts/

nothing added to commit but untracked files present (use "git add" to track)
Putting these files under version control would be a waste of disk space. What’s worse, having them all listed could distract us from changes that actually matter, so let’s tell Git to ignore them.
We do this by creating a file in the root directory of our project
called .gitignore:
OUTPUT
*.png
receipts/
These patterns tell Git to ignore any file whose name ends in
.png and everything in the receipts directory.
(If any of these files were already being tracked, Git would continue to
track them.)
Once we have created this file, the output of git status
is much cleaner:
OUTPUT
On branch main
Untracked files:
  (use "git add <file>..." to include in what will be committed)

	.gitignore

nothing added to commit but untracked files present (use "git add" to track)
The only thing Git notices now is the newly-created
.gitignore file. You might think we wouldn’t want to track
it, but everyone we’re sharing our repository with will probably want to
ignore the same things that we’re ignoring. Let’s add and commit
.gitignore:
OUTPUT
On branch main
nothing to commit, working tree clean
As a bonus, using .gitignore helps us avoid accidentally
adding files to the repository that we don’t want to track:
OUTPUT
The following paths are ignored by one of your .gitignore files:
a.png
Use -f if you really want to add them.
If we really want to override our ignore settings, we can use
git add -f to force Git to add something. For example,
git add -f a.csv. We can also always see the status of
ignored files if we want:
OUTPUT
On branch main
Ignored files:
 (use "git add -f <file>..." to include in what will be committed)

        a.png
        b.png
        c.png
        receipts/

nothing to commit, working tree cleanIf you only want to ignore the contents of
receipts/plots, you can change your .gitignore
to ignore only the /plots/ subfolder by adding the
following line to your .gitignore:
OUTPUT
receipts/plots/This line will ensure only the contents of
receipts/plots is ignored, and not the contents of
receipts/data.
Including Specific Files
How would you ignore all .png files in your root
directory except for final.png? Hint: Find out what
! (the exclamation point operator) does
You would add the following two lines to your .gitignore:
OUTPUT
*.png           # ignore all png files
!final.png      # except final.png
The exclamation point operator will include a previously excluded entry.
Note also that because you’ve previously committed .png
files in this lesson they will not be ignored with this new rule. Only
future additions of .png files added to the root directory
will be ignored.
Ignoring all data Files in a Directory
Assuming you have an empty .gitignore file, and given a directory structure that looks like:
BASH
receipts/data/market_position/gps/a.dat
receipts/data/market_position/gps/b.dat
receipts/data/market_position/gps/c.dat
receipts/data/market_position/gps/info.txt
receipts/plots
What’s the shortest .gitignore rule you could write to
ignore all .dat files in
receipts/data/market_position/gps? Do not ignore the
info.txt.
Appending receipts/data/market_position/gps/*.dat will
match every file in receipts/data/market_position/gps that
ends with .dat. The file
receipts/data/market_position/gps/info.txt will not be
ignored.
Ignoring all data Files in the repository
Let us assume you have many .csv files in different
subdirectories of your repository. For example, you might have:
BASH
results/a.csv
data/experiment_1/b.csv
data/experiment_2/c.csv
data/experiment_2/variation_1/d.csv
How do you ignore all the .csv files, without explicitly
listing the names of the corresponding folders?
In the .gitignore file, write:
OUTPUT
**/*.csvThis will ignore all the .csv files, regardless of their
position in the directory tree. You can still include some specific
exception with the exclamation point operator.
Practice using graphical Git tools - ignore PyCharm internal files
Open your recipes repo in PyCharm.
- does PyCharm create any additional files/directories in your repo?
- configure Git to ignore this additional PyCharm content
- PyCharm creates a
.idea/sub-directory in your repo directory - To exclude it from Git, you can add this line to your
.gitignore:
OUTPUT
.idea/Key Points
- The .gitignore file is a text file that tells Git which files to track and which to ignore in the repository.
- You can list specific files or folders to be ignored by Git, or you can include files that would normally be ignored.
Practice using graphical Git tools
Using the graphical Git tools in PyCharm repeat the basic Git commands explained so far:
- In the “recipes” repo, modify the
guacamole.mdrecipe. - Visually inspect what has been changed in the file.
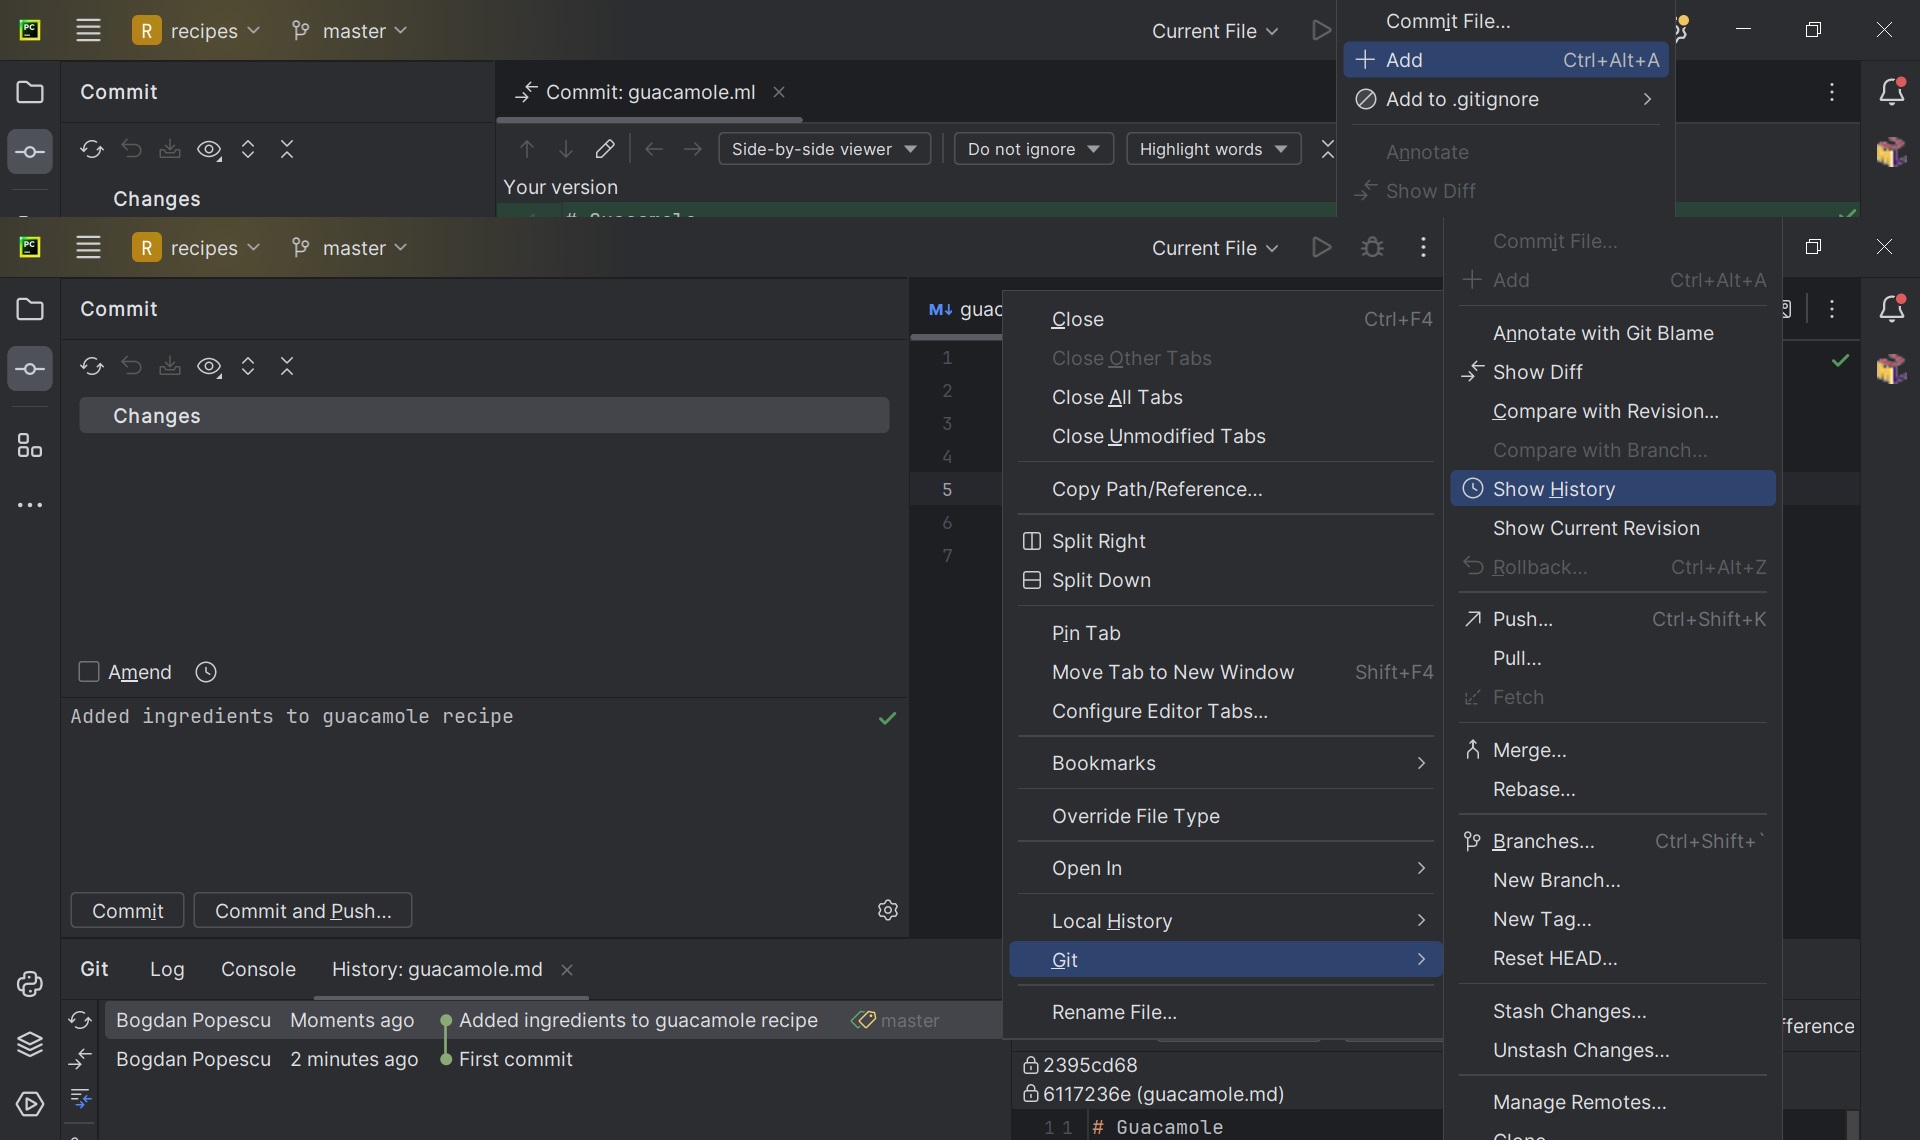
- Commit the file, and visually inspect the Git commit log.
Visually diff-ing in PyCharm: 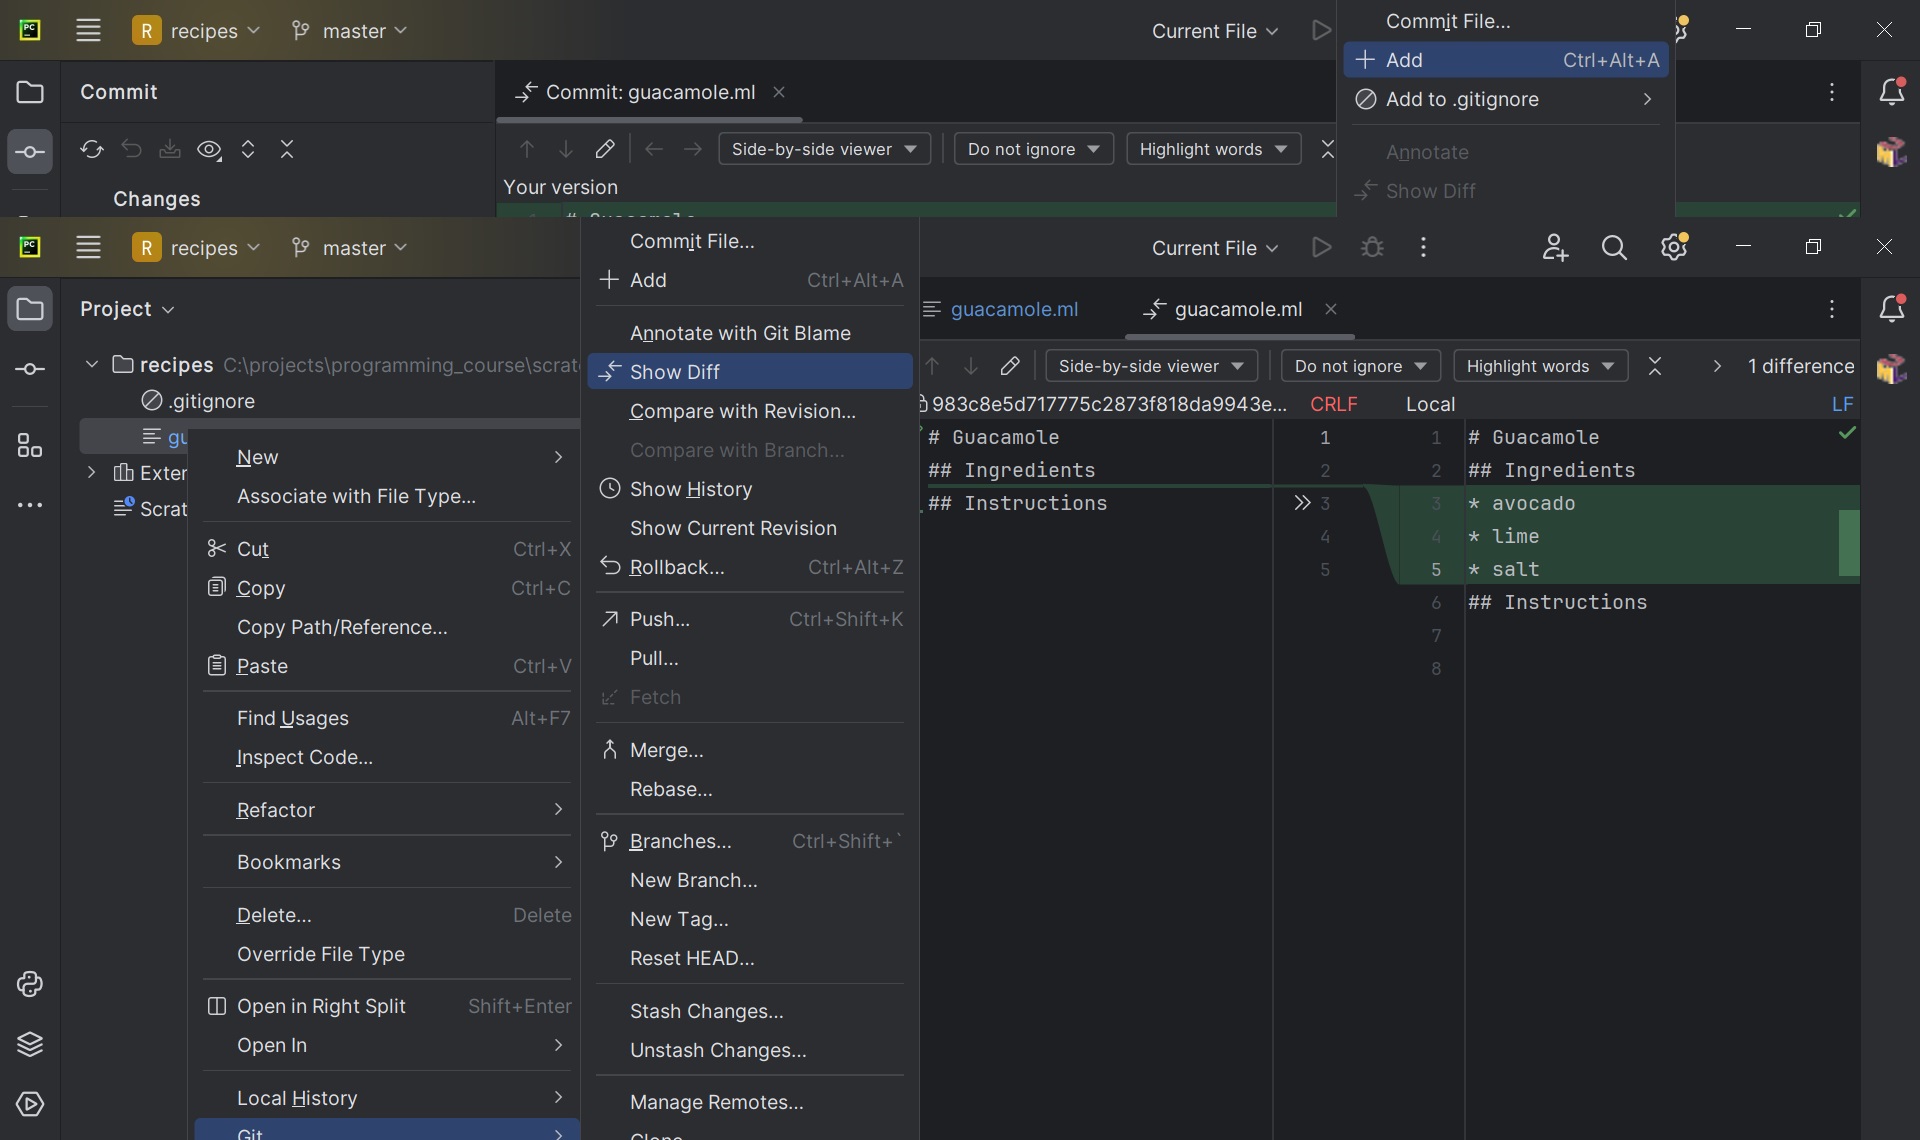
Visually inspecting commit logs:
Practice using graphical Git tools
Using the graphical Git tools in PyCharm repeat the basic Git commands explained so far:
- Revert un-staged changes in the
guacamole.mdrecipe. - Revert the
guacamole.mdrecipe to an earlier commit -HEAD~2. - Examine changes between
HEAD~1andHEAD~5.
- Discarding un-staged changes with PyCharm:
- “Revert the
guacamole.mdrecipe to an earlier commit -HEAD~2”:
This was actually a tricky question! PyCharm does not provide a direct GUI option to revert a file to a specific Git revision. This is one example of GUI tools limitations, which shows the importance of understanding and mastering Git from the command line.
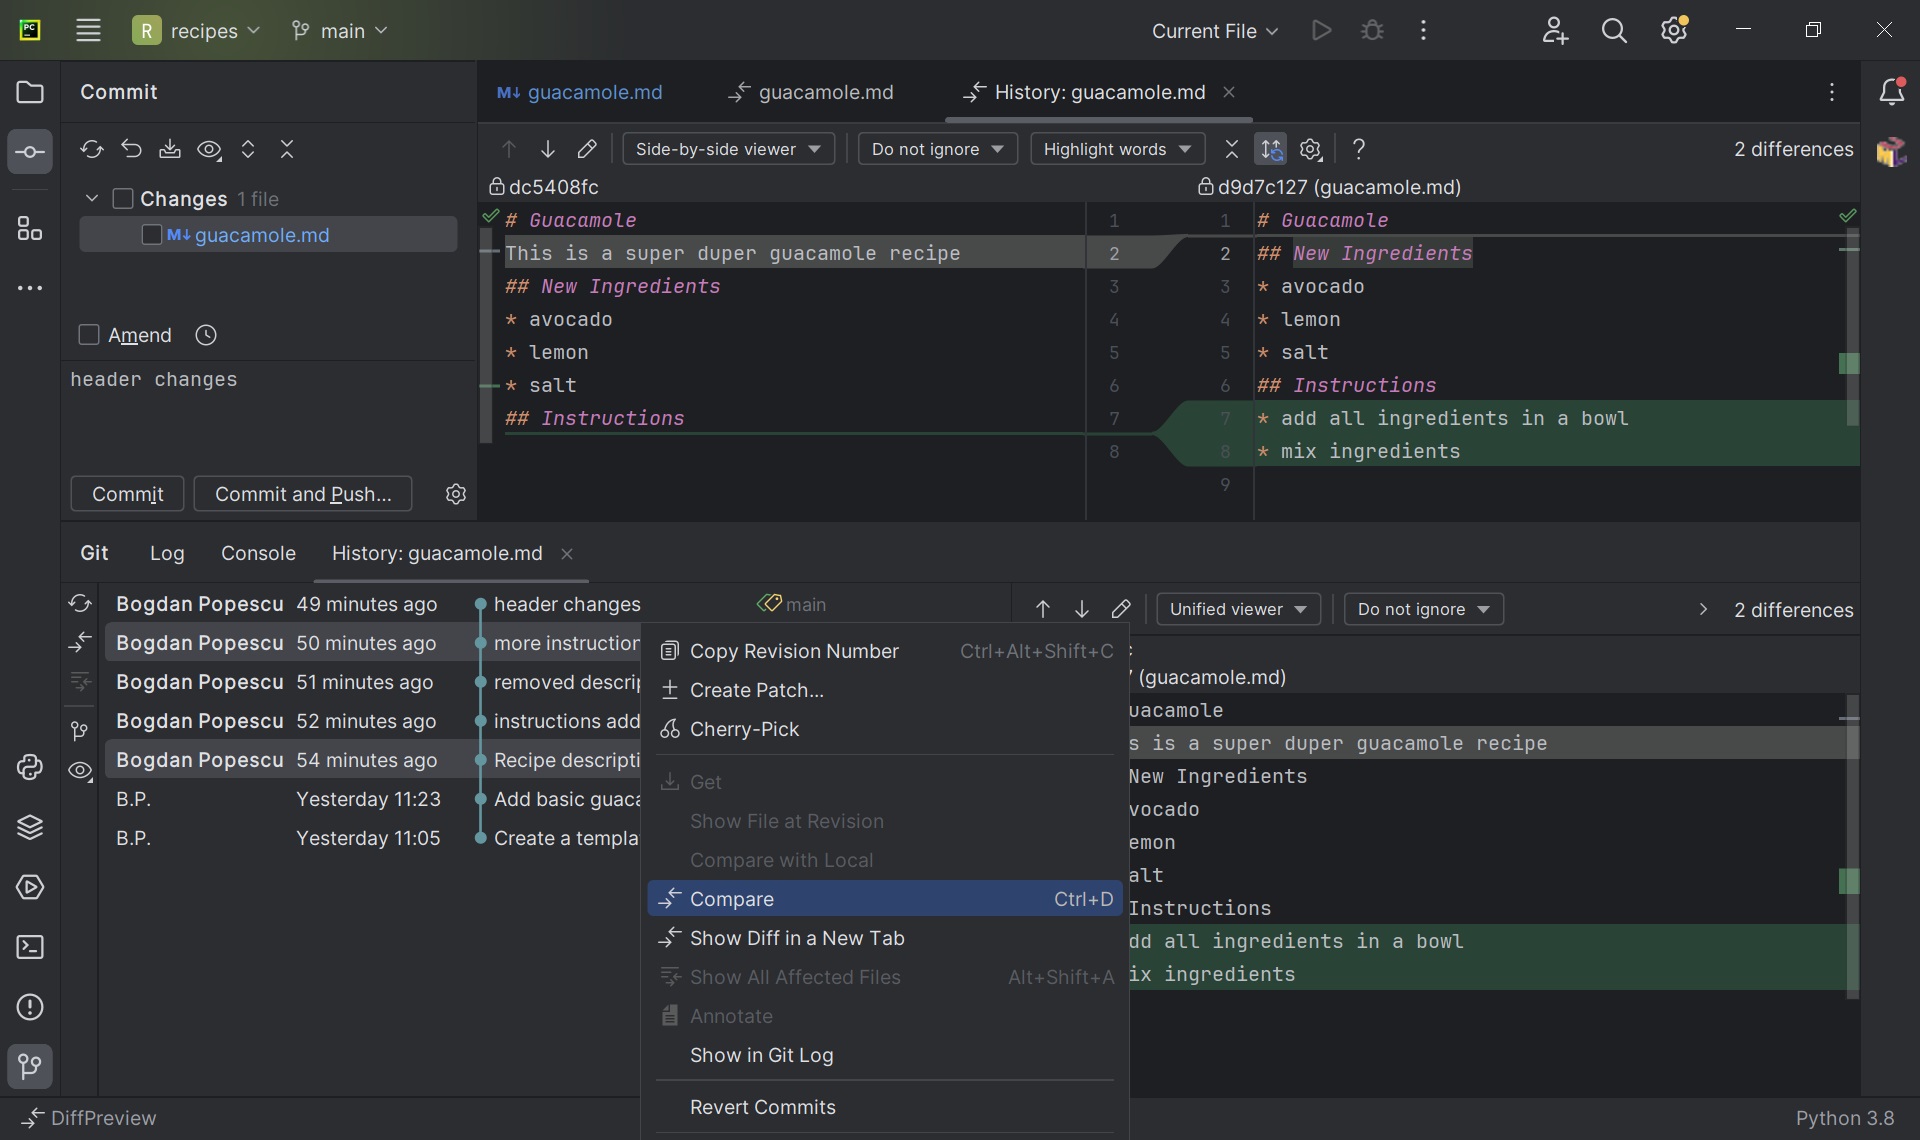
- Comparing two Git revisions:
Content from Intermezzo I
Last updated on 2025-07-07 | Edit this page
The focus of the first workshop of this course has been version
control, and an introduction to Git. Some very important Git workflows
have been covered, such as the “modify-add-commit” cycle. However, all
the Git topics covered then were focusing on creating and using a
local repository, stored on the user’s workstation, and
with only one participant - the user herself.
In this second workshop we will take you to the next level in terms of Git functionality - and show you how you can fully harness the power of version control by using Git in a collaborative environment where multiple users can work together on the same project all coordinated through Git workflows. Once we master such advanced Git workflows, we will pivot towards the programming part of this course by looking at Python virtual environments.
To summarize, this is how this second workshop will be organized:
- GitLab - an on-line Git platform
- Short break
- Advanced Git Commands - facilitated by on-line Git platforms such as GitLab
- Lunch break
- Python Virtual Environments
Required Software
In addition to the software we were using in the previous workshop, for today you will also need the following:
- Python (3.12 recommended)
- Access to the TUD GitLab
Content from GitLab
Last updated on 2025-07-08 | Edit this page
Overview
Questions
- What is GitLab?
- How can I find my way around GitLab?
- How can I create, modify and archive a GitLab project?
- How can multiple people collaborate on a project?
Objectives
- Use GitLab’s interface to find a projects/groups.
- Create and customize a project.
- Archive (or delete) a project.
- Connecting a GitLab project with a Git repository.
- Explain the concepts of members and roles and adding members to a GitLab project.
- Contribute to a project that you are a member of.
Introduction
GitLab is a web application for managing Git repositories. Since it is build around Git, it is suitable to manage any project that works primarily with plain text files, for example software source code, TeX based documents, or meeting notes in Markdown. With its built-in issue and wiki systems, it can, in certain cases, even be the right tool for managing a project without any files.
This episode will give you a foundational understanding of GitLab’s features, so you can make informed decisions on how to use it as a tool.
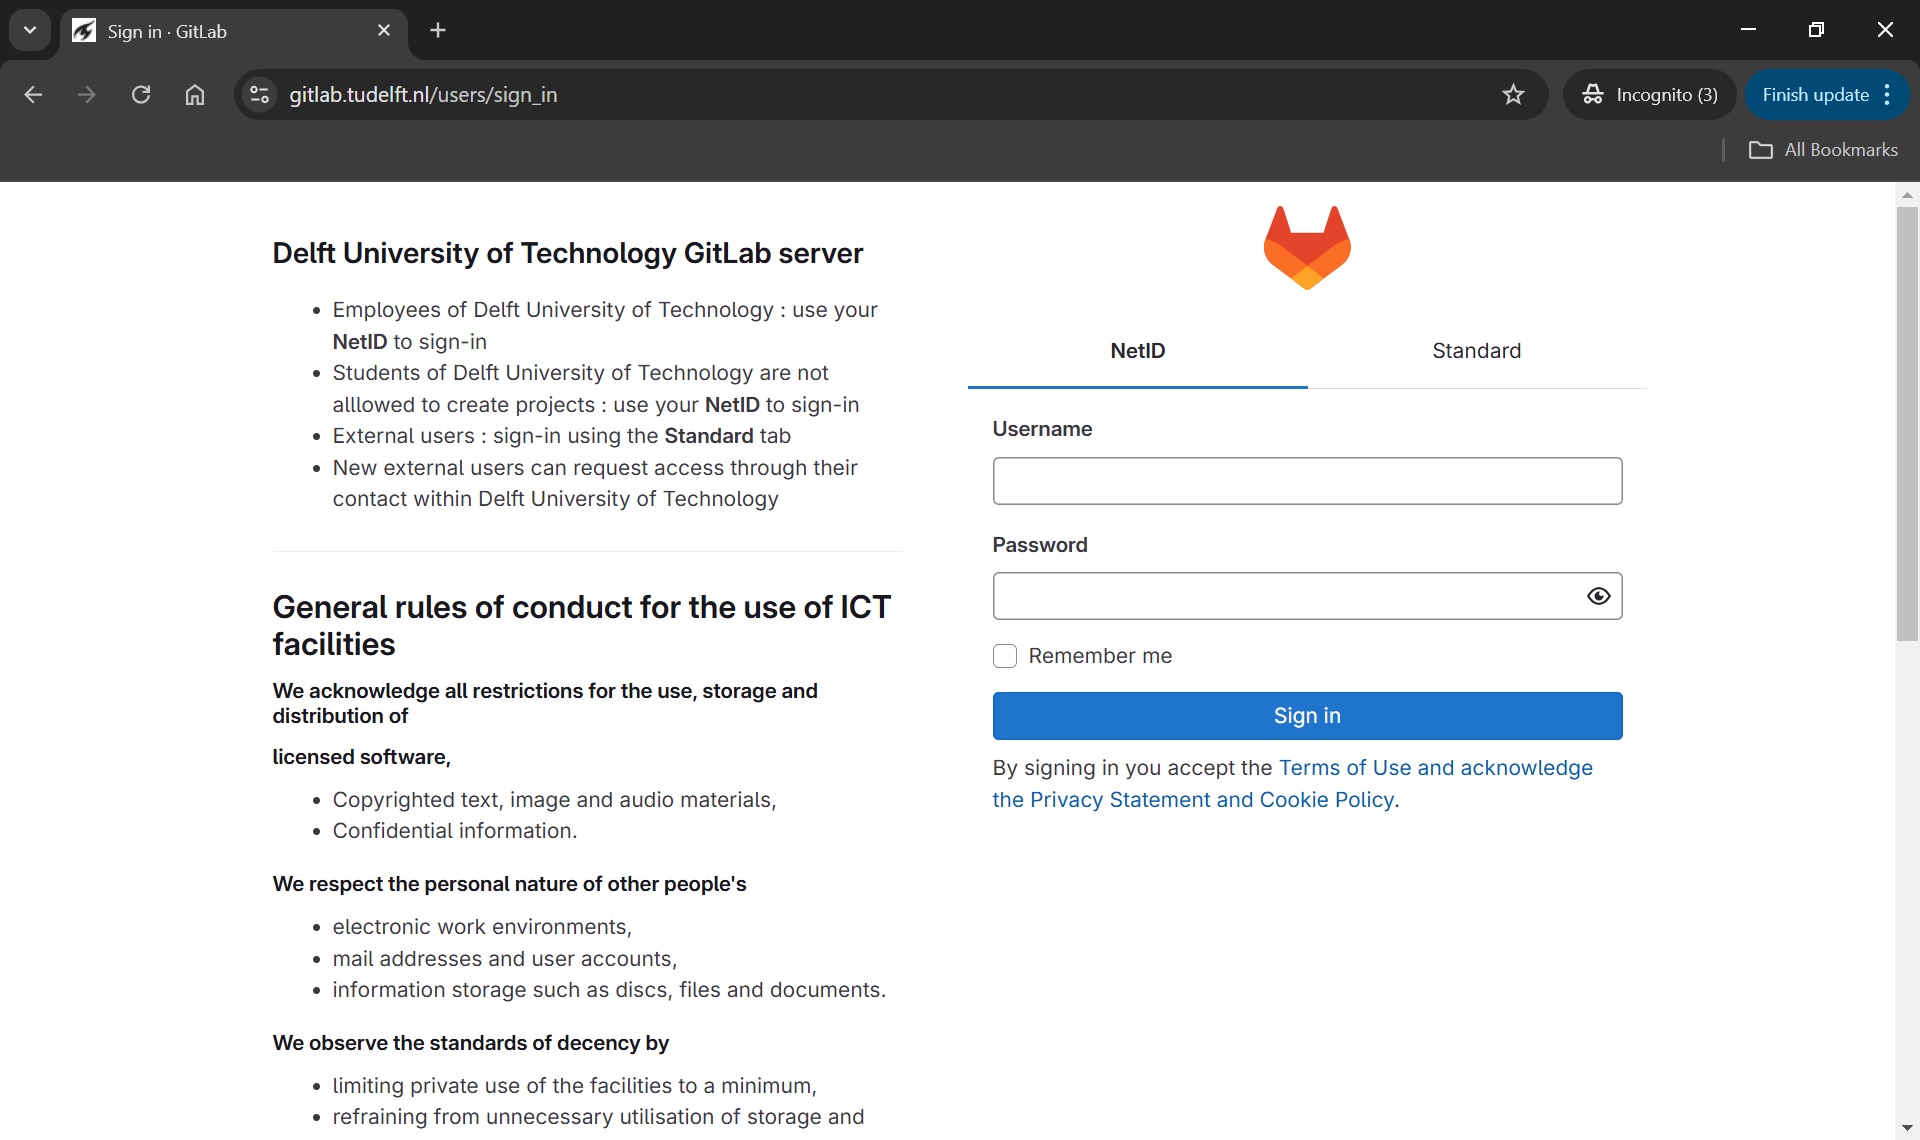
TU Delft is running their own self-hosted GitLab instance. As a QuTech employee, you are entitled to use this TUD GitLab instance; you can login to it with your NetID:
Navigation
When we log into GitLab for the first time, we are greeted by a welcome page:
GitLab Projects
The “project” is essentially GitLab’s “collaboration unit”. A GitLab project is the central hub where everything related to a specific piece of work (code, discussions, automation, documentation, and tracking) comes together. GitLab projects can be “public” - visible to everyone who can access a given GitLab platform, or “private” - only visible to you (the project owner) and to people you have specifically invited to collaborate on that project. Each GitLab project is associated with a Git repo, which is stored internally by the GitLab platform.
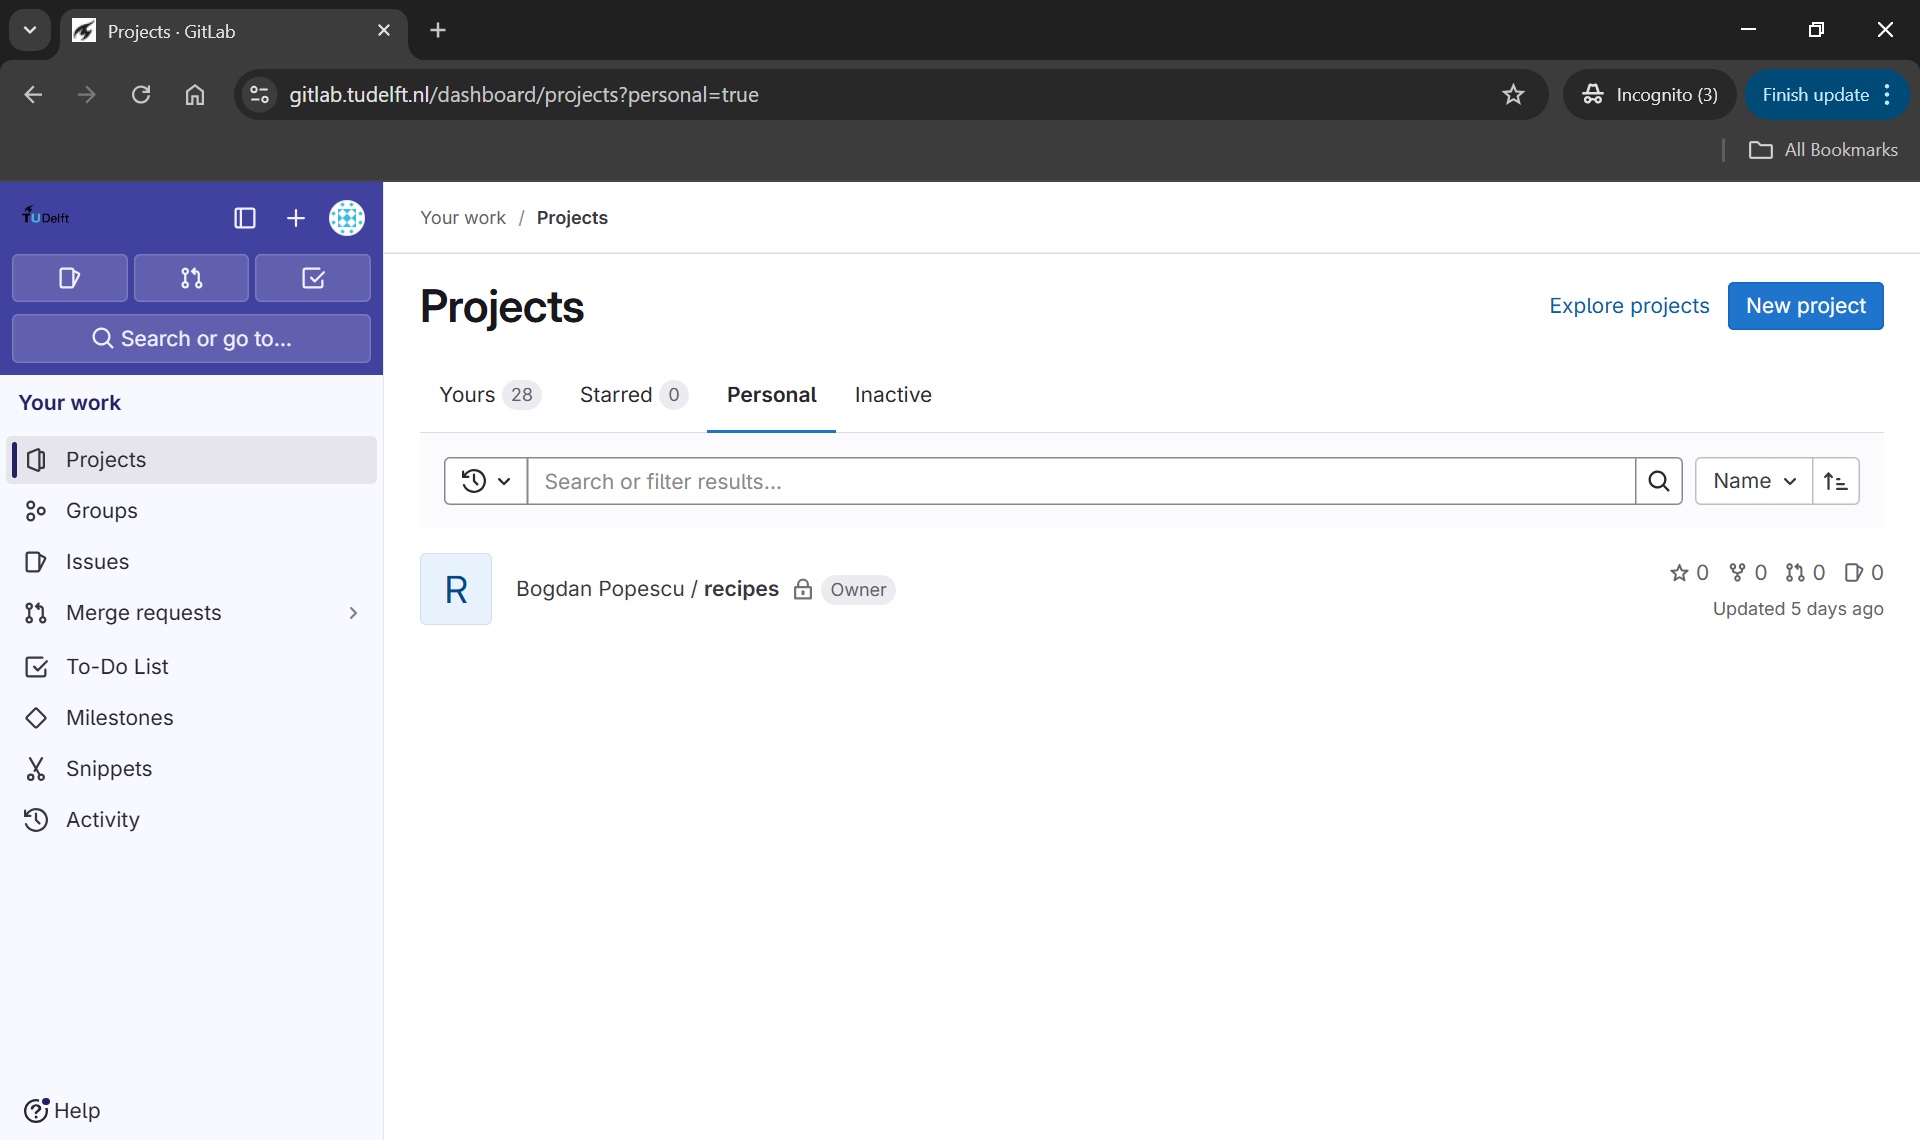
You can browse/explore projects accessible from your GitLab portal, by following the “Explore projects” link:
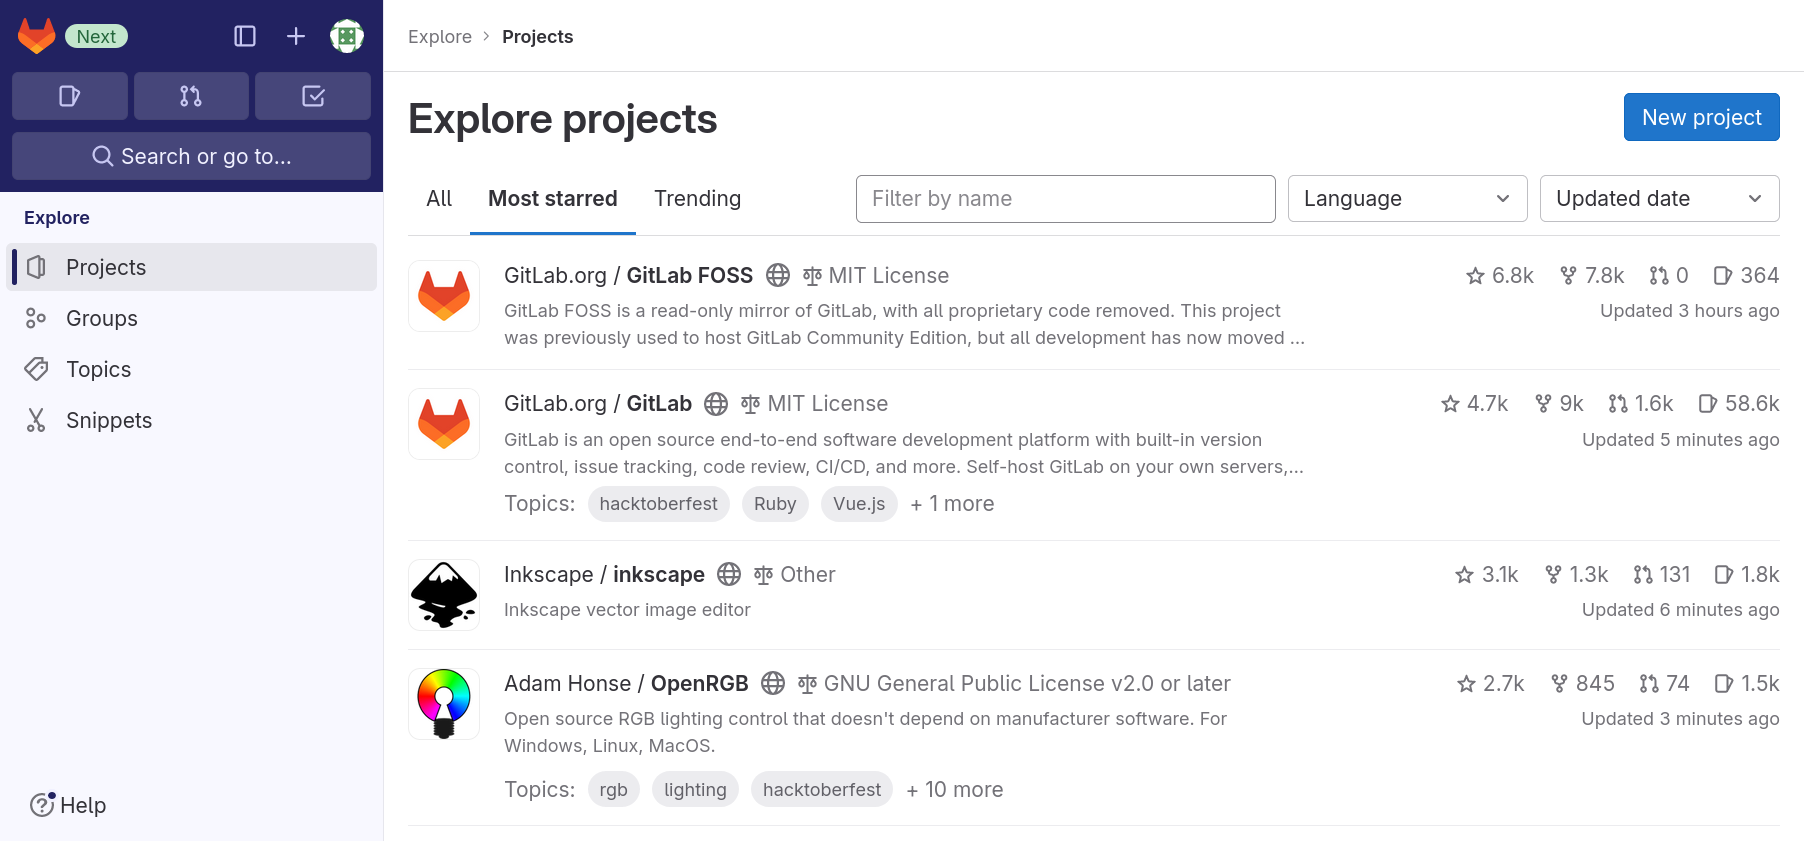
The first tab, “All”, lists all projects that are visible to you in most recently updated order.
The second tab, “Most starred projects”, also lists all projects, but this time ordered most starred first. Users of a GitLab instance can “star” a project, which is the equivalent of bookmarking them, as we will see shortly.
The third tab, “Trending”, lists all projects again, but this time ordered by activity during the previous months.
You can use the filter field next to the tab names to search through all projects that are visible to you.
Finally, by following the “Groups” link on the left of your portal, you can see the GitLab project groups you have access to.
GitLab Groups
A GitLab ‘group’ is a collection of related projects that share the same members, permissions, and settings. Such groups can be used to organize and manage projects related to the same organization, such as a faculty, department, or research group. As an analogy, you can think of GitLab projects as individual files, while the GitLab groups correspond to the folders/directories containing these files. In this course we will not deal directly with such groups, but you should be aware they exist - as your research team may make use of them to organize their projects.
With the basic GitLab concepts now covered, in the next section we will explain how you can create new GitLab projects and link them to the Git concepts we have covered in the previous episodes.
GitLab Projects
Creating a Project
After knowing how to find groups and projects, we want to go from passively browsing GitLab to actively using it. We are going to create a project and connect a local Git repository to it.
To create a project, we click on the “New project” button on the upper-right corner of the right tab.
Multiple options are presented for how to create the new project. In this lesson we will only look at, and use, the first option: “Create blank project”. So click on that.
This leads to the following page:
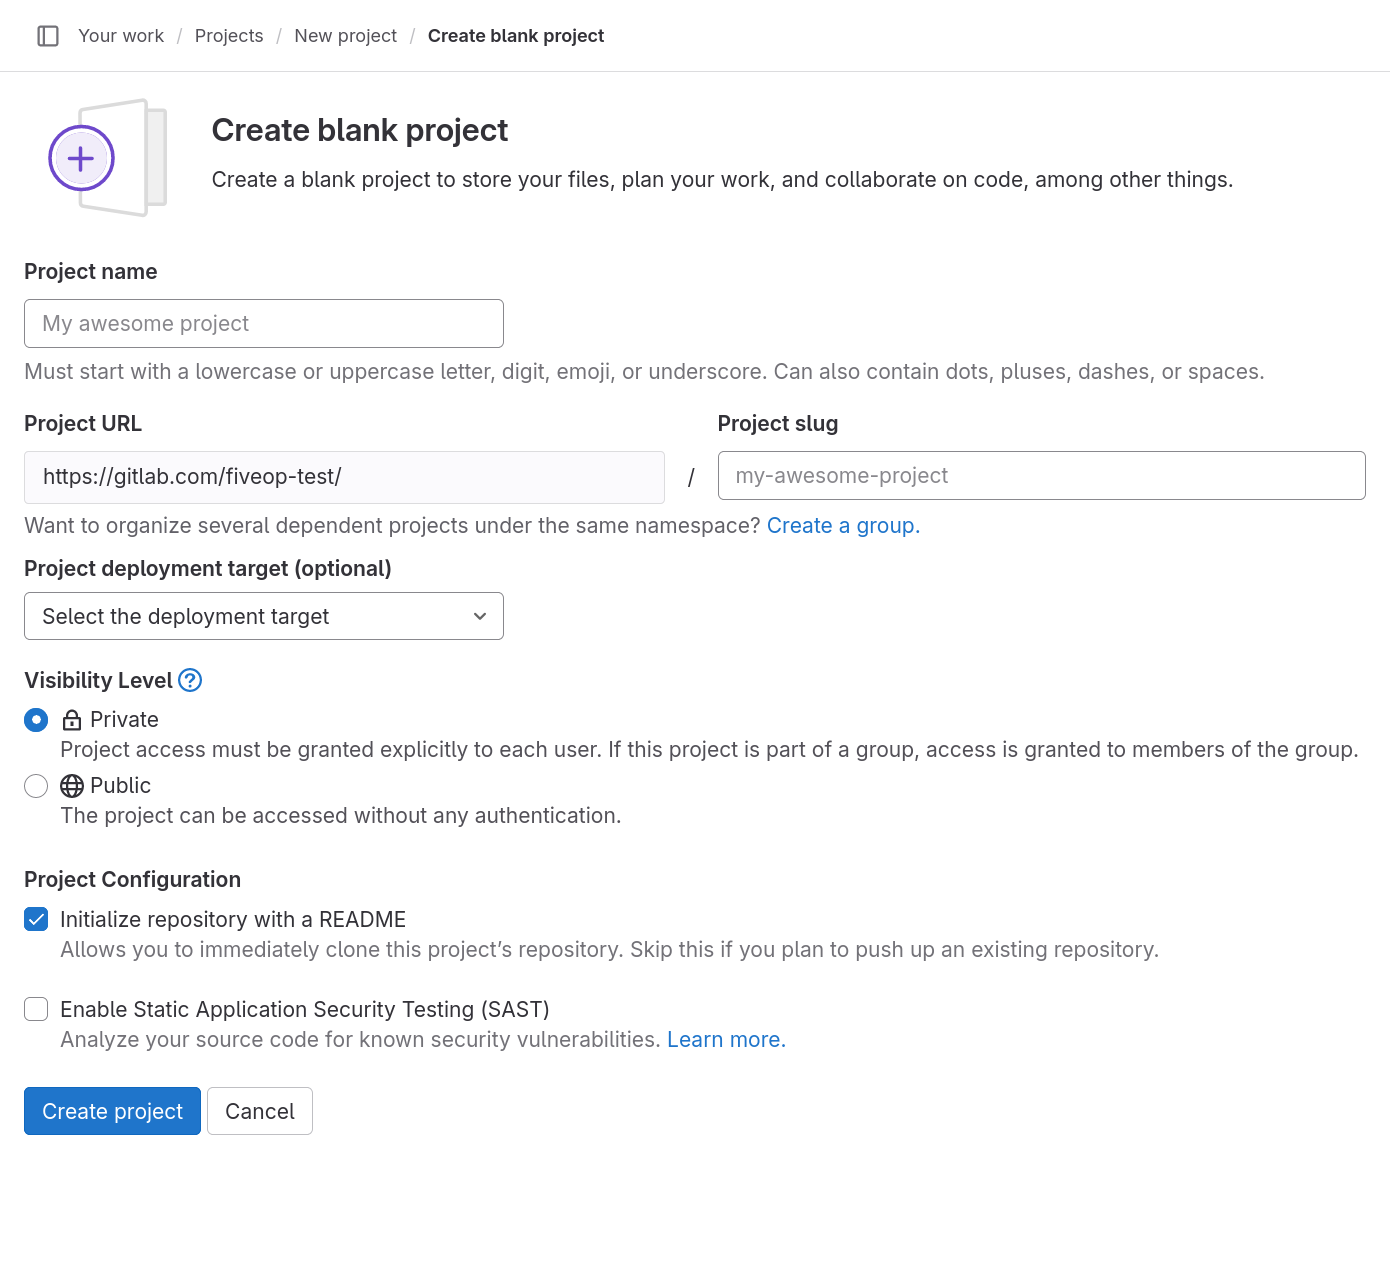
The “Project name” field is for just that, the project name. Its value has no other purpose and can be changed at anytime without indirect consequences (the direct consequence being, that its name will be different). Following the example in the previous episodes, we will call it “recipes”.
As we fill in the project name, a project slug gets suggested in the respective field. The project slug is the last part of the project’s, and the associated Git repository’s, URL or web address.
If the user belongs to at least one group, the URL’s middle part can be chosen in the drop-down field labeled “Project URL”, which defaults to the current user’s username. The default, indicated by the user’s name, is the location for a user’s projects (and groups). Other options in the drop-down list are the groups in which the current user may create projects.
Project URL and Project Slug
The two fields under labels “Project URL” and “Project slug” are the only fields in this form for which changing the value later might cause problems. They determine the URL under which the project’s pages and the project’s Git repository can be found, so changing them later might brake links and bookmarks as well as connections from Git repositories on other systems, for example on contributors’ machines.
We ignore the field labeled “Project deployment target (optional)”.
The choice under label “Visibility Level” determines the project’s visibility.
Visiblity
GitLab offers three settings for the visibility of a project: public, internal, and private. Publicly visible projects can be looked at by anyone that can access the GitLab instance, projects with internal visibility can be looked at by anyone logged in to the instance, while projects with private visibility can only be looked at by its members.
On GitLab.com the visibility “internal” is disabled. Everyone can create an account, log in to the instance, and thus could look at any project of internal visibility anyway.
Self-hosted instances might also disable some visibility types. For example, the public visibility might be disabled, to prevent users from publishing something to the whole internet.
We choose “Private” for our project’s visibility.
If, as per default, the checkbox “Initialize repository with a
README” is checked, the project’s repository will be initialized with a
commit that adds a file called README.md. Otherwise, a the
project will start with an empty repository. We will add such a file
later ourselves, so we uncheck the box.
README
A project’s README file usually contains basic information about the project: what it contains, how it can be used (for example built or installed, if it is a software project), how to contribute, how to get help, and licensing information.
It is common to write README files in Markdown format, indicated by
the filename suffix .md.
Platforms like GitLab show the contents of a project’s README file on its homepage; if it is in Markdown format, in its rendered form.
We will ignore any other fields that may be visible depending on the GitLab instances configuration.
After clicking the “Create project” button, GitLab creates the project and redirects us to the project’s homepage, which looks similar to this:
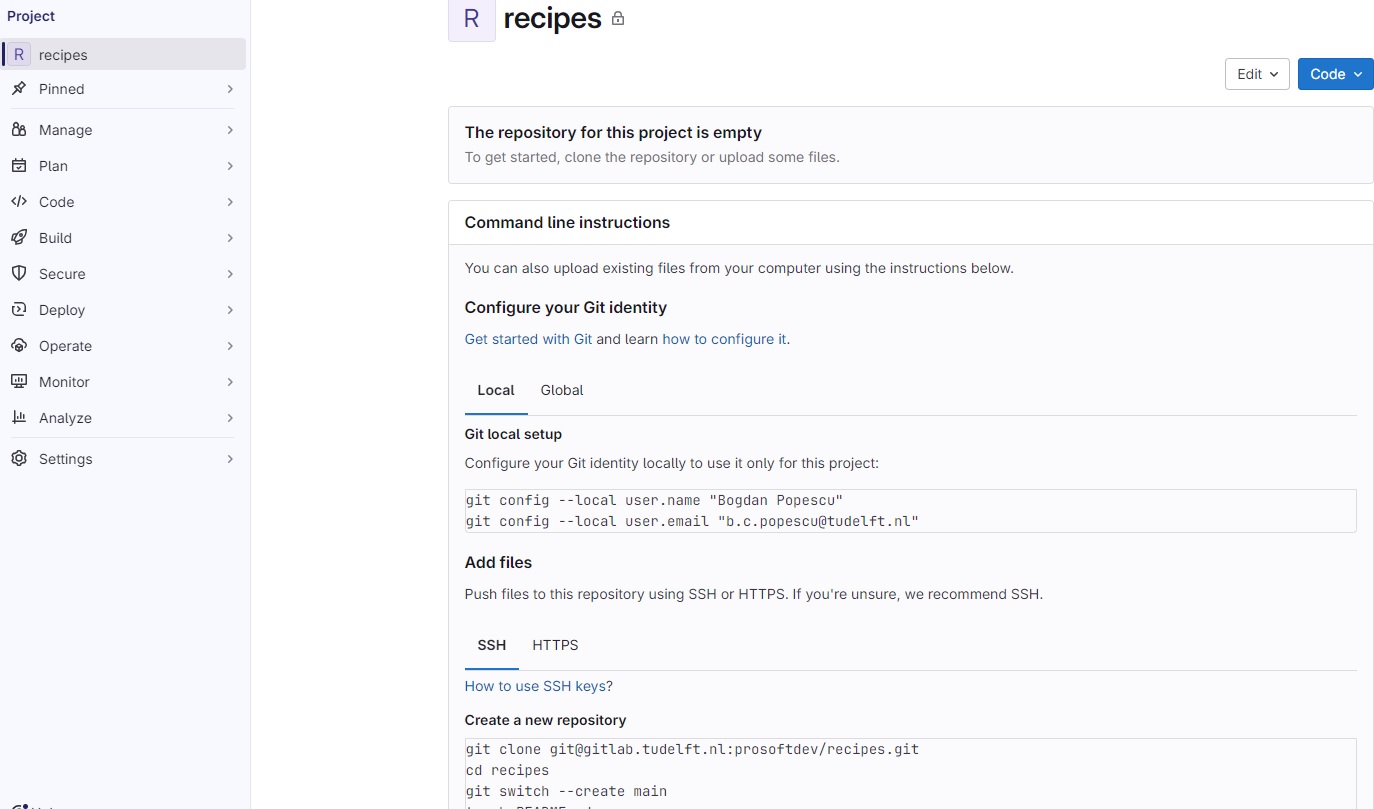
The page is split into the menu on the left and the project overview on the right.
The menu leads to pages related to various properties, processes, and content of the project. It is visible on each of these pages. The number of menu entries may seem overwhelming, in particular when one notices that the entries have sub-entries. However, it is not necessary to know what hides behind all these entries to use GitLab. Following this lesson, we will get to know parts of what lies behind the entries “Manage”, “Code”, and “Settings”.
The project overview shows (from the top): The project’s avatar (or icon) and name; a prompt to invite team members (we will cover members later on); a statement that our repository is currently empty with buttons for several options to add content to it; and finally the beginning of the instructions on how to push a local repository to this project’s repository to fill it with content. We will follow them in just a bit.
The project overview page will look slightly different, once we have content in its repository. We will have another look at the page then.
Change Name, Description, Visibility, or Avatar
Click on the “Settings” sub-menu and select its “General” entry. Set the description to something meaningful, such as “A collection of simple recipes”.
The project description appears in many lists and on some pages under the project’s name.
Then change any of the project’s name, visibility, or avatar. Do not forget to click the “Save changes” button once you are done.
This exercise should take about 5 minutes.
Markdown
Markdown is a markup language like HTML, on which the World Wide Web is based, or wikitext, which is used to write Wikipedia’s content. Its markup directives, indicating for example that something is a headline or a list item, are such that they serve their purpose even in the plain text form.
The project overview page presents us with many options to add content to the project’s repository directly in GitLab. We will add our first file to the project repository in the next section.
Archiving a Project
We just went through the beginning of a GitLab project’s life cycle. At its end, if it has one, a project gets archived (or deleted). We will now go through the process of archiving a project, without completing the procedure.
Using the menu on the left, we navigate to the project’s “General” settings.
At the bottom of the page, we find a section named “Advanced”. We click on the “Expand” button right next to it and scroll down the page.
Notice that some of buttons here are not the usual blue or white, but rather red. This indicates that we should be careful about clicking them. Things might break or get deleted.
Scrolling back up, we find a section labeled “Archive Project”. Clicking the button will not delete the project. Instead it will be placed in a read-only mode. Everything will be preserved but nothing can be changed anymore. In addition, the project no longer shows up in search results and on the page for exploring projects.
Most of the time archiving a project is preferable to deleting it, in particular when it comes to research projects. Do not archive the project now! We will work with it throughout this lesson.
At the bottom of the page is also a section for deleting a project, in case you ever think that is the right thing to do.
Connecting GitLab Projects with Local Git Repositories
Remember from an earlier lesson that we have created a local Git repository that looked like this:
Now we want to have a GitLab project that will be coupled with this local Git repo. The first step here is to follow the steps described in the previous section, and create a new GitLab project called ‘recipes’. Initially the Git repo for this GitLab project will be empty, as shown in the diagram below:

Connecting the local to remote repository
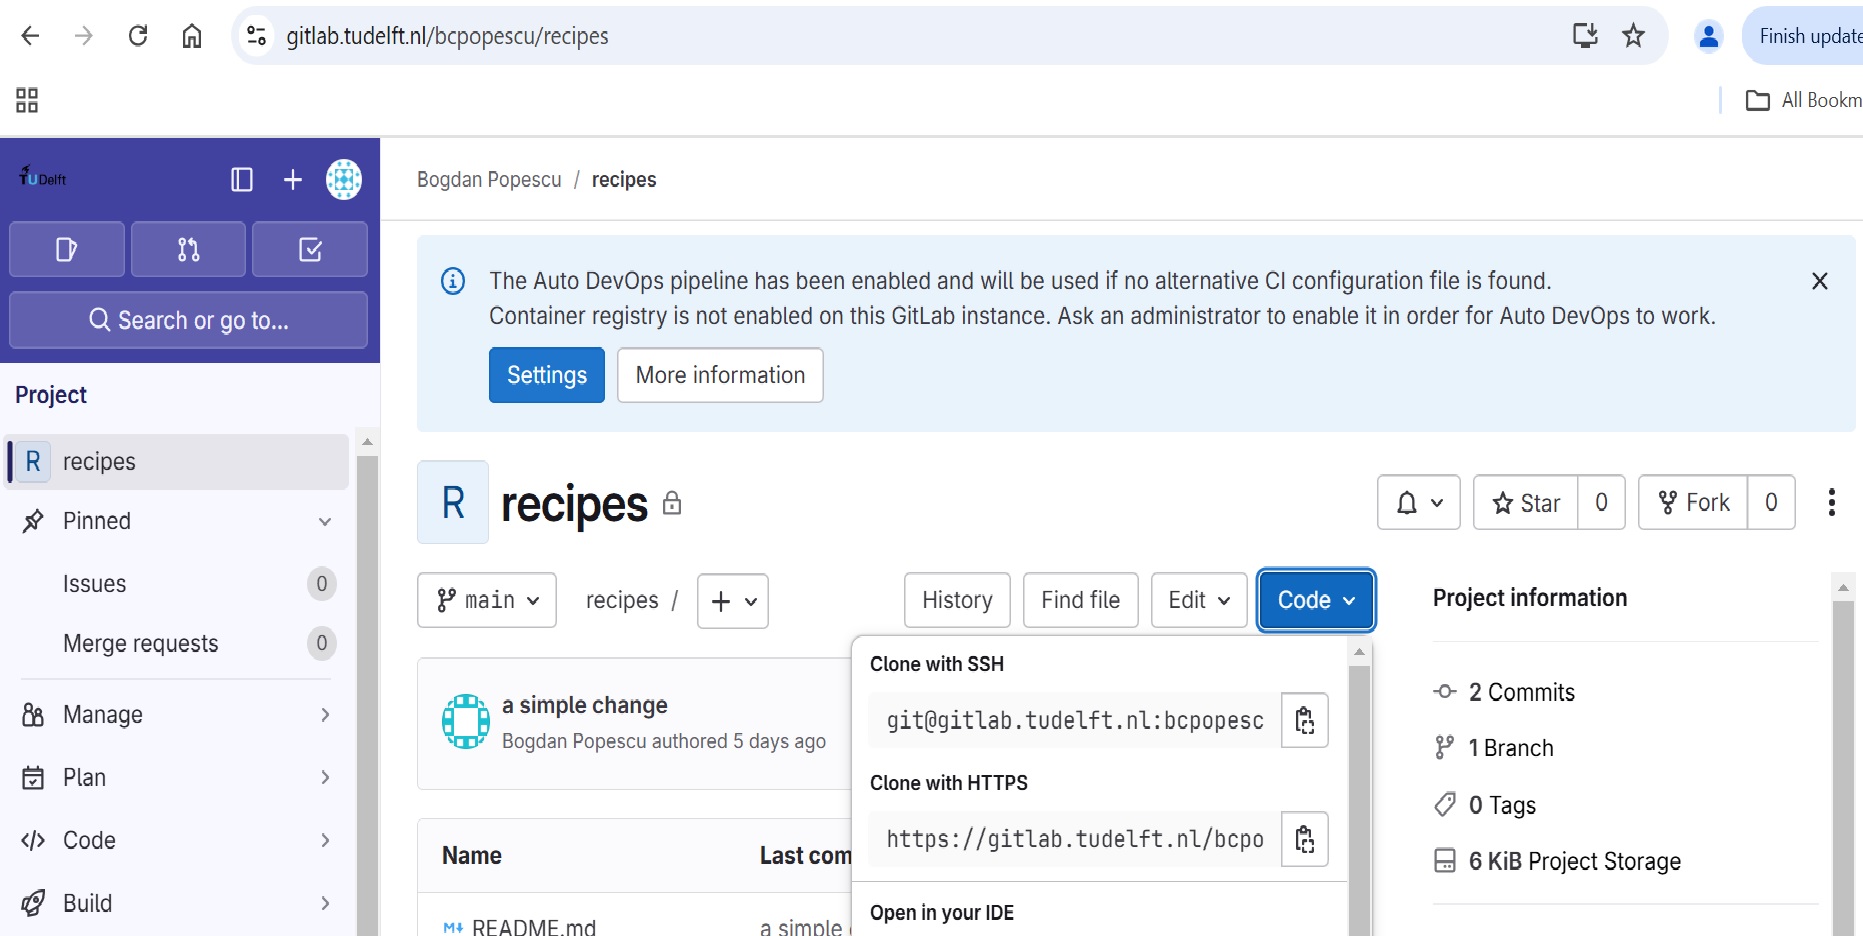
Now we connect the two repositories. We do this by making the GitLab
repository a remote for the local
repository. Go to the home page of the repository on GitLab, click on
the blue Code button, and copy the string below the
Clone with SSH
HTTPS vs. SSH
We use SSH here because, while it requires some additional configuration, it is a security protocol widely used by many applications. The steps below describe SSH at a minimum level for GitLab.
With the Clone with SSH string you copied from the
GitLab page, go into the local recipes repository, and run
this command:
Make sure to use the URL for your repository rather than Alfredo’s:
the only difference should be your username instead of
alflin.
origin is a local name used to refer to the remote
repository. It could be called anything, but origin is a
convention that is often used by default in git and GitLab, so it’s
helpful to stick with this unless there’s a reason not to.
We can check that the command has worked by running
git remote -v:
OUTPUT
origin   git@gitlab.tudelft.nl:alflin/recipes.git (fetch)
origin   git@gitlab.tudelft.nl:alflin/recipes.git (push)
SSH Background and Setup
Before Alfredo can connect to a remote repository, he needs to set up a way for his computer to authenticate with GitLab so it knows it’s him trying to connect to his remote repository.
We are going to set up the method that is commonly used by many different services to authenticate access on the command line. This method is called Secure Shell Protocol (SSH). SSH is a cryptographic network protocol that allows secure communication between computers using an otherwise insecure network.
SSH uses what is called a key pair. This is two keys that work together to validate access. One key is publicly known and called the public key, and the other key called the private key is kept private. Very descriptive names.
You can think of the public key as a padlock, and only you have the key (the private key) to open it. You use the public key where you want a secure method of communication, such as your GitLab account. You give this padlock, or public key, to GitLab and say “lock the communications to my account with this so that only computers that have my private key can unlock communications and send git commands as my GitLab account.”
What we will do now is the minimum required to set up the SSH keys and add the public key to a GitLab account.
The first thing we are going to do is check if this has already been done on the computer you’re on. Because generally speaking, this setup only needs to happen once and then you can forget about it.
Keeping your keys secure
You shouldn’t really forget about your SSH keys, since they keep your account secure. It’s good practice to audit your secure shell keys every so often. Especially if you are using multiple computers to access your account.
We will run the list command to check what key pairs already exist on your computer.
Your output is going to look a little different depending on whether or not SSH has ever been set up on the computer you are using.
Alfredo has not set up SSH on his computer, so his output is
OUTPUT
ls: cannot access '/c/Users/Alfredo/.ssh': No such file or directoryIf SSH has been set up on the computer you’re using, the public and
private key pairs will be listed. The file names are either
id_ed25519/id_ed25519.pub or
id_rsa/id_rsa.pub depending on how the key
pairs were set up. Since they don’t exist on Alfredo’s computer, he uses
this command to create them.
Create an SSH key pair
To create an SSH key pair Alfredo uses this command, where the
-t option specifies which type of algorithm to use and
-C attaches a comment to the key (here, Alfredo’s
email):
OUTPUT
Generating public/private ed25519 key pair.
Enter file in which to save the key (/c/Users/Alfredo/.ssh/id_ed25519):
We want to use the default file, so just press Enter.
OUTPUT
Created directory '/c/Users/Alfredo/.ssh'.
Enter passphrase (empty for no passphrase):
Now, it is prompting Alfredo for a passphrase. Alfredo will be using this key from his own laptop, from his password-protected account, so this extra security layer of having a passkey for this SSH key is not necessary at this point, so he can leave it empty - by pressing Enter twice.
At this point we should receive the confirmation that the key has been created:
OUTPUT
Your identification has been saved in /c/Users/Alfredo/.ssh/id_ed25519
Your public key has been saved in /c/Users/Alfredo/.ssh/id_ed25519.pub
The key fingerprint is:
SHA256:SMSPIStNyA00KPxuYu94KpZgRAYjgt9g4BA4kFy3g1o a.linguini@ratatouille.fr
The key's randomart image is:
+--[ED25519 256]--+
|^B== o.          |
|%*=.*.+          |
|+=.E =.+         |
| .=.+.o..        |
|....  . S        |
|.+ o             |
|+ =              |
|.o.o             |
|oo+.             |
+----[SHA256]-----+
The “identification” is actually the private key. You should never share it. The public key is appropriately named. The “key fingerprint” is a shorter version of a public key.
Now that we have generated the SSH keys, we will find the SSH files when we check.
OUTPUT
drwxr-xr-x 1 Alfredo   197121   0 Jul 16 14:48 ./
drwxr-xr-x 1 Alfredo   197121   0 Jul 16 14:48 ../
-rw-r--r-- 1 Alfredo   197121 419 Jul 16 14:48 id_ed25519
-rw-r--r-- 1 Alfredo   197121 106 Jul 16 14:48 id_ed25519.pub
Copy the public key to GitLab
Now we have a SSH key pair and we can run this command to check if GitLab can read our authentication.
OUTPUT
The authenticity of host 'gitlab.tudelft.nl (192.30.255.112)' can't be established. RSA key fingerprint
is SHA256:nThbg6kXUpJWGl7E1IGOCspRomTxdCARLviKw6E5SY8. This key is not known by any other names
Are you sure you want to continue connecting (yes/no/[fingerprint])? y
Please type 'yes', 'no' or the fingerprint: yes
Warning: Permanently added 'gitlab.tudelft.nl' (RSA) to the list of known hosts.
git@gitlab.tudelft.nl: Permission denied (publickey).
Right, we forgot that we need to give GitLab our public key!
First, we need to copy the public key. Be sure to include the
.pub at the end, otherwise you’re looking at the private
key.
OUTPUT
ssh-ed25519 AAAAC3NzaC1lZDI1NTE5AAAAIDmRA3d51X0uu9wXek559gfn6UFNF69yZjChyBIU2qKI a.linguini@ratatouille.frNow, going to the GitLab page in your browser, click on your profile
icon in the top right corner of the left panel, select
Edit profile from the menu, then click on the
SSH Keys link under User Settings in the same
panel:
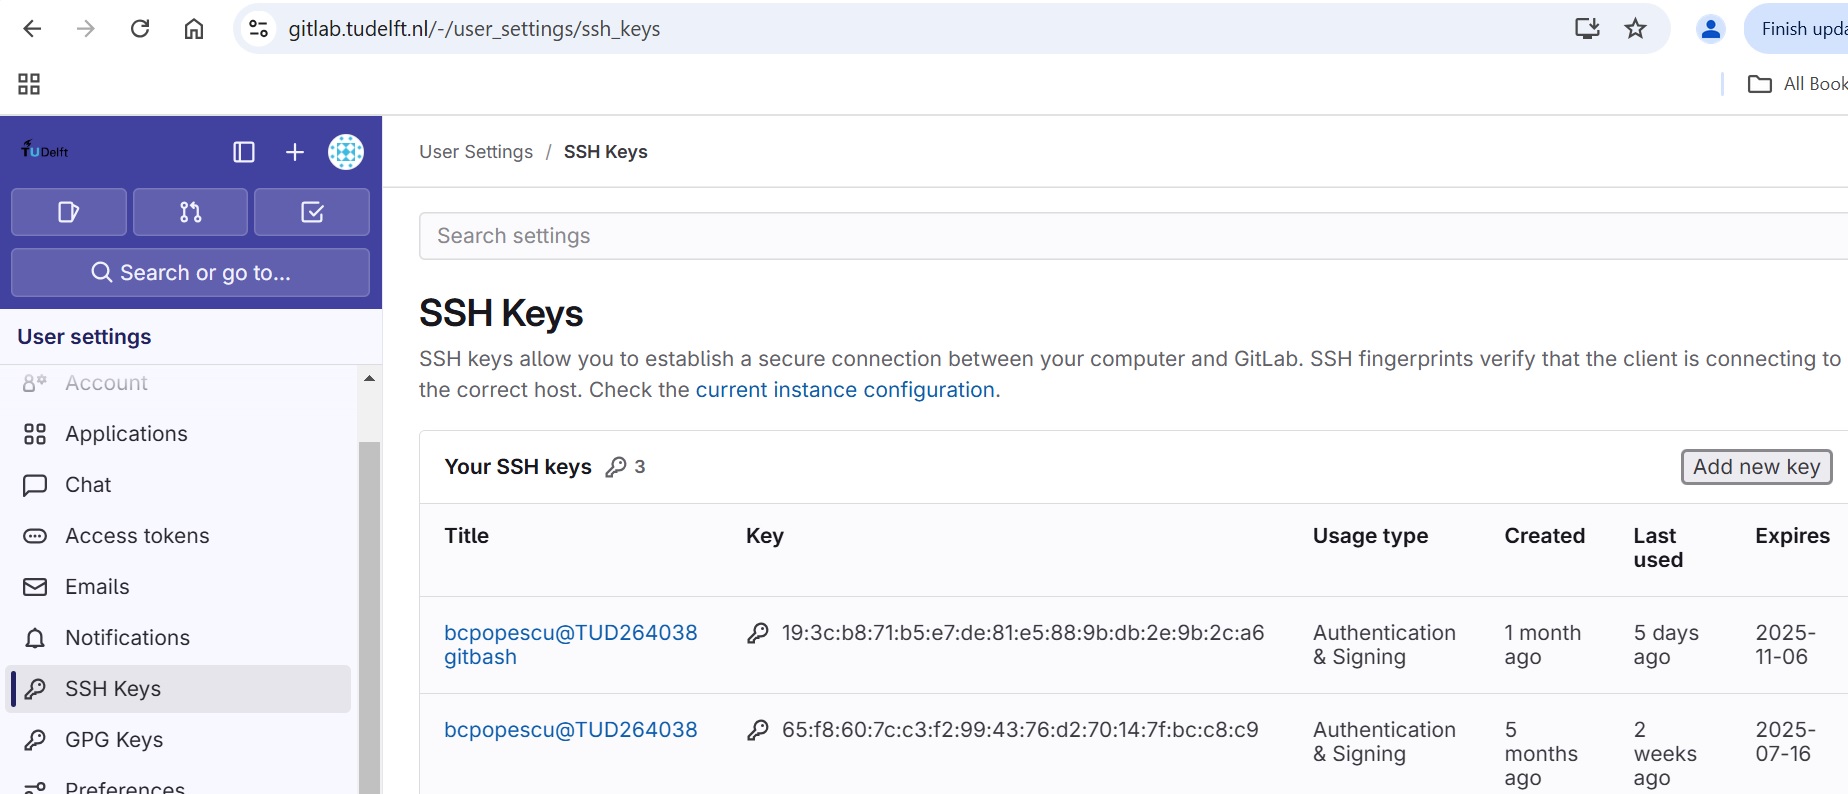
Click on the Add new key button, which will take you to
a page like this:

Here, you can paste your public key in the Key box, add
a title, and set an expiration date. Once everything is filled in, you
can click the Add key button.
Now that we’ve set that up, let’s check our authentication again from the command line.
OUTPUT
Welcome to GitLab, @alflin!Good! This output confirms that the SSH key works as intended. We are now ready to push our work to the remote repository.
Push local changes to a remote
Now that authentication is setup, we can return to the remote. This command will push the changes from our local repository to the repository on GitLab:
OUTPUT
Enumerating objects: 16, done.
Counting objects: 100% (16/16), done.
Delta compression using up to 8 threads.
Compressing objects: 100% (11/11), done.
Writing objects: 100% (16/16), 1.45 KiB | 372.00 KiB/s, done.
Total 16 (delta 2), reused 0 (delta 0)
remote: Resolving deltas: 100% (2/2), done.
To https://gitlab.tudelft.nl/alflin/recipes.git
 * [new branch]      main -> main
Our local and remote repositories are now in this state:

We can pull changes from the remote repository to the local one as well:
OUTPUT
From https://gitlab.tudelft.nl/alflin/recipes
 * branch            main     -> FETCH_HEAD
Already up-to-date.
Pulling has no effect in this case because the two repositories are already synchronized. If someone else had pushed some changes to the repository on GitLab, though, this command would download them to our local repository.
Adding/Removing Project Members
So far, each of you has created a GitLab project that no one but you can contribute to; depending on the visibility setting, no one but you might be able to even see it.
Git and GitLab can be and is used for one-person projects. But we want our colleagues to contribute to our recipes collection. To achieve this, we will grant others access to our GitLab project.
Using the menu on the left side of the project homepage (or nearly any other project page), we navigate to the project members page hovering over or clicking on “Manage” and then clicking on “Members” in the submenu. The project member page should look similar to the following screenshot:

On the page we can see the page title, “Project members”, three buttons to the left of the title, and a filterable table of members, currently only listing ourselves.
The table shows our full name and account name, why we are a member of this project, what our maximum role is–more on that in a bit–, when we got access—at the moment we created the project—, a disabled membership expiration date widget, and three dates on our activity.
For practice we will all add an instructor to our project and remove them again right away, as shown in the picture below:
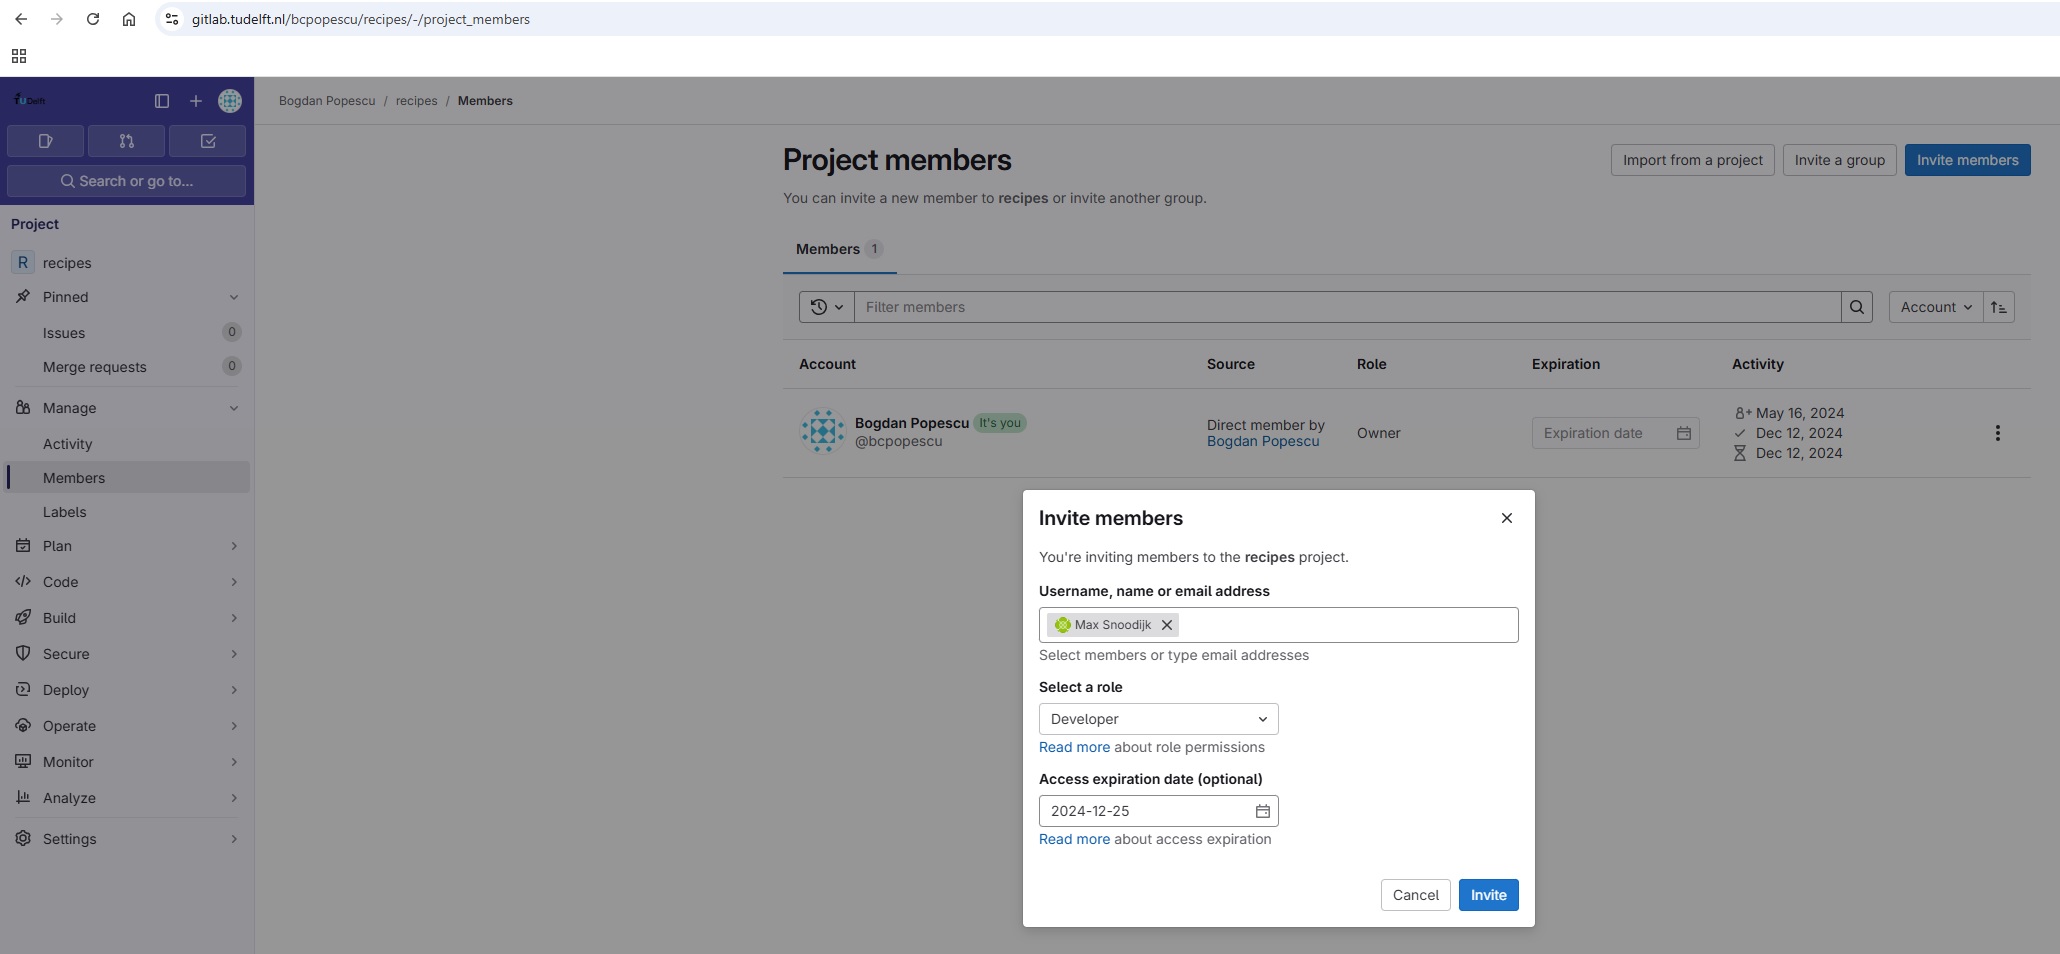
Click the button labeled “Invite members”, type in the username your instructors provided you with into the search field, make sure that “Guest” is selected as a role, and click the button labeled “Invite”.
Your instructor should now be listed next to you in the table. Unlike in your own row, you can change the role and the expiration date of this new entry.
Project member roles
In GitLab, every project member is assigned a role that defines their level of access and available actions within the project. Common roles include Guest, Developer, and Owner. Each role comes with specific permissions — for example, Maintainers can push code, while Owners have full control over the project. Choosing the right role ensures proper collaboration while protecting critical project settings. You can consult GitLab’s handbook for a detailed overview of the different roles’ permissions. The following roles are commonly used in GitLab software projects:
-
Guest
- Can view project files, and read issues and comments
- Cannot push git commits
- Ideal for external stakeholders or casual viewers
-
Maintainer
- Can push git commits
- Can manage advanced git and project workflows, such as branches and pipelines
- Cannot delete the project
-
Owner
- Full control over everything in the project
- Can manage settings, members, and even delete the project
The owner of the project can add as well as remove project members. Removing project members is done from the members list like this:
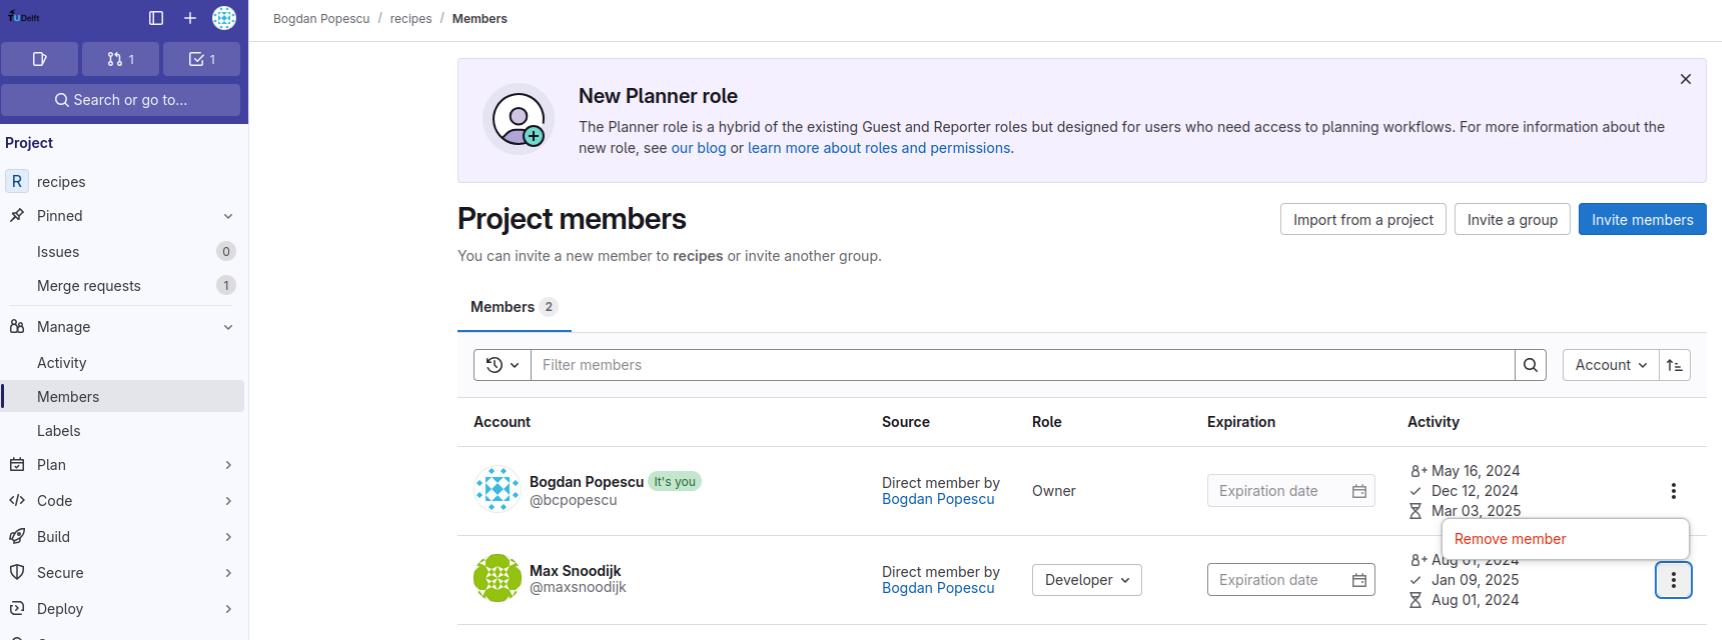
Adding project members
Get into pairs and add each other with the role “Maintainer” to your projects, and set the expiration for this membership to one month from now.
The “Maintainer” role grants just enough permissions for all the collaborative tasks we will practice in this lesson.
This exercise should take about 3 minutes.
Key Points
- Projects are GitLab’s primary entity of organization.
- You can explore/search projects visible to you on the “Explore projects” page.
- Groups can contain projects and other groups.
- You can explore/search groups visible to you on the ”Explore groups” page.
- Creating a GitLab project requires not more than a few clicks and providing a name.
- A project’s visibility can be set to either private, internal, or public.
- Adding others as members allows them to directly contribute to your projects
- Members with sufficient rights can independently contribute to repositories
Content from Advanced Git Commands
Last updated on 2025-07-07 | Edit this page
Overview
Questions
- How can I use version control to collaborate with other people?
- What do I do when my changes conflict with someone else’s?
Objectives
- Clone a remote repository.
- Describe the basic collaborative workflow: pushing changes to a common repository.
- Explain what conflicts are, when they can occur, and how we can sole them.
- Look at Git branches, and show how they can be managed/merged through GitLab merge requests.
Collaborating
For the next step, get into pairs. One person will be the “Owner” and the other will be the “Collaborator”. The goal is that the Collaborator add changes into the Owner’s repository. We will switch roles at the end, so both persons will play Owner and Collaborator.
Practicing By Yourself
If you’re working through this lesson on your own, you can carry on by opening a second terminal window. This window will represent your partner, working on another computer. You won’t need to give anyone access on GitLab, because both ‘partners’ are you.
Adding collaborators to your GitLab repo
In case you have not done this already, revisit what you have just learned in the last hour and add your Collaborator to your GitLab recipes project, giving them a “Maintainer” role, which should give them enough rights to complete all the collaborative workflows we will practice today.
Cloning a remote GitLab repo
Next, the Collaborator needs to download a copy of the Owner’s repository to her machine. This is called “cloning a repo”.
The Collaborator doesn’t want to overwrite her own version of
recipes.git, so needs to clone the Owner’s repository to a
different location than her own repository with the same name.
To clone the Owner’s repo into her projects folder, the
Collaborator enters:
OUTPUT
Cloning into 'recipes'...
remote: Enumerating objects: 18, done.
remote: Counting objects: 100% (18/18), done.
remote: Compressing objects: 100% (15/15), done.
remote: Total 18 (delta 4), reused 0 (delta 0), pack-reused 0 (from 0)
Receiving objects: 100% (18/18), 4.17 KiB | 2.09 MiB/s, done.
Resolving deltas: 100% (4/4), done.
Replace ‘alflin’ with the Owner’s username.
If you choose to clone without the clone path
(~/projects/alflin-recipes) specified at the end, you will
clone inside your own recipes folder! Make sure to navigate to the
projects folder first.

Making changes
The Collaborator can now make a change in her clone of the Owner’s repository, exactly the same way as we’ve been doing before:
OUTPUT
# Hummus
## Ingredients
* chickpeas
* lemon
* olive oil
* saltOUTPUT
 1 file changed, 6 insertion(+)
 create mode 100644 hummus.md
Then push the change to the Owner’s repository on GitLab:
OUTPUT
Enumerating objects: 4, done.
Counting objects: 4, done.
Delta compression using up to 4 threads.
Compressing objects: 100% (2/2), done.
Writing objects: 100% (3/3), 306 bytes, done.
Total 3 (delta 0), reused 0 (delta 0)
To gitlab.tudelft.nl:alflin/recipes.git
   9272da5..29aba7c  main -> main
Note that we didn’t have to create a remote called
origin: Git uses this name by default when we clone a
repository. (This is why origin was a sensible choice
earlier when we were setting up remotes by hand.)
Take a look at the Owner’s repository on GitLab again, and you should be able to see the new commit made by the Collaborator. You may need to refresh your browser to see the new commit.
Sync-ing changes made by collaborators
To download the Collaborator’s changes from GitLab, the Owner now enters:
OUTPUT
remote: Enumerating objects: 4, done.
remote: Counting objects: 100% (4/4), done.
remote: Compressing objects: 100% (2/2), done.
remote: Total 3 (delta 0), reused 3 (delta 0), pack-reused 0
Unpacking objects: 100% (3/3), done.
From gitlab.tudelft.nl:alflin/recipes
 * branch            main     -> FETCH_HEAD
   9272da5..29aba7c  main     -> origin/main
Updating 9272da5..29aba7c
Fast-forward
 hummus.md | 5 +
 1 file changed, 5 insertion(+)
 create mode 100644 hummus.md
Now the three repositories (Owner’s local, Collaborator’s local, and Owner’s on GitLab) are back in sync.
A Basic Collaborative Workflow
In practice, it is good to be sure that you have an updated version
of the repository you are collaborating on, so you should
git pull before making our changes. The basic collaborative
workflow would be:
- update your local repo with
git pull origin main, - make your changes and stage them with
git add, - commit your changes with
git commit -m, and - upload the changes to GitLab with
git push origin main
It is better to make many commits with smaller changes rather than of one commit with massive changes: small commits are easier to read and review.
Switch Roles and Repeat
Switch roles and repeat the whole process.
Review Changes
The Owner pushed commits to the repository without giving any information to the Collaborator. How can the Collaborator find out what has changed using GitLab?
On GitLab, the Collaborator can go to the project and click on the “Code” menu on the left panel, and from there select the “Commits” option. This will open a new page on the right panel, showing the commits history for that project. By clicking on such a commit, the user can see the changes made per file, which will be highlighted by GitLab as shown below.
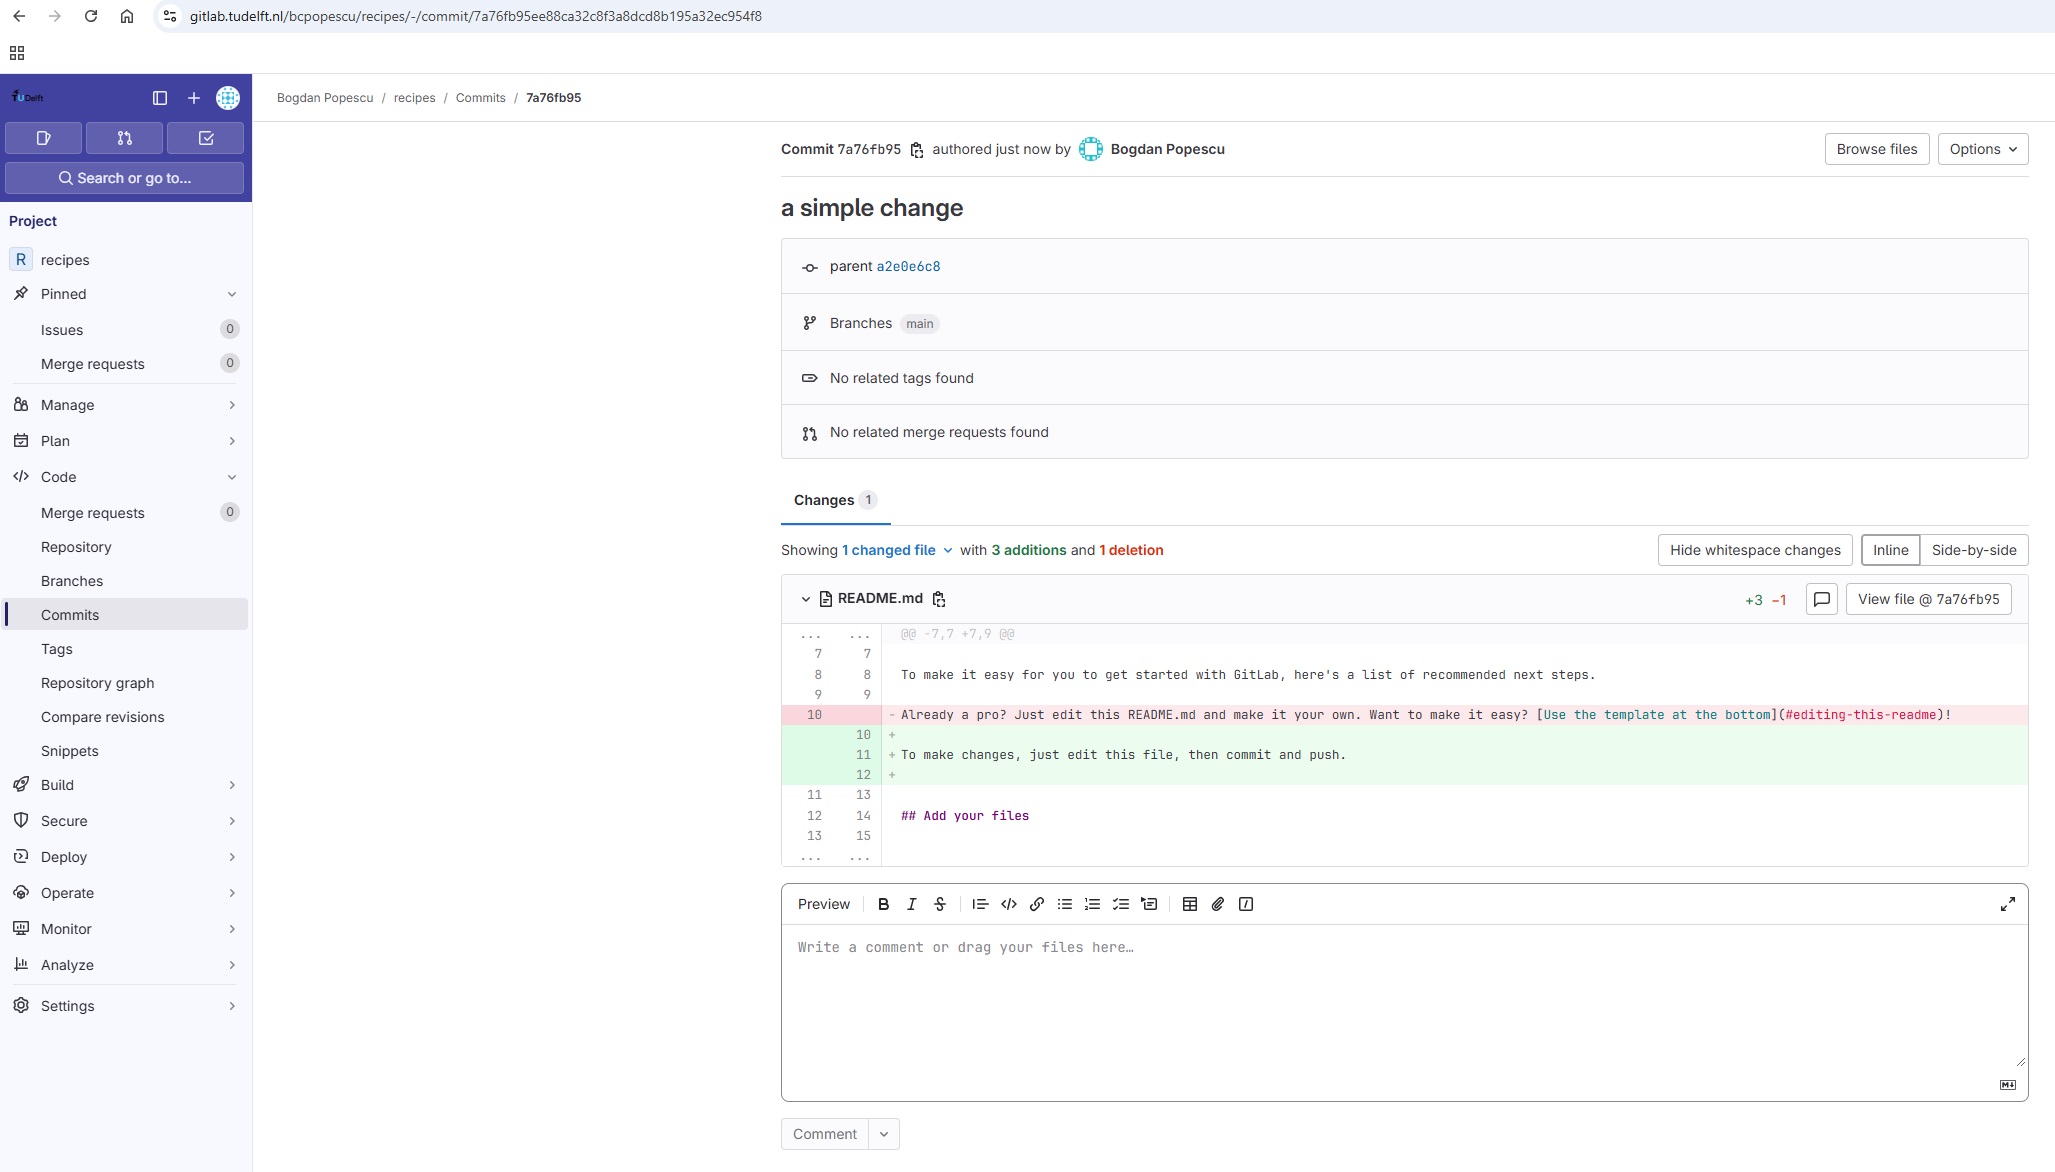
Solving Conflicts
As soon as people can work in parallel, they’ll likely step on each other’s toes. This will even happen with a single person: if we are working on a piece of software on both our laptop and a server in the lab, we could make different changes to each copy. Version control helps us manage these conflicts by giving us tools to resolve overlapping changes.
To see how we can resolve conflicts, we must first create one. The
file guacamole.md currently looks like this in both
partners’ copies of our recipes repository:
OUTPUT
# Guacamole
## Ingredients
* avocado
* lime
* salt
## Instructions
Let’s add a line to the collaborator’s copy only:
OUTPUT
# Guacamole
## Ingredients
* avocado
* lime
* salt
## Instructions
* put one avocado into a bowl.
and then push the change to GitLab:
OUTPUT
[main 5ae9631] First step on the instructions
1 file changed, 1 insertion(+)OUTPUT
Enumerating objects: 5, done.
Counting objects: 100% (5/5), done.
Delta compression using up to 8 threads
Compressing objects: 100% (3/3), done.
Writing objects: 100% (3/3), 331 bytes | 331.00 KiB/s, done.
Total 3 (delta 2), reused 0 (delta 0)
remote: Resolving deltas: 100% (2/2), completed with 2 local objects.
To gitlab.tudelft.nl:alflin/recipes.git
   29aba7c..dabb4c8  main -> main
Now let’s have the owner make a different change to their copy without updating from GitLab:
OUTPUT
# Guacamole
## Ingredients
* avocado
* lime
* salt
## Instructions
* peel the avocados
We can commit the change locally:
OUTPUT
[main 07ebc69] Add first step
 1 file changed, 1 insertion(+)
but Git won’t let us push it to GitLab:
OUTPUT
To https://gitlab.tudelft.nl/alflin/recipes.git
 ! [rejected]        main -> main (fetch first)
error: failed to push some refs to 'https://gitlab.tudelft.nl:alflin/recipes.git'
hint: Updates were rejected because the remote contains work that you do
hint: not have locally. This is usually caused by another repository pushing
hint: to the same ref. You may want to first integrate the remote changes
hint: (e.g., 'git pull ...') before pushing again.
hint: See the 'Note about fast-forwards' in 'git push --help' for details.
Telling Git how to solve conflicts
If you see the below in your output, Git is asking what it should do.
OUTPUT
hint: You have divergent branches and need to specify how to reconcile them.
hint: You can do so by running one of the following commands sometime before
hint: your next pull:
hint:
hint:   git config pull.rebase false  # merge (the default strategy)
hint:   git config pull.rebase true   # rebase
hint:   git config pull.ff only       # fast-forward only
hint:
hint: You can replace "git config" with "git config --global" to set a default
hint: preference for all repositories. You can also pass --rebase, --no-rebase,
hint: or --ff-only on the command line to override the configured default per
hint: invocation.
In newer versions of Git it gives you the option of specifying different behaviours when a pull would merge divergent branches. In our case we want ‘the default strategy’. To use this strategy run the following command to select it as the default thing git should do.
Then attempt the pull again.
OUTPUT
Auto-merging guacamole.md
CONFLICT (content): Merge conflict in guacamole.md
Automatic merge failed; fix conflicts and then commit the result.
The git pull command updates the local repository to
include those changes already included in the remote repository. After
the changes from remote branch have been fetched, Git detects that
changes made to the local copy overlap with those made to the remote
repository, and therefore refuses to merge the two versions to stop us
from trampling on our previous work. The conflict is marked in in the
affected file:
OUTPUT
# Guacamole
## Ingredients
* avocado
* lime
* salt
## Instructions
<<<<<<< HEAD
* peel the avocados
=======
* put one avocado into a bowl.
>>>>>>> dabb4c8c450e8475aee9b14b4383acc99f42af1d
Our change is preceded by
<<<<<<< HEAD. Git has then inserted
======= as a separator between the conflicting changes and
marked the end of the content downloaded from GitLab with
>>>>>>>. (The string of letters and
digits after that marker identifies the commit we’ve just
downloaded.)
Practice using graphical Git tools
Try to solve the conflicts in the guacamole.md file using the Git visual tools in PyCharm
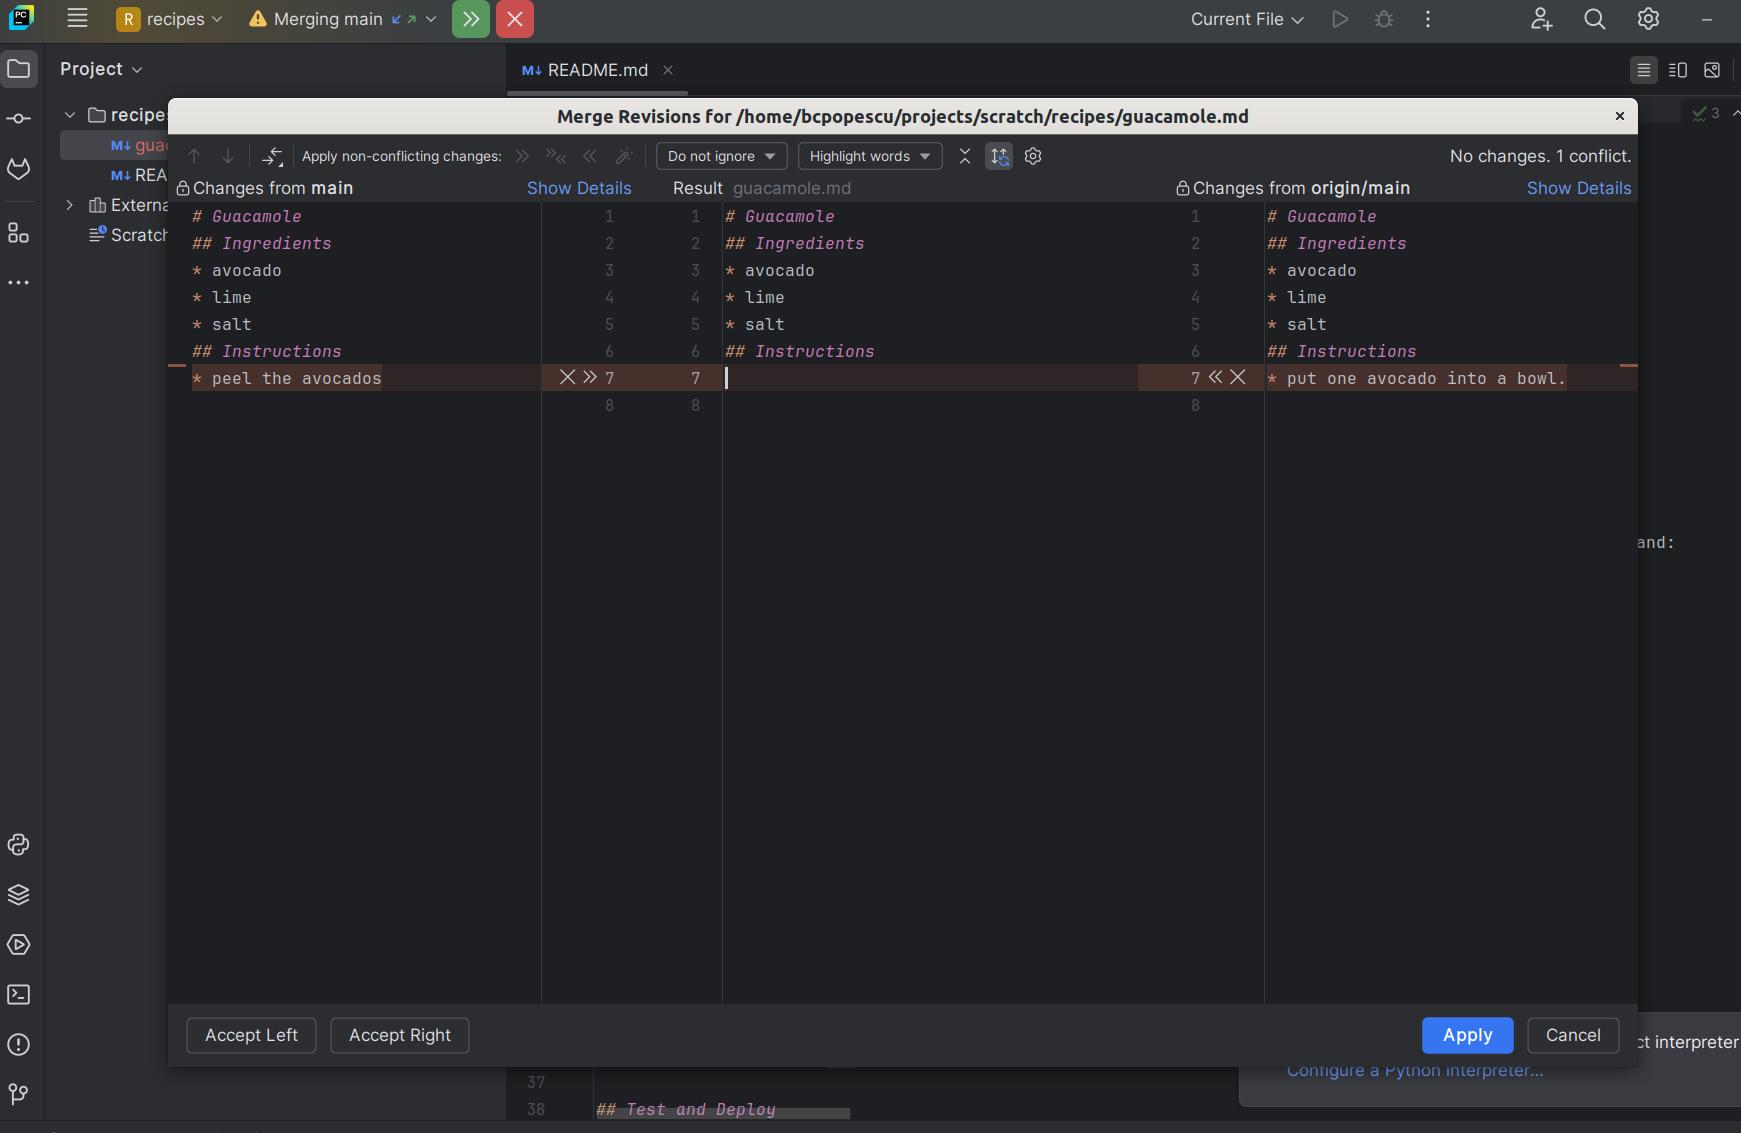
It is now up to us to edit this file to remove these markers and reconcile the changes. We can do anything we want: keep the change made in the local repository, keep the change made in the remote repository, write something new to replace both, or get rid of the change entirely. Let’s replace both so that the file looks like this:
OUTPUT
# Guacamole
## Ingredients
* avocado
* lime
* salt
## Instructions
* peel the avocados and put them into a bowl.
To finish merging, we add guacamole.md to the changes
being made by the merge and then commit:
OUTPUT
On branch main
All conflicts fixed but you are still merging.
  (use "git commit" to conclude merge)

Changes to be committed:

	modified:   guacamole.md
OUTPUT
[main 2abf2b1] Merge changes from GitLabNow we can push our changes to GitLab:
OUTPUT
Enumerating objects: 10, done.
Counting objects: 100% (10/10), done.
Delta compression using up to 8 threads
Compressing objects: 100% (6/6), done.
Writing objects: 100% (6/6), 645 bytes | 645.00 KiB/s, done.
Total 6 (delta 4), reused 0 (delta 0)
remote: Resolving deltas: 100% (4/4), completed with 2 local objects.
To https://gitlab.tudelft.nl:alflin/recipes.git
   dabb4c8..2abf2b1  main -> main
Git keeps track of what we’ve merged with what, so we don’t have to fix things by hand again when the collaborator who made the first change pulls again:
OUTPUT
remote: Enumerating objects: 10, done.
remote: Counting objects: 100% (10/10), done.
remote: Compressing objects: 100% (2/2), done.
remote: Total 6 (delta 4), reused 6 (delta 4), pack-reused 0
Unpacking objects: 100% (6/6), done.
From https://gitlab.tudelft.nl:alflin/recipes.git
 * branch            main     -> FETCH_HEAD
    dabb4c8..2abf2b1  main     -> origin/main
Updating dabb4c8..2abf2b1
Fast-forward
 guacamole.md | 2 +-
 1 file changed, 1 insertion(+), 1 deletion(-)
We get the merged file:
OUTPUT
# Guacamole
## Ingredients
* avocado
* lime
* salt
## Instructions
* peel the avocados and put them into a bowl.
We don’t need to merge again because Git knows someone has already done that.
How to minimize the chance of conflicts
Git’s ability to resolve conflicts is very useful, but conflict resolution costs time and effort, and can introduce errors if conflicts are not resolved correctly. If you find yourself resolving a lot of conflicts in a project, consider these technical approaches to reducing them:
- Pull from upstream more frequently, especially before starting new work
- Use topic branches to segregate work, merging to main when complete
- Make smaller more atomic commits
- Push your work when it is done and encourage your team to do the same to reduce work in progress and, by extension, the chance of having conflicts
- Where logically appropriate, break large files into smaller ones so that it is less likely that two authors will alter the same file simultaneously
Conflicts can also be minimized with project management strategies:
- Clarify who is responsible for what areas with your collaborators
- Discuss what order tasks should be carried out in with your collaborators so that tasks expected to change the same lines won’t be worked on simultaneously
- If the conflicts are stylistic churn (e.g. tabs vs. spaces),
establish a project convention that is governing and use code style
tools (e.g.
htmltidy,perltidy,rubocop, etc.) to enforce, if necessary
Solving Conflicts that You Create
Clone the repository created by your instructor. Add a new file to it, and modify an existing file (your instructor will tell you which one). When asked by your instructor, pull her changes from the repository to create a conflict, then resolve it.
A Typical Work Session
You sit down at your computer to work on a shared project that is tracked in a remote Git repository. During your work session, you take the following actions, but not in this order:
-
Make changes by appending the number
100to a text filenumbers.txt - Update remote repository to match the local repository
- Celebrate your success with some fancy beverage(s)
- Update local repository to match the remote repository
- Stage changes to be committed
- Commit changes to the local repository
In what order should you perform these actions to minimize the chances of conflicts? Put the commands above in order in the action column of the table below. When you have the order right, see if you can write the corresponding commands in the command column. A few steps are populated to get you started.
| order | action . . . . . . . . . . | command . . . . . . . . . . |
|---|---|---|
| 1 | ||
| 2 | echo 100 >> numbers.txt |
|
| 3 | ||
| 4 | ||
| 5 | ||
| 6 | Celebrate! |
| order | action . . . . . . | command . . . . . . . . . . . . . . . . . . . |
|---|---|---|
| 1 | Update local | git pull origin main |
| 2 | Make changes | echo 100 >> numbers.txt |
| 3 | Stage changes | git add numbers.txt |
| 4 | Commit changes | git commit -m "Add 100 to numbers.txt" |
| 5 | Update remote | git push origin main |
| 6 | Celebrate! |
Git Branches
When we do git status, Git also tells us that we are
currently on the main branch of the project. A branch is
one version of your project (the files in your repository) that can
contain its own set of commits. We can create a new branch, make changes
to the code which we then commit to the branch, and, once we are happy
with those changes, merge them back to the main branch. To see what
other branches are available, do:
OUTPUT
* mainAt the moment, there is only one branch (main) and hence
only one version of the code available. When you create a Git repository
for the first time, by default you only get one version (i.e. branch) -
main. Let us have a look at why having different branches
might be useful.
Feature Branch Software Development Workflow
While it is technically OK to commit your changes directly to
main branch, and you may often find yourself doing so for
some minor changes, the best practice is to use a new branch for each
separate and self-contained unit/piece of work you want to add to the
project. This unit of work is also often called a feature and
the branch where you develop it is called a feature branch.
Each feature branch should have its own meaningful name - indicating its
purpose (e.g. “issue23-fix”). If we keep making changes and pushing them
directly to main branch on GitLab, then anyone who
downloads our software from there will get all of our work in progress -
whether or not it is ready to use! So, working on a separate branch for
each feature you are adding is good for several reasons:
- it enables the main branch to remain stable while you and the team explore and test the new code on a feature branch,
- it enables you to keep the untested and not-yet-functional feature branch code under version control and backed up,
- you and other team members may work on several features at the same time independently from one another, and
- if you decide that the feature is not working or is no longer needed - you can easily and safely discard that branch without affecting the rest of the code.
Branches are commonly used as part of a feature-branch workflow, shown in the diagram below.

Git feature branches
Adapted from
Git
Tutorial by sillevl (Creative Commons Attribution 4.0 International
License)
The feature branch workflow is mostly used for software development projects, and consists of the following:
- The
mainbranch - which corresponds to the version of the software currently in use. This main branch should only contain code that has been thoroughly tested, and is stable and reliable. - The
developmentbranch - which typically contains completed but not yet released code. This branch should only contain working code (thus - no half-finished features); however the code here has not yet been released, so it may be less tested and reliable compared to themainbranch. - A number of
featurebranches - corresponding to various new features being developed for the project. Code on these branches does not have to be complete, and is not even expected to always work. - Developers work on new functionality on these
featurebranches, by making changes and commiting them (the typical modify-add-commit flow). Once a feature is completed, it is tested on its feature branch, and once testing is successful, thefeaturebranch is merged to thedevelopmentbranch. - After even more testing on the development branch, this branch is
then merged to the
mainbranch, and from there the code is released to users or customers.
It is important to understand that the points when feature branches
are merged to develop, and develop to
main depend entirely on the practice/strategy established
in the team. For example, for smaller projects (e.g. if you are working
alone on a project or in a very small team), feature branches sometimes
get directly merged into main upon testing, skipping the
develop branch step. In other projects, the merge into
main happens only at the point of making a new software
release. Whichever is the case for you, a good rule of thumb is -
nothing that is broken should be in
main.
Creating Branches
Let us create a develop branch to work on:
This command does not give any output, but if we run
git branch again, without giving it a new branch name, we
can see the list of branches we have - including the new one we have
just made.
OUTPUT
    develop
  * main
The * indicates the currently active branch. So how do
we switch to our new branch? We use the git switch command
with the name of the branch:
OUTPUT
Switched to branch 'develop'‘git switch’ vs ‘git checkout’
The original way of switching branches in Git was using
git checkout <branch> — and you may still find such
examples online. However, git checkout had multiple roles
(was also used to restore versions of a file for example), making it
confusing. To simplify things, starting with version 2.23 Git
has introduced the git switch, command which is dedicated
for branch changes. Use git switch <branch> for
switching branches and git checkout -- <file> to
restore files.
Updating Branches
If we start updating and committing files now, the commits will
happen on the develop branch and will not affect the
version of the code in main. We add and commit things to
develop branch in the same way as we do to
main.
Let us make a small modification to guacamole.md and,
say, change “peel the avocados” to “Peel the avocados”
to see updating branches in action.
If we do:
OUTPUT
   On branch develop
   Changes not staged for commit:
     (use "git add <file>..." to update what will be committed)
     (use "git restore <file>..." to discard changes in working directory)

   	modified:   guacamole.md

   no changes added to commit (use "git add" and/or "git commit -a")
Git is telling us that we are on branch develop and
which tracked files have been modified in our working directory.
We can now add and commit the changes in
the usual way.
Currently Active Branch
Remember, add and commit commands always
act on the currently active branch. You have to be careful and aware of
which branch you are working with at any given moment.
git status can help with that, and you will find yourself
invoking it very often.
Pushing New Branch Remotely
We push the contents of the develop branch to GitLab in
the same way as we pushed the main branch. However, as we
have just created this branch locally, it still does not exist in our
remote repository. You can check that in GitLab by listing all
branches.
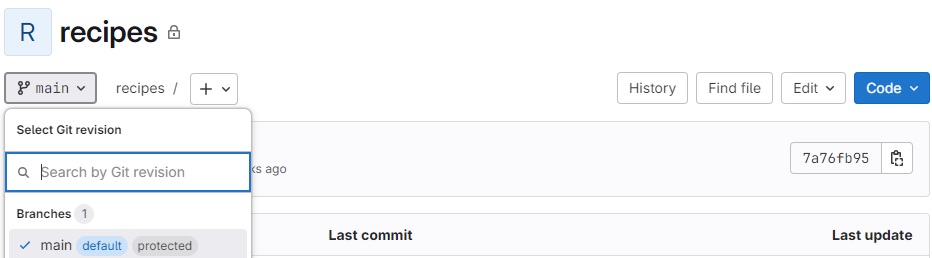
To push a new local branch remotely for the first time, you could use
the -u flag and the name of the branch you are creating and
pushing to:
Git Push With -u Flag
Using the -u switch with the git push
command is a handy shortcut for: (1) creating the new remote branch and
(2) setting your local branch to automatically track the remote one at
the same time. You need to use the -u switch only once to
set up that association between your branch and the remote one
explicitly. After that you could simply use git push
without specifying the remote repository, if you wished so. We still
prefer to explicitly state this information in commands.
Let us confirm that the new branch develop now exist
remotely on GitLab too. From your repository main page in GitLab, click
the branch dropdown menu (currently showing the default branch
main). You should see your develop branch in
the list too.
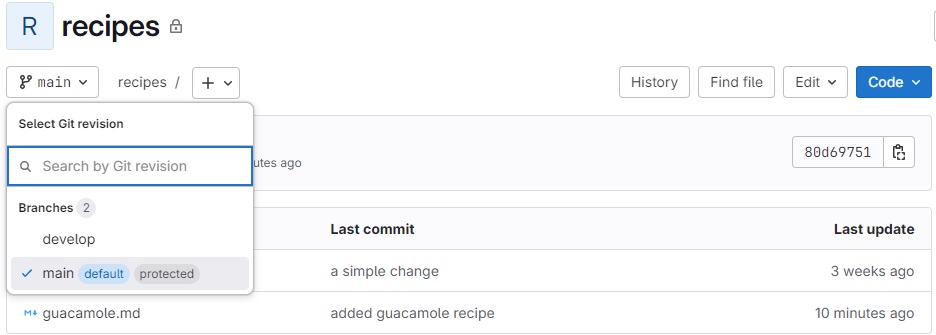
You may also have noticed GitLab’s notification about the latest push
to your develop branch just on top of the repository files
and branches drop-down menu.
Now the others can check out the develop branch too and
continue to develop code on it.
After the initial push of the new branch, each next time we push to
it in the usual manner (i.e. without the -u switch):
Merging Into Main Branch
Once you have tested your changes on the develop branch,
you will want to merge them onto the main branch. To do so,
make sure you have committed all your changes on the
develop branch and then switch to main:
OUTPUT
Switched to branch 'main'
Your branch is up to date with 'origin/main'.
To merge the develop branch on top of main
do:
OUTPUT
Updating 80d6975..a96062c
Fast-forward
 guacamole.md | 2 +-
 1 file changed, 1 insertion(+), 1 deletion(-)
If there are no conflicts, Git will merge the branches without
complaining and replay all commits from develop on top of
the last commit from main. If there are merge conflicts
(e.g. a team collaborator modified the same portion of the same file you
are working on and checked in their changes before you), the particular
files with conflicts will be marked and you will need to resolve those
conflicts and commit the changes before attempting to merge again. Since
we have no conflicts, we can now push the main branch to
the remote repository:
All Branches Are Equal
In Git, all branches are equal - there is nothing special about the
main branch. It is called that by convention and is created
by default, but it can also be called something else. A good example is
gh-pages branch which is often the source branch for
website projects hosted on GitHub (rather than main).
Keeping Main Branch Stable
Good software development practice is to keep the main
branch stable while you and the team develop and test new
functionalities on feature branches (which can be done in parallel and
independently by different team members). The next step is to merge
feature branches onto the develop branch, where more
testing can occur to verify that the new features work well with the
rest of the code (and not just in isolation). We talk more about
different types of code testing in one of the following episodes.
Merge Requests in GitLab
In addition to merging branches through the command line, it is also possible to perform a Merge Request in GitLab. To see how this works, switch back to the develop branch in the recipes repo, and modify the guacamole recipe - by adding one extra line for the ‘Instructions’: ‘Add salt’. Commit your changes, and push them to GitLab.
When you reload your GitLab repo main page, you should see that GitLab now gives you the option to create a ‘Merge Request’ to merge your changes in develop to main:
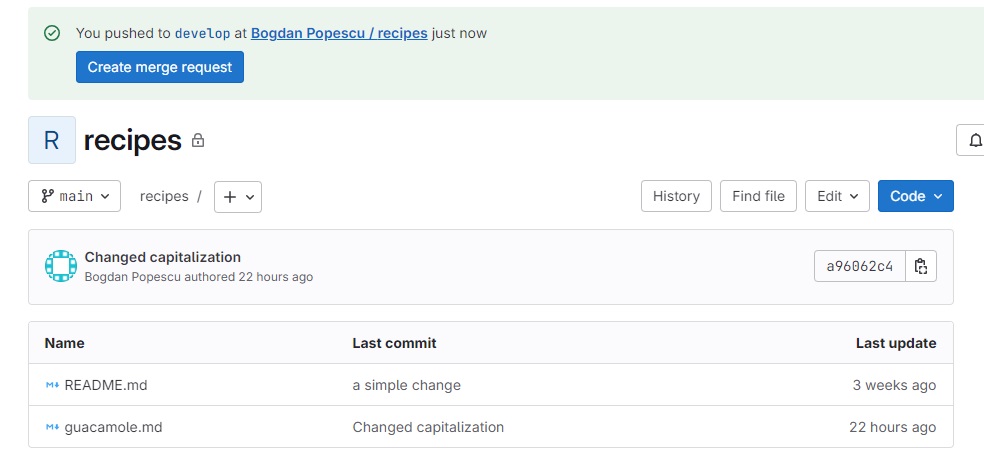
When clicking the “Create merge request” button, GitLab will open a new Merge Request form:
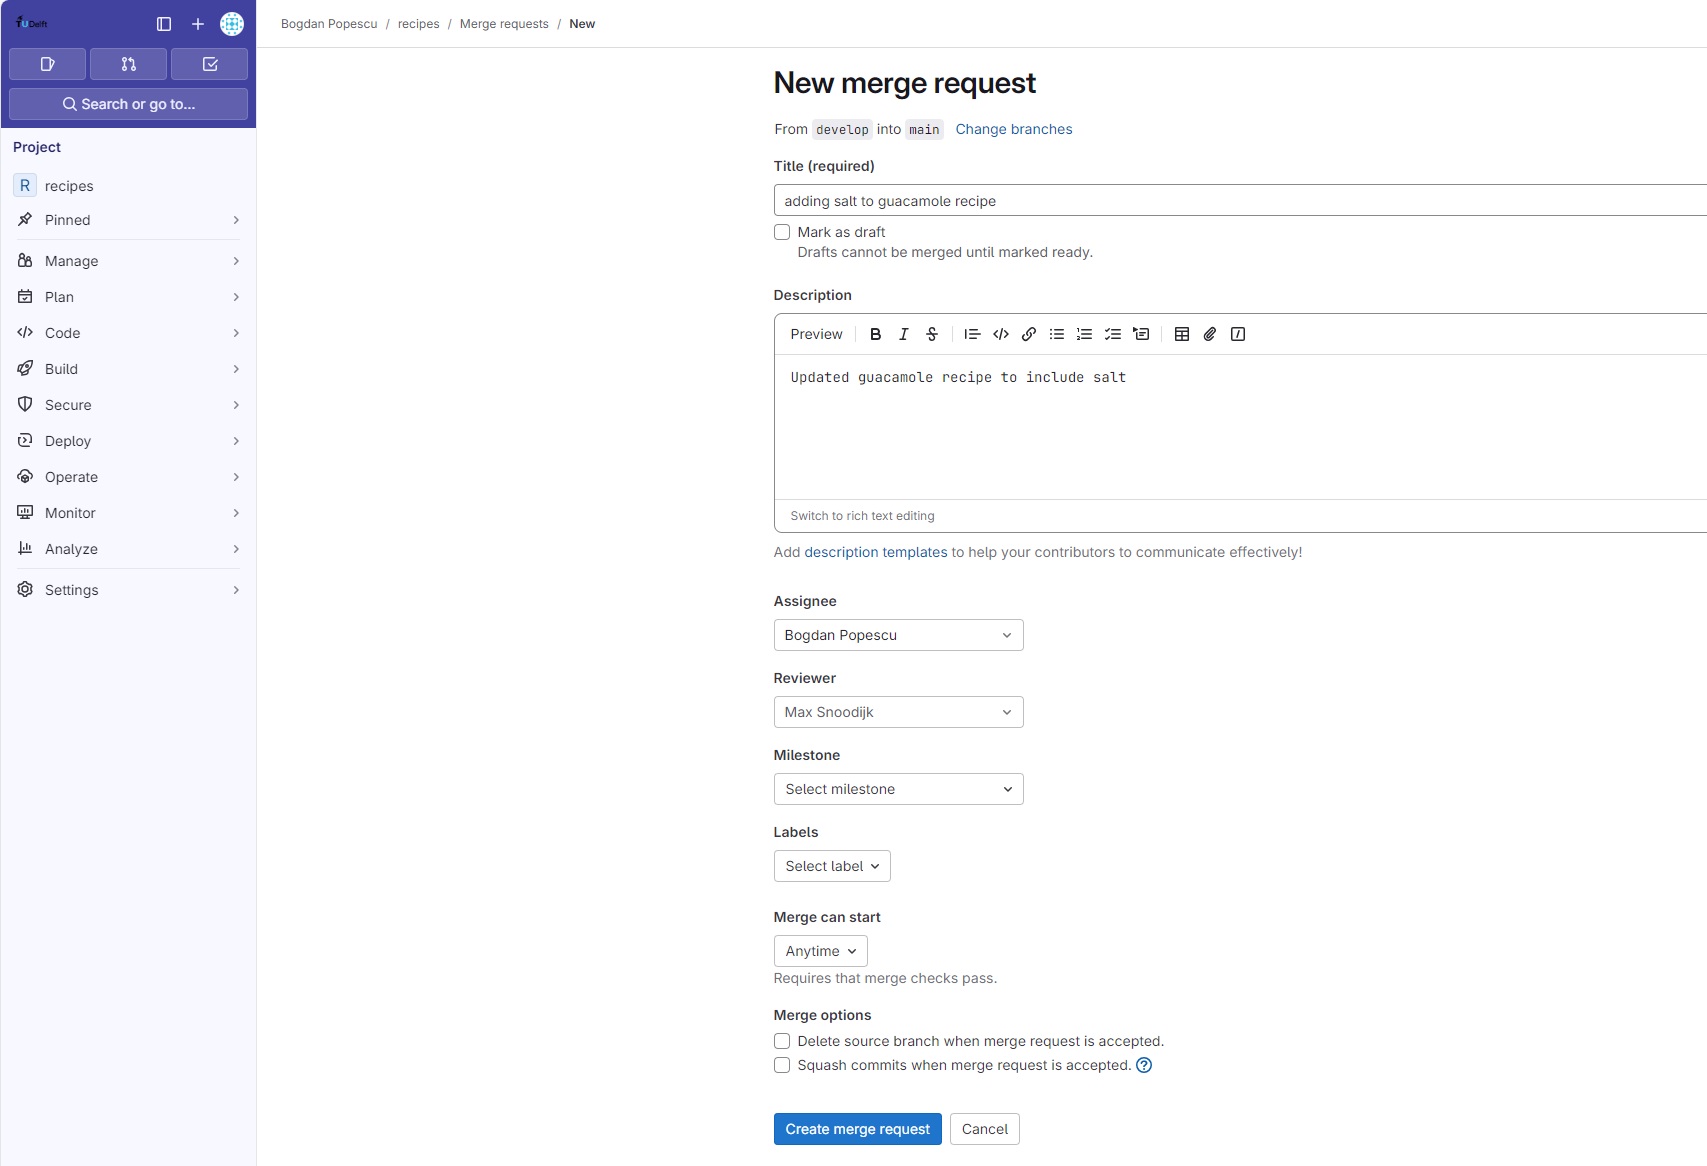
There you can fill details abut this merge, such as the Title and Description, as well as some process-related fields, such as the Asignee and Reviewer. It is good practice to always have a reviewer for any significant code changes. Many large software projects have strict governance rules requiring for example at least one reviewer approval before merging to the main branch, and it is even possible to even configure GitLab to enforce such policies. For now, we advise you to setup informal review rules with your colleagues when working on a joint project.
Once a merge request has been created, GitLab provides process controls for managing its lifecycle:
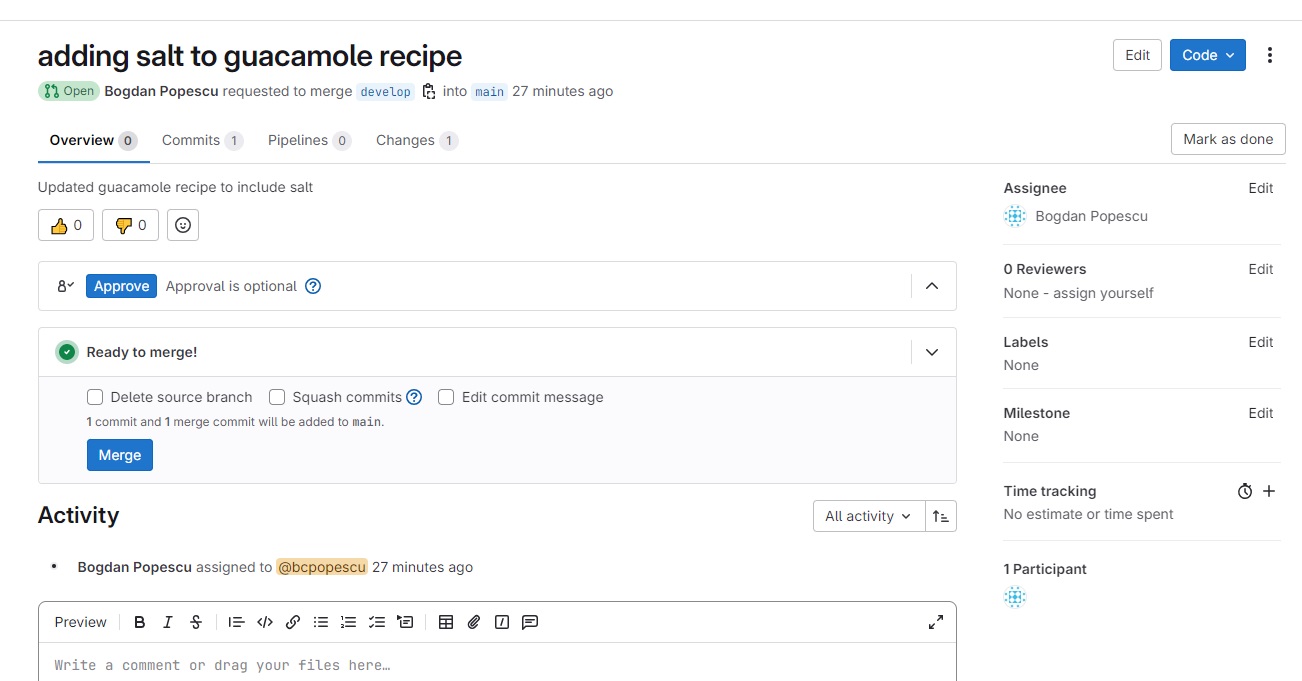
This form can be accessed from the “Merge requests” menu on the left tab. On this form you can perform actions such as: - approve the merge request by clicking the “Approve” button. - do the actual (Git) merge by clicking the “Merge” button. - review the commits part of this merge request in the “Commits” tab - review the code changes part of this merge request in the “Changes” tab - comment on code changes, also from the “Changes” tab. When making a comment, GitLab notifies the asignee for the merge request about the comment via email.
Branch - Merge Request Cycle with Conflicts
For this challenge, again work in Owner - Collaborator pairs
- As the Collaborator - create a new feature branch -
feature_all_caps - On this branch - change the spelling of all guacamole ingredients to all caps!
- Create a merge request in GitLab - requesting to merge your new
branch to
develop - After that, as the Owner change the guacamole recipe on the
developbranch:- all ingredients are capitalize (only the first letter!)
- commit and push your changes
- As the Collaborator - check the status of your merge request on GitLab. Is merging still possible?
- Together fix the
feature_all_capsbranch so merging to develop IS possible - Complete the merge request!
After the Owner has made changes to the develop branch
completing the merge request in GitLab is no longer possible - as GitLab
notices there is a conflict between develop and the
feature_all_caps branches:
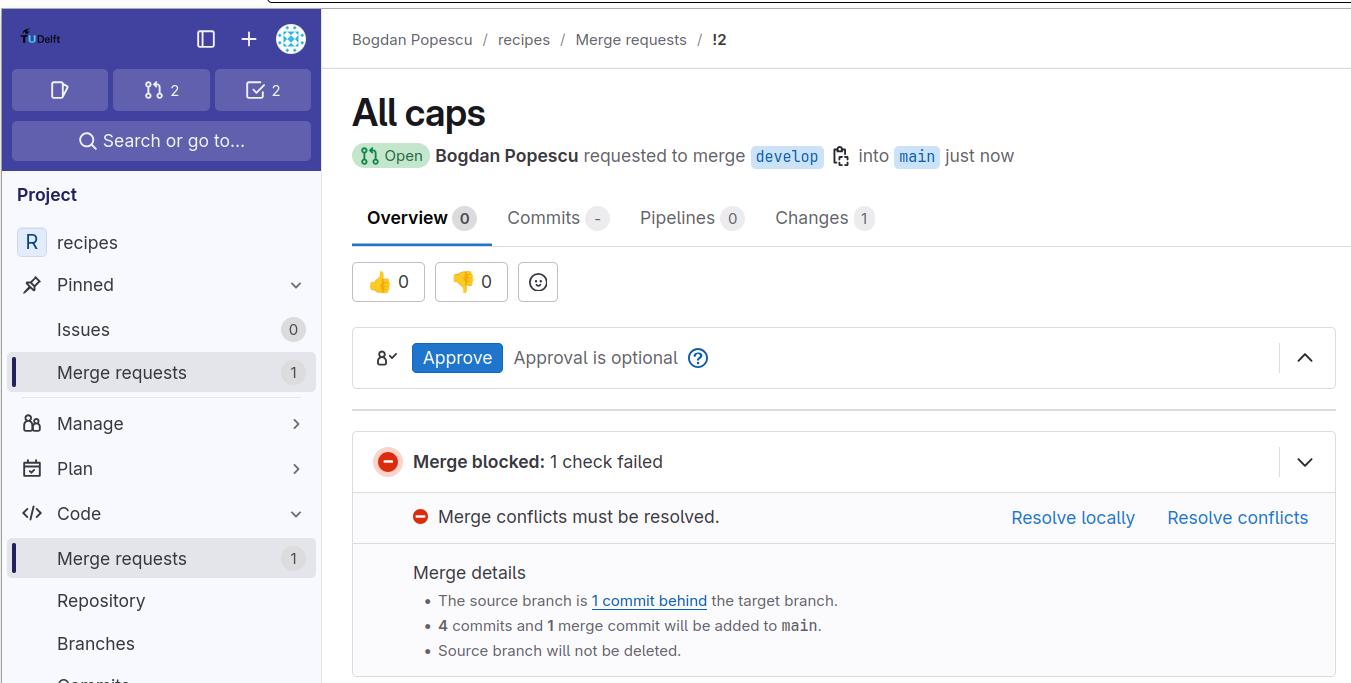
The trick to solving these conflicts is to manually merge the
develop branch into the feature_all_caps
branch:
Once you have done that, git will indicate there are merge conflicts - which you can solve the same way you did earlier - for example using the PyCharm git interface.
Once conflicts have been solved, commit them (on the
feature_all_caps branch) and push everything to GitLab.
Now, if you refresh the Merge Request page on GitLab you should see that merging is possible!
Key Points
-
git clonecopies a remote repository to create a local repository with a remote calledoriginautomatically set up. - Conflicts occur when two or more people change the same lines of the same file.
- The version control system does not allow people to overwrite each other’s changes blindly, but highlights conflicts so that they can be resolved.
- A branch is one version of your project that can contain its own set of commits.
- Feature branches enable us to develop / explore / test new code
features without affecting the stable
maincode. - GitLab merge requests provide a structured process approach to Git branch merging
Content from Python Virtual Environments
Last updated on 2025-07-08 | Edit this page
Overview
Questions
- What are virtual environments in software development and why you should use them?
- How can we manage Python virtual environments and external (third-party) libraries?
Objectives
- Understand the problems Python virtual environments help solve
- Set up a Python virtual environment for our software project using
venvandpip. - Managing external packages with
pip - Exporting/Importing Virtual Environments
Introduction
Up to now in this course we have focused on version control and
git. We have seen how these tools provide isolation,
reproducibility, and control over changes at the source code
level.
However a running program is more than just its source code; the environment/OS where it runs, the version of the programming language, as well as the external libraries it is using can also have a significant influence over its results.
In this episode we will pivot away from version control, and start looking at these other “externalities” that influence program behaviour. The goal, as with version control is to provide tools that allow us to control how these “externalities” influence our running programs, and provide the same isolation, reproducibility, and control over changes that version control can provide over our source code.
We will focus our discussion on Python and its tools ecosystem, as this is the language mostly used at QuTech and in the broader scientific community.
In the context of Python, the widely used solution to managing all the externalities mention above is Python virtual environments. For the rest of this episode we will explore ways to use these virtual environments so we can manage our running program “externalities” pretty much the same way we manage its source code via version control and git.
Python Virtual Environments
So what exactly are virtual environments, and why use them?
A Python virtual environment helps us create an isolated working copy of a software project that uses a specific version of Python interpreter together with specific versions of a number of external libraries installed into that virtual environment. Python virtual environments are implemented as directories with a particular structure within software projects, containing links to specified dependencies allowing isolation from other software projects on your machine that may require different versions of Python or external libraries.
As more external libraries are added to your Python project over time, you can add them to its specific virtual environment and avoid a great deal of confusion by having separate (smaller) virtual environments for each project rather than one huge global environment with potential package version clashes. Another big motivator for using virtual environments is that they make sharing your code with others much easier (as we will see shortly). Here are some typical scenarios where the use of virtual environments is highly recommended (almost unavoidable):
- You have an older project that only works under Python 2. You do not have the time to migrate the project to Python 3 or it may not even be possible as some of the third party dependencies are not available under Python 3. You have to start another project under Python 3. The best way to do this on a single machine is to set up two separate Python virtual environments.
- One of your Python 3 projects is locked to use a particular older version of a third party library. You cannot use the latest version of the dependency as it breaks things in your project. In a separate branch of your project, you want to try and fix problems introduced by the new version of the dependency without affecting the working version of your project. You need to set up a separate virtual environment for your branch to ‘isolate’ your code while testing the new feature.
You do not have to worry too much about specific versions of external libraries that your project depends on most of the time. Virtual environments also enable you to always use the latest available version without specifying it explicitly. They also enable you to use a specific older version of a package for your project, should you need to.
A Specific Python or Package Version is Only Ever Installed Once
Note that you will not have a separate Python or package installations for each of your projects - they will only ever be installed once on your system but will be referenced from different virtual environments.
Tools for Managing Python Virtual Environments and External Packages
There are several commonly used command line tools for creating and managing Python virtual environments:
-
venv, available by default from the standardPythondistribution fromPython 3.3+ -
virtualenv, needs to be installed separately but supports bothPython 2.7+andPython 3.3+versions -
pipenv, created to fix certain shortcomings ofvirtualenv -
conda, package and environment management system (also included as part of the Anaconda Python distribution often used by the scientific community) -
poetry, a modern Python packaging tool which handles virtual environments automatically
Part of managing your (virtual) working environment involves installing, updating and removing external packages on your system. Here as well there are plenty of tools and technologies to choose from:
-
pip- the most commonly used Python package manager - it interacts and obtains the packages from the central repository called Python Package Index (PyPI) -
easy_install- a legacy package manager now largely replaced bypip -
pdm- a modern Python package manager that follows the latest Python community guidelines, but doesn’t enforce virtual environments -
uv- a new and very fast Python package manager intended to eventually replacepip condapoetry
Many Tools for the Job
Installing and managing Python distributions, external libraries and
virtual environments is, well, complex. There is an abundance of tools
for each task, each with its advantages and disadvantages, and there are
different ways to achieve the same effect (and even different ways to
install the same tool!). Note that each Python distribution comes with
its own version of pip - and if you have several Python
versions installed you have to be extra careful to use the correct
pip to manage external packages for that Python
version.
For a novice in this area it is very easy to quickly get overwhelmed, leading to situation like this:
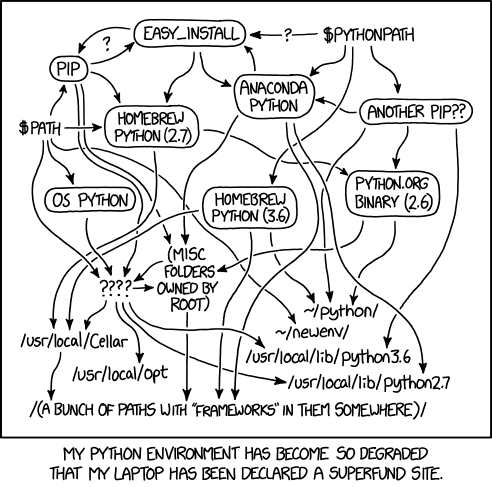
Python Environment Hell
From
XKCD (Creative
Commons Attribution-NonCommercial 2.5 License)
In order to avoid this “Python environment hell” problem, in this
course we will only focus on venv and pip.
Only focusing on these has several advantages, especially for novice
users:
-
venvandpiphave been around for quite a while, they are widely used, are very stable, and there is ample online documentation for both of them. -
venvandpipare quite low-level, and minimalistic, so you do not have to deal with the feature explosion and bloatware that other tools may experience. - finally, many of the more high-level tools use the functionality
provided by
venvandpipas building blocks, so having a good understanding of these provides a solid foundation to expand to more sophisticated tools.
In the next sections we will look at how to use venv and
pip from the command line, similar to the approach we took
when learning git
Python Hangs in Git Bash on Windows
If you are using Windows and invoking python command
causes your Git Bash terminal to hang with no error message or output,
you may have to use winpty - a Windows software package
providing an interface similar to a Unix pty-master for communicating
with Windows command line tools. Inside the shell type:
This alias will be valid for the duration of the shell session. For a more permanent solution, from the shell do:
A Motivating Example
For the rest of this episode, we will use the following (simple) Python program as a motivation on where virtual environments may be useful:
PYTHON
import numpy as np
import matplotlib.pyplot as plt
from dateutil import parser
from datetime import timedelta

# Generate time data using python-dateutil and timedelta
start_time = parser.parse("2025-01-01T00:00:00")
time_steps = [start_time + timedelta(minutes=10 * i) for i in range(100)]
time_values = [t.strftime("%Y-%m-%d %H:%M:%S") for t in time_steps]

print(f"Plotting a sine wave starting at {start_time} in 100 steps of 10 minutes")

# Create the sine wave data using numpy
x_values = np.linspace(0, 10 * np.pi, 100)  # 100 points from 0 to 10*pi
y_values = np.sin(x_values)

# Plot the data
plt.figure(figsize=(10, 6))
plt.plot(time_values, y_values, label="Sine Wave")
tick_step = 10
plt.xticks(range(0, len(time_values), tick_step), time_values[::tick_step], rotation=45)

plt.xlabel("Time")
plt.ylabel("Sine Value")
plt.title("Sine Wave Over Time")
plt.grid(True)
plt.tight_layout()
plt.legend()
plt.show()
On your system, create a new directory sine_wave, and copy the above code in a file plot_sine_wave.py. We want to see what happens if we try to run this program on a system where Python has just been installed, and for this, we will create a new Python virtual environment.
Creating Virtual Environments Using venv
Creating a virtual environment with venv is done by
executing the following command:
In Windows (GitBash), you can do the same with the following command:
where /path/to/new/virtual/environment is a path to a
directory where you want to place it - conventionally within your
software project so they are co-located. This will create the target
directory for the virtual environment (and any parent directories that
don’t exist already).
What is -m Flag in
python Command?
The Python -m flag means “module” and tells the Python
interpreter to treat what follows -m as the name of a
module and not as a single, executable program with the same name. Some
modules (such as venv or pip) have main entry
points and the -m flag can be used to invoke them on the
command line via the python command. The main difference
between running such modules as standalone programs (e.g. executing
“venv” by running the venv command directly) versus using
python -m command is that with the latter you are in full
control of which Python module will be invoked (the one that came with
your environment’s Python interpreter vs. some other version you may
have on your system). This makes it a more reliable way to set things up
correctly and avoid issues that could prove difficult to trace and
debug.
For our project let us create a virtual environment called “venv”. First, ensure you are within the project root directory (sine_wave), then:
If you list the contents of the newly created directory “venv”, on a Mac or Linux system (slightly different on Windows as explained below) you should see something like:
OUTPUT
total 8
drwxr-xr-x  12 alex  staff  384  5 Oct 11:47 bin
drwxr-xr-x   2 alex  staff   64  5 Oct 11:47 include
drwxr-xr-x   3 alex  staff   96  5 Oct 11:47 lib
-rw-r--r--   1 alex  staff   90  5 Oct 11:47 pyvenv.cfg
So, running the python -m venv venv command created the
target directory called “venv” containing:
-
pyvenv.cfgconfiguration file with a home key pointing to the Python installation from which the command was run, -
binsubdirectory (calledScriptson Windows) containing a symlink of the Python interpreter binary used to create the environment and the standard Python library, -
lib/pythonX.Y/site-packagessubdirectory (calledLib\site-packageson Windows) to contain its own independent set of installed Python packages isolated from other projects, and - various other configuration and supporting files and subdirectories.
Naming Virtual Environments
What is a good name to use for a virtual environment?
Using “venv” or “.venv” as the name for an environment and storing it within the project’s directory seems to be the recommended way - this way when you come across such a subdirectory within a software project, by convention you know it contains its virtual environment details.
A slight downside is that all different virtual environments on your machine then use the same name and the current one is determined by the context of the path you are currently located in. A (non-conventional) alternative is to use your project name for the name of the virtual environment, with the downside that there is nothing to indicate that such a directory contains a virtual environment.
For this episode we will use the name “venv” instead of “.venv” since it is not a hidden directory and we want it to be displayed by the command line when listing directory contents. In the future, you should decide what naming convention works best for you. Here are some references for each of the naming conventions:
- The Hitchhiker’s Guide to Python notes that “venv” is the general convention used globally
- The Python Documentation indicates that “.venv” is common
- “venv” vs “.venv” discussion
Once you’ve created a virtual environment, you will need to activate it.
On Mac or Linux, it is done as:
On Windows, recall that we have Scripts directory
instead of bin and activating a virtual environment is done
as:
Activating the virtual environment will change your command line’s prompt to show what virtual environment you are currently using (indicated by its name in round brackets at the start of the prompt), and modify the environment so that running Python will get you the particular version of Python configured in your virtual environment.
You can now verify you are using your virtual environment’s version of Python:
OUTPUT
Python 3.12.9When you’re done working on your project, you can exit the environment with:
If you have just done the deactivate, ensure you
reactivate the environment ready for the next part:
Python Within A Virtual Environment
Within an active virtual environment, commands like
python3 and python should both refer to the
version of Python 3 you created the environment with (note you may have
multiple Python 3 versions installed).
However, on some machines with Python 2 installed,
python command may still be hardwired to the copy of Python
2 installed outside of the virtual environment - this can cause errors
and confusion.
To make it even more confusing, python3 may also not
work on newer versions of Windows (where Python 2 is deemed obsolete -
hence python deemed to be sufficient)
You can always check which version of Python you are using in your
virtual environment with the command which python to be
absolutely sure. We will be using python in this material
since this should work on most modern systems, but if this points to
Python 2 on your system you may have to use python3.
Installing External Packages Using pip
Now that we have a virtual environment, let us try to run the plot_sine_wave.py program:
OUTPUT
Traceback (most recent call last):
  File "C:\projects\programming_course\sine_wave\plot_sine_wave.py", line 1, in <module>
    import numpy as np
ModuleNotFoundError: No module named 'numpy'
As we can see in the code (‘includes’), our code depends on a number
of external libraries - numpy, matplotlib, and
python-dateutil. In order for the code to run on your
machine, you need to install these three dependencies into your virtual
environment.
To install the latest version of a package with pip you
use pip’s install command and specify the package’s name,
e.g.:
BASH
(venv) $ python -m pip install numpy
(venv) $ python -m pip install matplotlib
(venv) $ python -m pip install python-dateutil
or like this to install multiple packages at once for short:
How About
pip install <package-name> Command?
You may have seen or used the
pip install <package-name> command in the past, which
is shorter and perhaps more intuitive than
python -m pip install. However, the official
Pip documentation recommends python -m pip install and
core Python developer Brett Cannon offers a more detailed
explanation of edge cases when the two commands may produce
different results and why python -m pip install is
recommended. In this material, we will use python -m
whenever we have to invoke a Python module from command line.
If you run the python -m pip install command on a
package that is already installed, pip will notice this and
do nothing.
To display information about a particular installed package do:
OUTPUT
Name: numpy
Version: 2.2.3
Summary: Fundamental package for array computing in Python
Home-page:
Author: Travis E. Oliphant et al.
Author-email:
License: Copyright (c) 2005-2024, NumPy Developers.
 All rights reserved.
...
pip install Flags
pip install allows you to precisely control the version
of the library it will install through its command flags. Some of the
most commonly-used flags are shown here:
- To install a specific version of a Python package give the package
name followed by
==and the version number, e.g.python -m pip install numpy==2.2.3. - To specify a minimum version of a Python package, you can do
python -m pip install numpy>=1.20. - To upgrade a package to the latest version,
e.g.
python3 -m pip install --upgrade numpy.
Once packages have been installed, it is often useful to get an
overview of everything present in a virtual environment. For this,
pip provides a handy command called list:
OUTPUT
Package         Version
--------------- -----------
contourpy       1.3.1
cycler          0.12.1
fonttools       4.55.3
kiwisolver      1.4.8
matplotlib      3.10.0
numpy           2.2.1
packaging       24.2
pillow          11.1.0
pip             23.2.1
pyparsing       3.2.1
python-dateutil 2.9.0.post0
six             1.17.0
Finally, installed packages can be un-installed using the
uninstall command:
python -m pip uninstall <package-name>. You can also
supply a list of packages to uninstall at the same time.
Practice various pip
operations
For this challenge create a new virtual environment
venv-scratch on your working directory
- Activate the new virtual environment
- Install numpy version 1.0.3
- Upgrade numpy to version 1.6.1
- Upgrade numpy to version 1.26.1
- Upgrade numpy to version 1.26.3
- Upgrade numpy to the latest version
- Uninstall numpy from
venv-scratch - Remove the
venv-scratchvirtual environment
- Numpy version 1.0.3 does not exist - when you try to install it
pipwill give an error message This shows you thatpipis robust - it will not mess up if you try to uninstall non-existing package versions. - Numpy version 1.6.1 does exist, but it will not install
with the Python 3.12 version that you are using.
pipwill attempt the installation, and fail in the process. This again shows thatpipis robust even when it fails in the middle of an installation it is able to successfully rollback. -
python -m pip install numpy==1.26.1- should succeed -
python -m pip install numpy==1.26.3- should succeed -
python -m pip install --upgrade numpy- should succeed - and upgrade numpy to its latest version (2.2.3) -
python -m pip uninstall numpy- should succeed - removing a Python virtual environment is as easy as removing its root folder, so:
Exporting/Importing Virtual Environments Using pip
You are collaborating on a project with a team so, naturally, you
will want to share your environment with your collaborators so they can
easily ‘clone’ your software project with all of its dependencies and
everyone can replicate equivalent virtual environments on their
machines. pip has a handy way of exporting, saving and
sharing virtual environments.
To export your active environment - use
python3 -m pip freeze command to produce a list of packages
installed in the virtual environment. A common convention is to put this
list in a requirements.txt file:
OUTPUT
contourpy==1.3.1
cycler==0.12.1
fonttools==4.55.3
kiwisolver==1.4.8
matplotlib==3.10.0
numpy==2.2.1
packaging==24.2
pillow==11.1.0
pyparsing==3.2.1
python-dateutil==2.9.0.post0
six==1.17.0
The first of the above commands will create a
requirements.txt file in your current directory. Yours may
look a little different, depending on the version of the packages you
have installed, as well as any differences in the packages that they
themselves use.
The requirements.txt file can then be added/committed to
the Git repo for your project and get shipped as part of your software
and shared with collaborators and/or users.
To see how this requirements.txt can be used to
re-create a virtual environment, let us practice creating an identical
copy of our first virtual environment in a different directory. Let us
first create a new virtual environment - venv_copy - like
this:
BASH
$ deactivate
$ cd ..
$ mkdir venv_copy
$ cd venv_copy
$ python -m venv venv_copy
$ source venv_copy/bin/activate
(venv_copy) $
They can then replicate your original environment and install all the
original packages by first copying the requirements.txt to
the new virtual environment root directory, and then running a version
of the pip install command:
As your project grows - you may need to update your environment for a
variety of reasons. For example, one of your project’s dependencies has
just released a new version (dependency version number update), you need
an additional package for data analysis (adding a new dependency) or you
have found a better package and no longer need the older package (adding
a new and removing an old dependency). What you need to do in this case
(apart from installing the new and removing the packages that are no
longer needed from your virtual environment) is update the contents of
the requirements.txt file accordingly by re-issuing
pip freeze command and propagate the updated
requirements.txt file to your collaborators via your code
sharing platform (e.g. GitLab).
Official Documentation
For a full list of options and commands, consult the official
venv documentation and the Installing
Python Modules with pip guide. Also check out the guide
“Installing
packages using pip and virtual environments”.
Putting it All Together
Congratulations! Your environment is now activated and set up to run
our plot_sine_wave.py program from the command line.
You should already be located in the root of the
sine_wave directory (if not, please navigate to it from the
command line now). When you run this program from the command line:
You should now see the following plot:
Multiple Python versions on the same machine
Using virtual environments it is very easy to manage multiple Python versions on the same machine. As a challenge, install Python 3.5 on your system, and create a virtual environment specifically for it. Then try to run plot_sine_wave.py in this new environment. Does it work? Modify the program so it does.
Key Points
- “Virtual environments keep Python versions and dependencies required by different projects separate.”
- “A virtual environment is itself a directory structure.”
- “Use
venvto create and manage Python virtual environments.” - “Use
pipto install and manage Python external (third-party) libraries.” - “
pipallows you to declare all dependencies for a project in a separate file (by convention calledrequirements.txt) which can be shared with collaborators/users and used to replicate a virtual environment.” - “Use
python -m pip freeze > requirements.txtto take snapshot of your project’s dependencies.” - “Use
python -m pip install -r requirements.txtto replicate someone else’s virtual environment on your machine from therequirements.txtfile.”
Content from Intermezzo II
Last updated on 2025-07-07 | Edit this page
Welcome to the third and last workshop of the “Introduction to Modern Software Engineering Practices” series.
There is already quite a bit of material that has been covered in the first two workshops, and by now you should have a good understanding, and some practice using some very important modern software development tools and technologies, such as
- Version control
- Git
- GitLab
- Python Virtual Environments
On the last part of our last workshop we have started focusing on programming topics, by looking at Python virtual environments. In today’s workshop, we will expand this programming focus, and look at at a very important software engineering area - Clean Code.
Unlike previous topics in this course, which were very much focused on specific tools, Clean Code does not focus just on tools, but rather on a methodology on how to approach software development. The emphasis here is on continuous improvement, such that each new program that you will write can take you one step closer to this clean code ideal.
Our goal for this workshop is to get you started on this learning and self-improvement journey. To prepare you for this journey, we will first look what clean code actually means; we will then follow with some fundamental rules that when followed facilitate writing clean code, introduce some tools that help enforcing these rules, and finish with a fairly elaborate software project where you can practice and apply everything you have learned. To summarize, the high level planning for this workshop is the following:
- Explaining “Clean Code”
- “Clean Code” rules
- Short break
- “Clean Code” tools
- Lunch break
- “Clean Code” project
Content from Clean Code
Last updated on 2025-07-07 | Edit this page
Overview
Questions
- What is “Clean Code” and why is it important?
- What are the most important “Clean Code” rules?
- What tools can I use to improve my code quality towards the “Clean Code” ideal?
Objectives
- Understand the importance of Clean Code
- Understand some of the fundamental Clean Code rules related to:
- Code structure
- Naming conventions
- Functions
- Comments
- Unit tests
- Become familiar with the most important tools that can facilitate writing Clean Code
Introduction
Imagine you are reading a well-organized book or following a simple recipe. Each step is clear, easy to understand, and there’s no unnecessary clutter. Now imagine the opposite—a messy, confusing set of instructions where you’re constantly backtracking to figure out what’s going on. This is the difference between “clean code” and messy code in programming.
Here are the key ideas behind Clean Code:
- Readable and Understandable
- Well-Organized
- Minimal but Effective
- Easy to Test
- Follows Good Practices

Why Clean Code Matters:
- For Teamwork: Most software projects involve multiple developers. Clean code ensures everyone can collaborate without getting stuck deciphering messy work.
- For Longevity: Code often lives longer than you think. Writing clean code saves you time in the future when making updates.
- For Quality: Clean code reduces bugs and improves the user experience of the software.
Callout
Clean Code is code that’s easy to read, maintain, understand for developers and other teams while improving the quality of their software through structure and consistency with performance demands. It lets you get the most value and purpose out of your software.
Callout
What is clean code, anyway? Here are some of its features:
- Clean code is obvious for other programmers.
- Clean code does not contain duplication.
- Clean code contains a minimal number of classes and other moving parts.
- Clean code passes all tests.
- Clean code is easier and cheaper to maintain!
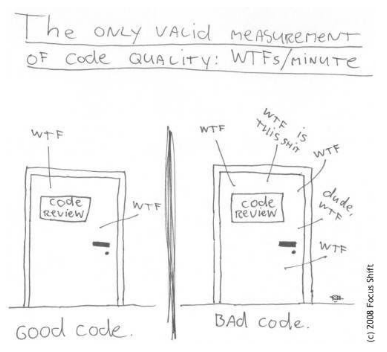
In this episode we will cover the basics of clean code, introduce some tools that facilitate writing clean code, and end with a refactoring exercise that will allow you to put these concepts into practice.
Clean Code Rules
In this section, we will cover some basic rules that, when followed, lead to cleaner code. It’s important to recognize that these rules are just the “tip of the iceberg,” as there is much more to explore on this topic. However, adhering to these simple guidelines can significantly improve the quality of your code. As you grow into a more experienced developer and adopt advanced software techniques, it remains valuable to stay aligned with “clean code” principles relevant to these practices. Clean Code: A Handbook of Agile Software Craftsmanship by Robert C. Martin is often regarded as the definitive guide for the clean code movement and is highly recommended reading.
Working with code samples
In this workshop you will be presented many small code samples
(snippets); sometimes you will be asked to re-factor them. To keep
things neat, we advise keep all these samples in separate source files
(e.g. example01.py, example02.py, etc.) and
place them under a common clean_code directory.
Furthermore, to ensure isolation, you should also create a separate
virtual environment for all the coding in this workshop:
General Rules
- Follow standard conventions. Find a standard that suits you, and stick to it! For example:
- Keep it simple stupid. Simpler is always better. Reduce complexity as much as possible.
- Boy scout rule. Leave the campground cleaner than you found it.
Source code structure
The newspaper metaphor: code should be organized and structured like a well-written newspaper article: it should guide the reader from broad, general concepts to more specific details. At the top, high-level information—such as the purpose of the code or function should be immediately clear, similar to a headline. As the reader delves deeper, they encounter progressively detailed logic, analogous to sections and paragraphs expanding on the headline. This structure helps developers quickly grasp the overall intent of the code before diving into implementation specifics, improving readability and maintainability.
There are a number of source code structure rules that derive from this metaphor:
Refactor the code below by following this guideline
PYTHON
def calculate_total(cart, discount_rate):
    if not cart:
        raise ValueError("Cart cannot be empty.")
    if not (0 <= discount_rate <= 1):
        raise ValueError("Discount rate must be between 0 and 1.")
    subtotal = sum(item['price'] * item['quantity'] for item in cart)
    discount = subtotal * discount_rate
    total = subtotal - discount
return totalPYTHON
def calculate_total(cart, discount_rate):
    if not cart:
        raise ValueError("Cart cannot be empty.")


    if not (0 <= discount_rate <= 1):
        raise ValueError("Discount rate must be between 0 and 1.")


    subtotal = sum(item['price'] * item['quantity'] for item in cart)
    discount = subtotal * discount_rate
    total = subtotal - discount  # Related code is vertically dense


    return total
Declare/initialize variables close to their usage.
Follows the same principle that closely related code constructs should be in close visual proximity.
Refactor the code below by following this guideline
PYTHON
def calculate_average_grades(students):
    total_grades = 0
    count = len(students) if students else 0
    average_grade = 0

    if not students:
        raise ValueError("The students list cannot be empty.")

    for student in students:
        total_grades += student['grade']

    average_grade = total_grades / count

return average_gradeKeep lines short
PYTHON
# VERY BAD
def get_unique_even_cubed_double_of_positive_numbers(numbers):
    return list(map(lambda x: round(x**3, 2), filter(lambda x: x % 2 == 0, set(map(lambda y: y * 3, [i for i in numbers if i > 0])))))


# GOOD
def get_unique_even_cubed_tripled_of_positive_numbers(numbers):
    positive_numbers = [i for i in numbers if i > 0]
    tripled_numbers = map(lambda y: y * 3, positive_numbers)
    unique_numbers = set(tripled_numbers)
    even_numbers = filter(lambda x: x % 2 == 0, unique_numbers)

    return [round(x**3, 2) for x in even_numbers]
Function placement
- Dependent functions should be close.
- Similar functions should be close.
- Place functions in the downward direction.
PYTHON
def get_unique_even_cubed_tripled_of_positive_numbers(numbers):
    positive_numbers = filter_positive_numbers(numbers)
    tripled_numbers = triple_numbers(positive_numbers)
    unique_numbers = get_unique_numbers(tripled_numbers)
    even_numbers = get_even_numbers(unique_numbers)

    return even_numbers


def filter_positive_numbers(numbers):
    return [num for num in numbers if num > 0]


def triple_numbers(numbers):
    return [num * 3 for num in numbers]


def get_unique_numbers(numbers):
    return list(set(numbers))


def get_even_numbers(numbers):
    return [num for num in numbers if num % 2 == 0]


def cube_numbers(numbers):
    return [num ** 3 for num in numbers]
Names rules
Choose descriptive and unambiguous names
A name of a function/variable should as much as possible reveal the reason why that function/variable is necessary, and its intended use. Choosing a good name takes time at the start but saves time in the long-run.
If first variable use requires a comment, you are probably using the wrong name:
Choosing names that reveal intend makes code much easier to understand, and will save you (and everyone else who will be working with your code) a lot of time in the future:
PYTHON
# BAD
def get_them(the_list):
    list1 = []
    for x in the_list:
        if x[2] = 5:
            list1.append(x)
    return list1


# GOOD
STATUS_FIELD = 2
FLAGGED = 5

def get_flagged_cells(game_board):
    flagged_cells = []
    for cell in game_board:
        if cell[STATUS_FIELD] = FLAGGED:
             flagged_cells.append(x)
    return flagged_cells
Use pronounceable names
Unpronounceable names are hard to use in a conversation. If names used in your code are pronounceable, you can easily discuss them with your colleagues which fosters collaboration.
Use searchable names and replace magic numbers with named constants
Single letter names and “magic numbers” in the code are very difficult to locate when you do a text search through your source code. As such, changing them can be extremely error-prone. Replacing them with named constants can greatly simplify this process:
PYTHON
# BAD
def sum_up(t):
    s = 0
    ...
    for j in range(5):
        s += (t[j] * 4) / 5
    ...


# GOOD
def sum_work_days_per_week(task_estimate):
    REAL_DAYS_PER_IDEAL_DAY = 4
    WORK_DAYS_PER_WEEK = 5
    NUMBER_OF_TASKS = 5
    sum = 0
    ...
    for j in range(NUMBER_OF_TASKS):
        real_task_days = task_estimate[j] * REAL_DAYS_PER_IDEAL_DAY
        real_task_weeks = real_days / WORK_DAYS_PER_WEEK
        sum += real_task_weeks
    ...
Functions rules
Small
A function should be small enough so one could understand it without having to do “mental jumps” between various parts of the code. Such “mental jumps” are time consuming and tiring. Ideally, the entire function should fit on one screen.
Refactor the code below by breaking it into smaller functions
PYTHON
# Dummy calibration function - operations shown here have no "real life" meaning
def calibrate_fridge(fridge_data, include_safety_checks):
    fridge_id = fridge_data.get("id")
    current_temp = fridge_data.get("current_temperature")
    target_temp = fridge_data.get("target_temperature")
    calibration_params = fridge_data.get("calibration_params")

    if include_safety_checks:
        if current_temp > calibration_params.get("max_safe_temperature"):
            raise Exception("Unsafe temperature detected during calibration.")
        if target_temp < calibration_params.get("min_safe_temperature"):
            raise Exception("Unsafe target temperature detected during calibration.")

    adjustment_factor = calibration_params.get("adjustment_factor", 1.0)
    adjusted_temp = current_temp + (target_temp - current_temp) * adjustment_factor
    if adjusted_temp > calibration_params["max_safe_temperature"]:
        adjusted_temp = calibration_params["max_safe_temperature"]
    if adjusted_temp < calibration_params["min_safe_temperature"]:
        adjusted_temp = calibration_params["min_safe_temperature"]

    stabilization_steps = calibration_params.get("stabilization_steps", 10)
    for step in range(stabilization_steps):
        correction_factor = 0.1 * (adjusted_temp - target_temp)
        adjusted_temp -= correction_factor

        if adjusted_temp < target_temp:
            adjusted_temp += 0.05  # Minor correction if under target
        elif adjusted_temp > target_temp:
            adjusted_temp -= 0.05  # Minor correction if above target

        temperature_variance = abs(adjusted_temp - target_temp)
        if temperature_variance < 0.01:
            break  # Break early if within small tolerance
        adjusted_temp -= 0.01 * temperature_variance

    fridge_data["final_temperature"] = adjusted_temp

    telemetry_data = {
        "fridge_id": fridge_id,
        "start_temp": current_temp,
        "end_temp": adjusted_temp,
        "safety_checks": include_safety_checks
    }

    print(f"Telemetry data: {telemetry_data}")

return f"Calibration complete. Final temperature: {adjusted_temp:.2f}"PYTHON
# Function refactored into smaller functions
def calibrate_fridge(fridge_data, include_safety_checks):
    fridge_id = fridge_data.get("id")
    current_temp = fridge_data.get("current_temperature")
    target_temp = fridge_data.get("target_temperature")
    calibration_params = fridge_data.get("calibration_params")

    if include_safety_checks:
        perform_safety_checks(current_temp, target_temp, calibration_params)

    adjusted_temp = apply_temperature_adjustment(current_temp, target_temp, calibration_params)
    stabilized_temp = stabilize_temperature(adjusted_temp, target_temp, calibration_params)
    fridge_data["final_temperature"] = stabilized_temp

    display_telemetry(fridge_id, current_temp, stabilized_temp)
    return f"Calibration complete. Final temperature: {stabilized_temp:.2f}"


def perform_safety_checks(current_temp, target_temp, calibration_params):
    if current_temp > calibration_params["max_safe_temperature"]:
        raise Exception("Unsafe temperature: Current temperature exceeds safe limits.")

    if target_temp < calibration_params["min_safe_temperature"]:
        raise Exception("Unsafe target temperature: Below safe limits.")


def apply_temperature_adjustment(current_temp, target_temp, calibration_params):
    adjustment_factor = calibration_params.get("adjustment_factor", 1.0)
    adjusted_temp = current_temp + (target_temp - current_temp) * adjustment_factor

    if adjusted_temp > calibration_params["max_safe_temperature"]:
        adjusted_temp = calibration_params["max_safe_temperature"]
    if adjusted_temp < calibration_params["min_safe_temperature"]:
        adjusted_temp = calibration_params["min_safe_temperature"]

    return adjusted_temp


def stabilize_temperature(initial_temp, target_temp, calibration_params):
    stabilization_steps = calibration_params.get("stabilization_steps", 10)
    stabilized_temp = initial_temp

    for step in range(stabilization_steps):
        correction_factor = 0.1 * (stabilized_temp - target_temp)
        stabilized_temp -= correction_factor

        if stabilized_temp < target_temp:
            stabilized_temp += 0.05  # Minor correction if under target
        elif stabilized_temp > target_temp:
            stabilized_temp -= 0.05  # Minor correction if above target

        temperature_variance = abs(stabilized_temp - target_temp)
        if temperature_variance < 0.01:
            break  # Break early if within a small tolerance
        stabilized_temp -= 0.01 * temperature_variance

    return stabilized_temp


def display_telemetry(fridge_id, start_temp, end_temp, safety_checks):
    telemetry_data = {
        "fridge_id": fridge_id,
        "start_temp": start_temp,
        "end_temp": end_temp,
    }
    print(f"Telemetry data: {telemetry_data}")
Single Responsibility Principle: Do one thing at one level of abstraction
The “messy” code example above is difficult to comprehend because the code constantly jumps between different levels of abstractions: performing low-level calibration and stabilization steps, fetching parameters, throwing exceptions, etc. This goes against the so-called Single Responsibility Principle - which is a well-known rule in object-oriented programming and software engineering - stating that a class or a function should only do one thing.
This is easy to achieve if “clean” functions should also follow our earlier “newspaper article” paradigm: the code should read like a top-down story - so we can read the program like a narrative, descending one level of abstraction as we read down the list of functions. This is what makes the refactored example so much easier to understand.
Use descriptive names
This should follow the methodology already discussing under Name rules. In addition to this:
- Do not be afraid to use long names - the function name should pretty much describe what the function does, to the point where comments become superfluous
- Spend time thinking of a good name, and change it as soon as you have found a better one
- Be consistent in your naming: use same phrases, nouns and verbs in your function names
Prefer fewer arguments
- Ideally have 0-2 arguments. A high number of arguments can make functions harder to understand, test, and reuse.
- When multiple related arguments are necessary, encapsulate them in an object or data structure to simplify the function signature and improve readability.
PYTHON
# BAD
def calibrate_fridge(min_temperature, max_temperature, steps, accuracy, seconds_timeout):

# GOOD
@dataclass
class CalibrationParameters:
    min_temperature: float,
    max_temperature: float,
    steps: int,
    accuracy: float,
    seconds_timeout: int

def calibrate_fridge(calibration_parameters: CalibrationParameters):
...- Functions should avoid boolean or flag arguments, as they often indicate that the function is doing more than one thing and violate the Single Responsibility Principle
Have no side effects
- Side effects break the Single Responsibility Principle
- No side effects facilitate parallel execution
- Side effects can lead to subtle (and occasionally catastrophic) errors!
Comments rules
As a general rule, always strive to have the code “explain itself” so comments are not necessary. In most cases, comments are an acceptance of failure: the code itself is not clear enough, so it needs additional explanation in the form of a comment.
PYTHON
# BAD
# Check if the experiment is complete
if status == 1:
    handle_completion()

# GOOD
if is_experiment_complete(status):
    handle_completion()
Bad Comments
In many cases comments are useless, and occasionally straight dangerous:
Commented out code
Clutters the source code, and makes it harder to follow the natural flow of your program. Use version control instead!
Good Comments
There are a number of cases when comments can be beneficial:
Clarification of code
PYTHON
# Flag transactions with an amount greater than 10,000 as "flagged" for manual review.
# This threshold is set by international banking regulations, specifically the
# Financial Action Task Force (FATF) Recommendation 10, to prevent money laundering.
MANUAL_REVIEW_THRESHOLD = 10000

def classify_transactions(transactions):
    for t in transactions:
        if t.amount > MANUAL_REVIEW_THRESHOLD:
            t.status = "flagged"
        else:
            t.status = "completed"
Warning of consequences
# WARNING: This function permanently deletes experimental data.
# Ensure backups are created before calling.
def delete_experiment_data(experiment_id):
    database.delete(f"experiment_{experiment_id}")
Unit Test Rules
Unit tests verify the functionality of individual components or
functions in a program. They help detect bugs early by isolating and
testing small code units. Typically, they are written using testing
frameworks like Pytest or PyUnit.
Tests enable the -ilities!!
Unit tests keep your code flexible, maintainable, and reusable - they are the key and core of clean code! The reason for this is that unit tests allow you to change your code without fear of introducing new bugs. If you have enough unit tests with good coverage you can start with a sub-par architecture and “messy” code, and move towards “clean” code in small and quick iterations, at each iteration being able to effectively test that your changes have not introduced bugs.
Unit tests enable change!
Unit tests should be as clean as the rest of the code
- Tests change as tested code changes!
- If tests are difficult to evolve then the overall speed one can change the program is slow
- Unit tests can be a very effective tool to document what a program does
- Clean tests allow new members of the team quickly understand the expected behaviour of the system without diving deeply into the implementation
Unit tests should follow the F.I.R.S.T principles
- Fast - so can be run often, so they detect problems early - when they are easy to fix
- Independent - they should not depend on each other - so they can be run in any order
- Repeatable - should not depend on anything in the environment - ideally not even on a network connection being present! Should be possible to run them offline - so one can work on re-factoring even when offline
- Self-validating - should return either True or False. Checking success/failure should be fast!
- Timely - add unit tests as soon as you have written the code, or even before (TDD). Forces one to think in terms of testing => testable code.
A unit test should cover a single concept
Having a unit test check multiple parts of the code makes it harder to reason on the cause of the failure. They are also not self-validating - if they fail - on which part did they fail?
Challenge
Have a look at the unit test below. Is it “clean”? Can you name which of the “clean tests” principles discussed so far it breaks? Can you refactor it into “clean” test code?
PYTHON
import pytest

def test_math_operations():
    result = 4 + 5
    if result == 9:
        print("Addition passed")
    else:
        print("Addition failed")

    result = 3 * 3
    assert result == 9  # Works, I guess

    division_result = 10 / 2
    assert division_result == 5, "Division failed"  # Check division, right?

    my_list = [1, 2, 3]
    assert len(my_list) == 3

    assert division_result == 5

print("Test completed!")The above test breaks many of the “clean” tests and “clean” code principles:
- name does not reflect purpose
- test does not cover just one aspect of the code, but rather multiple - math operations and a completely un-related list operation
- redundant assertions - like the one for the division result
- test is not self-validating - the user needs to monitor the test output to determine success/failure
- extraneous output - “Test completed!” is unnecessary and distracts the user
Refactored test:
Key Points
- Do not follow the clean code rules blindly; always keep in mind the guiding principles!
- Do not try to write perfect clean code at once; instead, start with “normal code” and try to continuously improve it!
Clean Code Tools
PyCharm and Clean Code
Using a modern development environment, such as PyCharm, can greatly facilitate writing clean code. Correctly configured, PyCharm can give you very useful hints on the style and content of your code, which can greatly facilitate refactoring towards clean code. PyCharm can also do some refactoring for you - for example changing the name of a function or variable - PyCharm will ensure the name is changed consistently throughout the code - which is much less error prone than doing it by hand.
Configuring a Python interpreter for a PyCharm project
For a given PyCharm project it is possible to setup a python interpreter, as shown below:
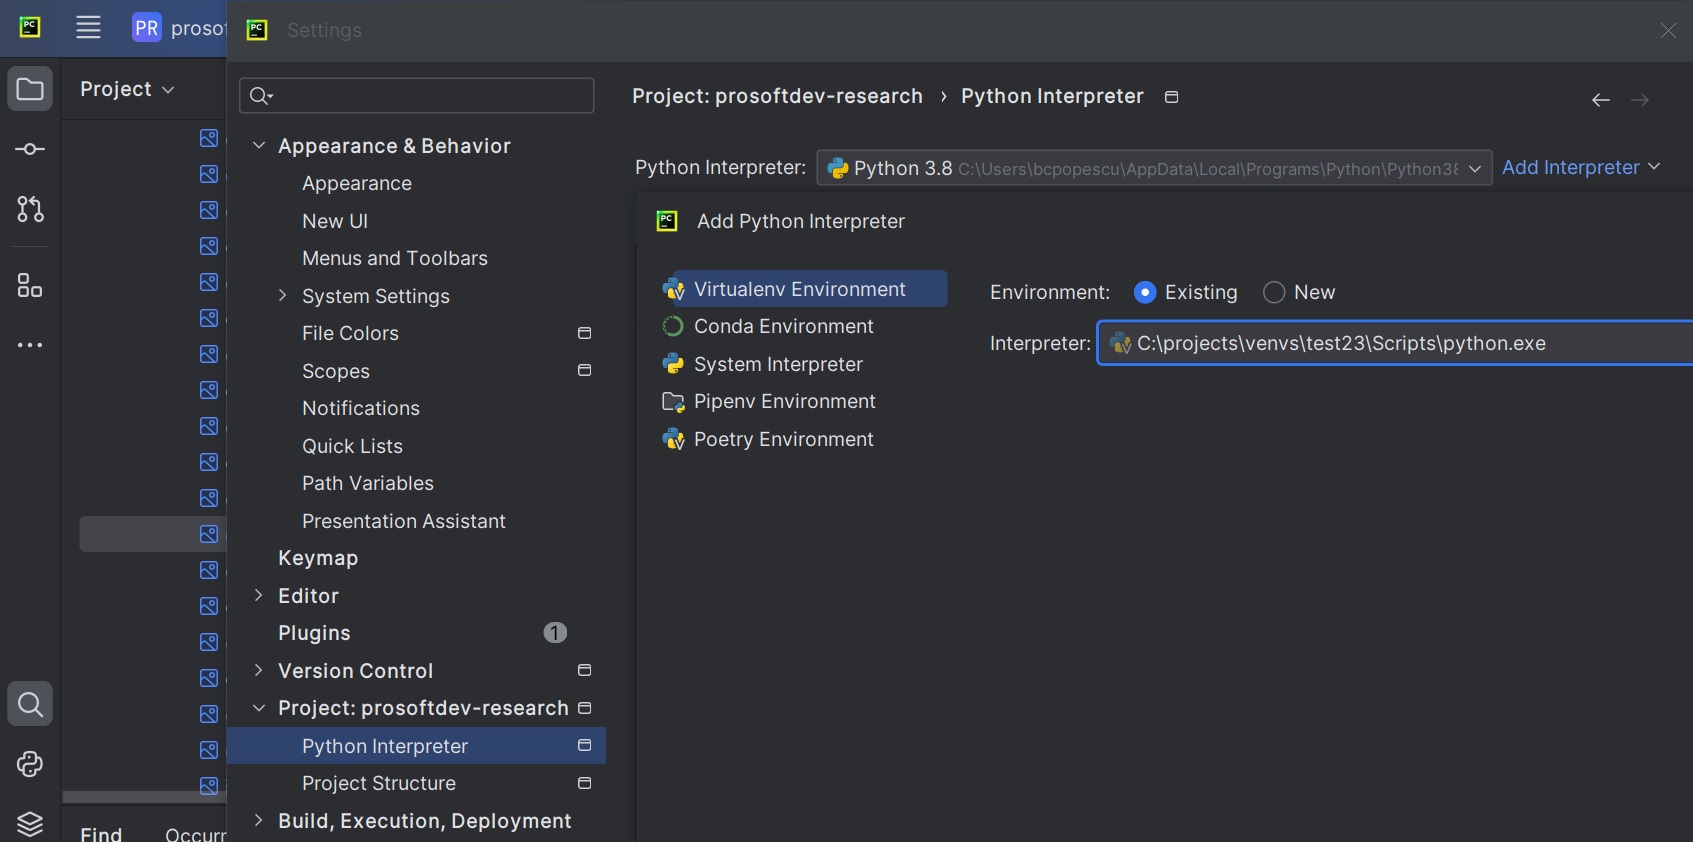
Newer versions of PyCharm will automatically select the Python
interpreter from a virtual environment if the environment uses the
default naming convention (e.g. venv) and is located in the
project directory.
The selected interpreter can be the system-wide one, or one selected from a virtual environment.
Once a Python interpreter has been configured, PyCharm will use it to
run code (e.g. .py files part of that project), or analyze
the code and provide useful hints to the developer:
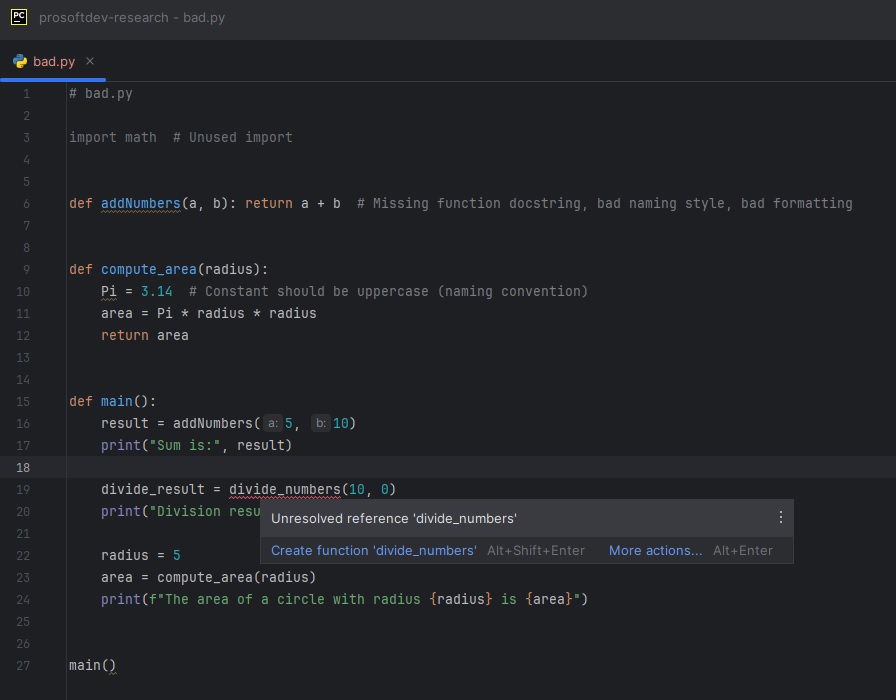
The figure above shows Pycharm hints in action: in this case the
function divide_numbers() has not yet been defined. PyCharm
then marks the place where the undefined function is invoked in the code
with red underline, so the developer can quickly spot it. Hovering over
the underline provides a hint, in this case explaining that the function
is undefined.
Linters - PyLint
Pylint is a tool that helps you write cleaner, more reliable Python code by analyzing your code for errors, enforcing coding standards, and suggesting improvements. It checks for issues like unused variables, inconsistent naming, or missing documentation.
Pylint assigns a score to your code, ranging from -10.0 (very poor) to 10.0 (perfect). This score reflects the overall quality of your code based on the issues Pylint identifies, weighted by their severity. Pylint also outputs each location in your code where it has found issues that reduce your score, together with a short explanation of the problem it has found. You can use this output to guide your code refactoring, which eventually should lead to cleaner code.
Pylint can be easily installed using pip:
Running Pylint on a sample program
PYTHON
# bad_pylint.py
import math  # Unused import


def addNumbers(a, b): return a + b  # Missing function docstring, bad naming style, bad formatting


def divide_numbers(a, b):
    if b == 0:
        print("Cannot divide by zero")
        return None
    return a / b


def compute_area(radius):
    Pi = 3.14  # Constant should be uppercase (naming convention)
    area = Pi * radius * radius
    return area


def main():
    result = addNumbers(5, 10)
    print("Sum is:", result)

    divide_result = divide_numbers(10, 0)
    print("Division result:", divide_result)

    radius = 5
    area = compute_area(radius)
    print(f"The area of a circle with radius {radius} is {area}")


main()
$ python -m pylint bad_pylint.py
************* Module bad_example
bad_example.py:34:0: C0304: Final newline missing (missing-final-newline)
bad_example.py:1:0: C0114: Missing module docstring (missing-module-docstring)
bad_example.py:4:0: C0116: Missing function or method docstring (missing-function-docstring)
bad_example.py:4:0: C0103: Function name "addNumbers" doesn't conform to snake_case naming style (invalid-name)
bad_example.py:4:22: C0321: More than one statement on a single line (multiple-statements)
bad_example.py:7:0: C0116: Missing function or method docstring (missing-function-docstring)
bad_example.py:14:0: C0116: Missing function or method docstring (missing-function-docstring)
bad_example.py:20:0: C0116: Missing function or method docstring (missing-function-docstring)
bad_example.py:1:0: W0611: Unused import math (unused-import)
-----------------------------------
Your code has been rated at 5.91/10Challenge
Fix the above warnings to bring the score to a perfect 10!
PYTHON
"""This module provides basic mathematical operations and area computation."""


def add_numbers(a, b):
    """Adds two numbers and returns the result."""
    return a + b


def divide_numbers(a, b):
    """Divides two numbers and returns the result.

    Prints an error message if division by zero is attempted.
    """
    if b == 0:
        print("Cannot divide by zero")  # pylint MAY suggest logging here
        return None
    return a / b


def compute_area(radius):
    """Computes the area of a circle given its radius."""
    pi = 3.14  # Use lowercase for variables
    return pi * radius * radius


def main():
    """Main function to demonstrate the usage of mathematical operations."""
    result = add_numbers(5, 10)
    print("Sum is:", result)

    divide_result = divide_numbers(10, 0)
    print("Division result:", divide_result)

    radius = 5
    area = compute_area(radius)
    print(f"The area of a circle with radius {radius} is {area}")


if __name__ == "__main__":
    main()
(test11) bcpopescu@TUD264038:~/projects/examples$ pylint good_pylint.py
-------------------------------------------------------------------
Your code has been rated at 10.00/10 (previous run: 5.91/10, +4.09)Instructing Pylint to ignore certain rules
Pylint is a great tool, but sometimes you may want to ignore some of its advices - for example when they may not be suitable for the overall coding style you have chosen for your project, or when certain rule does not make sense for a given function/file in your project.
Disabling a Pylint rule for a specific function is very simple - just add a comment next to that function definition, like this:
To disable that rule for the entire file, add the same comment at the top of the file:
It is also possible to create custom Pylint configuration files for your project, as explained in the documentation
Pytest - a simple yet powerful unit test framework
We have already discussed the importance of unit tests in the context
of clean code. Unit tests become even more powerful in facilitating
change when they are used together with unit test frameworks. Such
frameworks make it very easy to write and execute unit tests, and
typically integrate smoothly with modern IDEs such as PyCharm.
Pytest is a simple yet powerful such framework,
specifically designed for testing Python code.
Pytest is an external Python package, so before we can
use it, we need to install it via pip:
With Pytest installed, you can write tests as regular
functions and run them easily. As an example consider this simple
function:
With Pytest, you can test it by creating a new file
test_simple_function.py:
PYTHON
# in test_simple_function.py

from simple_function import simple_function


def test_simple_function():
    assert simple_function(2, 3) == 5
and then running pytest from the command line:
BASH
$ python -m pytest
============================= test session starts =============================
platform win32 -- Python 3.11.8, pytest-8.0.2, pluggy-1.4.0
rootdir: C:\projects\examples
plugins: anyio-4.3.0, flaky-3.7.0, cov-4.1.0, mock-3.12.0
collected 1 item

test_simple_function.py .                                                [100%]

============================== 1 passed in 0.02s ==============================
By default, when running pytest from the command line,
this package will look for any files named test_*.py or
*_test.py in the working directory, and from these files
run any functions names test_*. Inside these functions, you
can test functionality using the assert keyword. A test
function is assumed to fail if any assert fails, or if the
the test function throws an exception. Alternatively, the test function
succeeds if it completes without any failed asserts or exceptions. After
running all tests, Pytest will display the number of tests
that have succeeded and failed.
Alternatively, Pytest can be invoked directly from the
PyCharm environment as shown below:
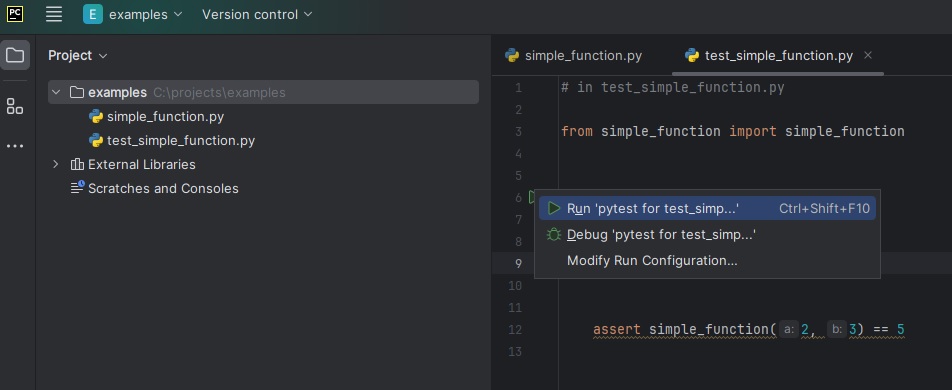
Test Coverage
Test coverage is a way to measure how much of your code is tested by your test cases. It helps you understand how well your tests are checking the functionality of your program and ensures that your code behaves as expected.
Think of your code as a map, and your tests as explorers. Test coverage tells you how much of the map has been explored. If there are unexplored areas (untested code), they might hide bugs or unexpected behaviors.
Why Test Coverage is Important
- Finding Bugs Early: By ensuring most of your code is tested, you can catch issues early in development.
- Improved Confidence: High test coverage makes you more confident that changes to the code won’t break existing functionality.
- Code Quality: Writing tests often leads to better structured and easier-to-maintain code.
Coverage is a Guide, Not a Goal
While high test coverage is beneficial, it is not a guarantee that your code is bug-free. It is possible to have 100% coverage and still miss edge cases or logical errors. Focus on writing meaningful tests that cover real-world scenarios.
The coverage.py Tool
coverage.py is a commonly-used Python tool for measuring test coverage. It helps you understand how much of your code is executed during tests and identifies untested parts. It is lightweight, easy to use, and integrates well with various testing frameworks like pytest.
Installing coverage.py
To use coverage.py you will need to install it first. This can be easily done using pip:
You can then verify the installation:
OUTPUT
Coverage.py, version 7.4.3 with C extension
Full documentation is at https://coverage.readthedocs.io/en/7.4.3
Running coverage.py
For this section, we will use a simple example, where we are developing a math_utils.py library:
PYTHON
# math_utils.py

def add(a, b):
    return a + b

def subtract(a, b):
    return a - b

def multiply(a, b):
    return a * b

def divide(a, b):
    if b == 0:
        raise ValueError("Cannot divide by zero")
    return a / b
which we then test using unit tests in a test_math_utils.py file:
PYTHON
# test_math_utils.py

from math_utils import add, subtract, multiply, divide
import pytest

def test_add():
    assert add(2, 3) == 5

def test_subtract():
    assert subtract(0, 1) == -1

def test_multiply():
    assert multiply(2, 3) == 6

def test_divide():
    assert divide(-6, 2) == -3
The coverage.py tool is typically used in conjunction with a
testing framework, such as pytest; to use the tool, instead of
running your tests directly (e.g. with pytest), use
coverage run instead:
OUTPUT
$ python -m coverage run -m pytest test_math_utils.py
============================= test session starts =============================
platform win32 -- Python 3.8.8, pytest-8.1.1, pluggy-1.4.0
rootdir: C:\projects\programming_course\prosoftdev-research\coverage
plugins: anyio-4.3.0, flaky-3.8.0, cov-4.1.0, mock-3.12.0
collected 4 items

test_math_utils.py ....                                                  [100%]
Once you have run the coverage.py tool, it is possible to generate a coverage report:
OUTPUT
$ python -m coverage report -m

Name                 Stmts   Miss  Cover   Missing
--------------------------------------------------
math_utils.py           10      1    90%   14
test_math_utils.py      10      0   100%
--------------------------------------------------
TOTAL                   20      1    95%
As you can see, in this (simple) case we have achieved a very high coverage ratio with relative ease.
Visualizing test coverage
To make the results more user-friendly, coverage.py can generate an HTML report.
This creates a directory named htmlcov containing detailed coverage reports. To visualize the report, you need to open the index.html file in the htmlcov directory:
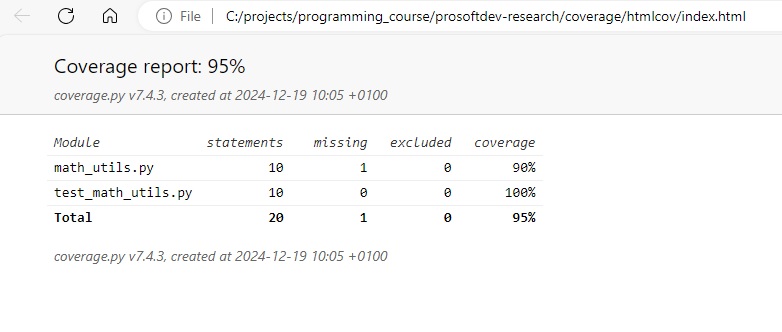
Even more useful, you can drill down to the test coverage of individual files, by clicking on the file name in the overview. This shows the test coverage at the level of lines of code:
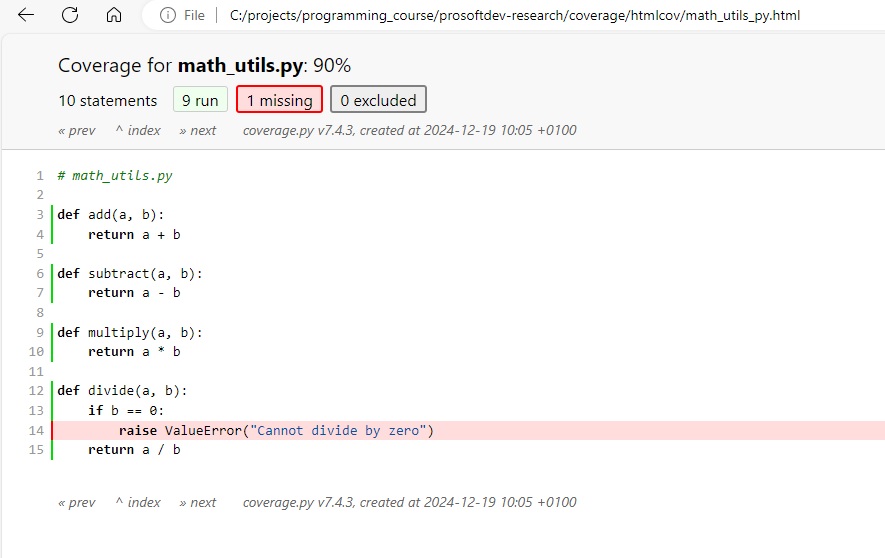
By using such visual tools you can quickly zoom on untested parts of your codebase, so that you can add additional tests for covering them.
Final Project
In this last hour of the last workshop of this course, you will get the chance to apply most of the material covered in this course in a final project. For this final project we will be using this Python program, which is an expanded version of a challenge you have already seen earlier in this course:
PYTHON
import numpy as np


# Dummy calibration function - operations shown here have no "real life" meaning
def calibrate_fridge(fridge_data, include_safety_checks):
    fridge_id = fridge_data.get("id")
    current_temp = fridge_data.get("current_temperature")
    target_temp = fridge_data.get("target_temperature")
    calibration_params = fridge_data.get("calibration_params")
    experiment_params = fridge_data.get("experiment_params")

    if include_safety_checks:
        if current_temp > calibration_params.get("max_safe_temperature"):
            raise Exception("Unsafe temperature detected during calibration.")
        if target_temp < calibration_params.get("min_safe_temperature"):
            raise Exception("Unsafe target temperature detected during calibration.")

    adjustment_factor = calibration_params.get("adjustment_factor", 1.0)
    adjusted_temp = current_temp + (target_temp - current_temp) * adjustment_factor
    if adjusted_temp > calibration_params["max_safe_temperature"]:
        adjusted_temp = calibration_params["max_safe_temperature"]
    if adjusted_temp < calibration_params["min_safe_temperature"]:
        adjusted_temp = calibration_params["min_safe_temperature"]

    stabilization_steps = calibration_params.get("stabilization_steps", 10)
    operating_temperature = adjusted_temp
    for step in range(stabilization_steps):
        correction_factor = 0.1 * (operating_temperature - target_temp)
        operating_temperature -= correction_factor

        if operating_temperature < target_temp:
            operating_temperature += 0.05  # Minor correction if under target
        elif operating_temperature > target_temp:
            operating_temperature -= 0.05  # Minor correction if above target

        temperature_variance = abs(operating_temperature - target_temp)
        if temperature_variance < 0.01:
            break  # Break early if within small tolerance
        operating_temperature -= 0.01 * temperature_variance

    telemetry_data = {
        "fridge_id": fridge_id,
        "adjusted_temp": adjusted_temp,
        "safety_checks": include_safety_checks,
        "operating_temperature": operating_temperature
    }

    # Experiment calibration logic
    scaling_factor = experiment_params.get("scaling_factor", 1.2)
    offset_value = experiment_params.get("offset_value", 3)
    smoothing_coefficient = experiment_params.get("smoothing_coefficient", 0.8)
    window_size = experiment_params.get("window_size", 5)
    modulation_factor = experiment_params.get("modulation_factor", 0.05)
    experiment_data = fridge_data.get("experiment_data", [])

    if len(experiment_data) != 20:
        raise ValueError("Calibration data must have exactly 20 readings")

    experiment_data = np.array(experiment_data)
    scaled_data = experiment_data * scaling_factor - offset_value
    smoothed_data = np.convolve(scaled_data, np.ones(window_size) / window_size, mode='valid')
    adjusted_data = smoothed_data * (1 + modulation_factor * np.sin(smoothed_data))
    experiment_temperature_adjustment = np.tanh(
        np.average(adjusted_data, weights=np.linspace(1, 2, len(adjusted_data))) / 10)

    experiment_temperature = operating_temperature + experiment_temperature_adjustment

    experiment_outputs = {
        "mean_before_adjustment": np.mean(experiment_data),
        "std_dev_before_adjustment": np.std(experiment_data),
        "mean_after_adjustment": np.mean(adjusted_data),
        "experiment_temperature_adjustment": experiment_temperature_adjustment,
        "calibration_factor": scaling_factor * smoothing_coefficient / (1 + abs(modulation_factor)),
        "experiment_temperature": experiment_temperature
    }

    return telemetry_data, experiment_outputs


def main():
    fridge_data = {
        "id": "fridge123",
        "current_temperature": 5.0,
        "target_temperature": 2.85,
        "calibration_params": {
            "max_safe_temperature": 6.8,
            "min_safe_temperature": 2.1,
            "adjustment_factor": 1.05,
            "stabilization_steps": 10
        },
        "experiment_params": {
            "scaling_factor": 1.1,
            "offset_value": 2,
            "smoothing_coefficient": 0.9,
            "window_size": 3,
            "modulation_factor": 0.03
        },
        "experiment_data": [10.1, -6.8, 9.8, -10.3, -9.9, 12.0, 10.1, 10.2, 10.1, 9.7, -15.1,
                            8.1, 1-1.2, 10.3, 10.0, 10.1, 7.2, 9.8, 9.9, -9.7]
    }

    include_safety_checks = True

    # Run the function
    telemetry_data, experiment_outputs = calibrate_fridge(fridge_data, include_safety_checks)

    # Print results
    print("Telemetry Data:", telemetry_data)
    print("Experiment Outputs:", experiment_outputs)

# Run main function
if __name__ == "__main__":
    main()
Given this code, the challenge/final project of this course is the following:
Final Project
- The code shown above is available here
- clone this repo on your local machine
- create a separate branch
final_project_<username>where you will do your work
- In your local working directory for this project, create a new Python 3.12 virtual environment and activate it.
- Install all necessary packages and run the calibration function
- Start creating unit tests for the calibration function. Assume the calibration function as given is correct.
- Run the unit tests, and check the code coverage; keep adding unit tests until you have a very high code coverage - you should aim for 100%!
- Run your code through
pylint. Note the issuespylintidentifies in your code, and its initial score. - Start refactoring the code - taking into account
pylint'sfindings, and applying all techniques you have learned in this workshop.- Make a plan of what you want to refactor, and in which order.
- Use the PyCharm refactoring tools to help you speed up this process.
- Work in small steps; after each refactoring step re-run the unit tests and make sure they pass!
- If tests start to fail - fix them; if you get stuck, use git to restore your code to a version where the tests were passing, and re-start from there.
- After each successful refactoring step commit your changes to git.
- After each refactoring step, re-run
pylintand notice how your score is improving.
Content from Credits
Last updated on 2025-07-01 | Edit this page
Parts of this course are based on publicly available material from the following:
Ivan Gonzalez; Daisie Huang; Nima Hejazi; Katherine Koziar; Madicken
Munk (eds): “Software Carpentry: Version Control with Git.”
Version 2019.06.1, July 2019, https://github.com/swcarpentry/git-novice,
10.5281/zenodo.3264950
F. Grooteman “QSMM - QuTech Software Maturity Model” Version 0.6 - Internal QuTech document
Aleksandra Nenadic, Steve Crouch, James Graham, et al. (2022). carpentries-incubator/python-intermediate-development: beta (beta). Zenodo. https://doi.org/10.5281/zenodo.6532057
Wojtek Lukaszuk - “Summary of ‘Clean code’ by Robert C. Martin”: https://gist.github.com/wojteklu/73c6914cc446146b8b533c0988cf8d29
Introduction to GitLab https://carpentries-incubator.github.io/gitlab-novice/index.html
Robert C. Martin - “Clean Code” Most of the code examples shown in the “Clean Code” episode are adapted from examples used in the above book.
Comment Changes in GitLab
The Collaborator has some questions about one line change made by the Owner and has some suggestions to propose.
With GitLab, it is possible to comment on a commit. Over the line of code to comment, a blue comment icon appears to open a comment window. In that window, the Collaborator can post their comments. When a comment is posted, GitLab will inform the author of the commit about it by email, and then the author can address the comment using the same GitLab web interface.