Python Virtual Environments
Last updated on 2025-11-11 | Edit this page
Overview
Questions
- What are virtual environments in software development and why you should use them?
- How can we manage Python virtual environments and external (third-party) libraries?
Objectives
- Understand the problems Python virtual environments help solve
- Set up a Python virtual environment for our software project using
venvandpip. - Managing external packages with
pip - Exporting/Importing Virtual Environments
Introduction
Up to now in this course we have focused on version control and
git. We have seen how these tools provide isolation,
reproducibility, and control over changes at the source code
level.
However a running program is more than just its source code; the environment/OS where it runs, the version of the programming language, as well as the external libraries it is using can also have a significant influence over its results.
In this episode we will pivot away from version control, and start looking at these other “externalities” that influence program behaviour. The goal, as with version control is to provide tools that allow us to control how these “externalities” influence our running programs, and provide the same isolation, reproducibility, and control over changes that version control can provide over our source code.
We will focus our discussion on Python and its tools ecosystem, as this is the language mostly used at QuTech and in the broader scientific community.
In the context of Python, the widely used solution to managing all the externalities mention above is Python virtual environments. For the rest of this episode we will explore ways to use these virtual environments so we can manage our running program “externalities” pretty much the same way we manage its source code via version control and git.
Python Virtual Environments
So what exactly are virtual environments, and why use them?
A Python virtual environment helps us create an isolated working copy of a software project that uses a specific version of Python interpreter together with specific versions of a number of external libraries installed into that virtual environment. Python virtual environments are implemented as directories with a particular structure within software projects, containing links to specified dependencies allowing isolation from other software projects on your machine that may require different versions of Python or external libraries.
As more external libraries are added to your Python project over time, you can add them to its specific virtual environment and avoid a great deal of confusion by having separate (smaller) virtual environments for each project rather than one huge global environment with potential package version clashes. Another big motivator for using virtual environments is that they make sharing your code with others much easier (as we will see shortly). Here are some typical scenarios where the use of virtual environments is highly recommended (almost unavoidable):
- You have an older project that only works under Python 2. You do not have the time to migrate the project to Python 3 or it may not even be possible as some of the third party dependencies are not available under Python 3. You have to start another project under Python 3. The best way to do this on a single machine is to set up two separate Python virtual environments.
- One of your Python 3 projects is locked to use a particular older version of a third party library. You cannot use the latest version of the dependency as it breaks things in your project. In a separate branch of your project, you want to try and fix problems introduced by the new version of the dependency without affecting the working version of your project. You need to set up a separate virtual environment for your branch to ‘isolate’ your code while testing the new feature.
You do not have to worry too much about specific versions of external libraries that your project depends on most of the time. Virtual environments also enable you to always use the latest available version without specifying it explicitly. They also enable you to use a specific older version of a package for your project, should you need to.
A Specific Python or Package Version is Only Ever Installed Once
Note that you will not have a separate Python or package installations for each of your projects - they will only ever be installed once on your system but will be referenced from different virtual environments.
Tools for Managing Python Virtual Environments and External Packages
There are several commonly used command line tools for creating and managing Python virtual environments:
-
venv, available by default from the standardPythondistribution fromPython 3.3+ -
virtualenv, needs to be installed separately but supports bothPython 2.7+andPython 3.3+versions -
pipenv, created to fix certain shortcomings ofvirtualenv -
conda, package and environment management system (also included as part of the Anaconda Python distribution often used by the scientific community) -
poetry, a modern Python packaging tool which handles virtual environments automatically
Part of managing your (virtual) working environment involves installing, updating and removing external packages on your system. Here as well there are plenty of tools and technologies to choose from:
-
pip- the most commonly used Python package manager - it interacts and obtains the packages from the central repository called Python Package Index (PyPI) -
easy_install- a legacy package manager now largely replaced bypip -
pdm- a modern Python package manager that follows the latest Python community guidelines, but doesn’t enforce virtual environments -
uv- a new and very fast Python package manager intended to eventually replacepip condapoetry
Many Tools for the Job
Installing and managing Python distributions, external libraries and
virtual environments is, well, complex. There is an abundance of tools
for each task, each with its advantages and disadvantages, and there are
different ways to achieve the same effect (and even different ways to
install the same tool!). Note that each Python distribution comes with
its own version of pip - and if you have several Python
versions installed you have to be extra careful to use the correct
pip to manage external packages for that Python
version.
For a novice in this area it is very easy to quickly get overwhelmed, leading to situation like this:
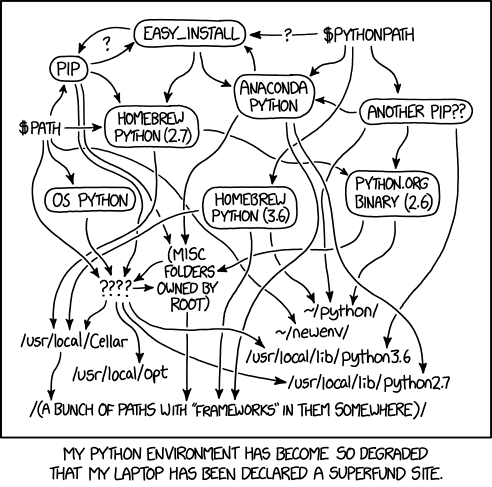
Python Environment Hell
From
XKCD (Creative
Commons Attribution-NonCommercial 2.5 License)
In order to avoid this “Python environment hell” problem, in this
course we will only focus on venv and pip.
Only focusing on these has several advantages, especially for novice
users:
-
venvandpiphave been around for quite a while, they are widely used, are very stable, and there is ample online documentation for both of them. -
venvandpipare quite low-level, and minimalistic, so you do not have to deal with the feature explosion and bloatware that other tools may experience. - finally, many of the more high-level tools use the functionality
provided by
venvandpipas building blocks, so having a good understanding of these provides a solid foundation to expand to more sophisticated tools.
In the next sections we will look at how to use venv and
pip from the command line, similar to the approach we took
when learning git
Python Hangs in Git Bash on Windows
If you are using Windows and invoking python command
causes your Git Bash terminal to hang with no error message or output,
you may have to use winpty - a Windows software package
providing an interface similar to a Unix pty-master for communicating
with Windows command line tools. Inside the shell type:
This alias will be valid for the duration of the shell session. For a more permanent solution, from the shell do:
A Motivating Example
For the rest of this episode, we will use the following (simple) Python program as a motivation on where virtual environments may be useful:
PYTHON
import numpy as np
import matplotlib.pyplot as plt
from dateutil import parser
from datetime import timedelta

# Generate time data using python-dateutil and timedelta
start_time = parser.parse("2025-01-01T00:00:00")
time_steps = [start_time + timedelta(minutes=10 * i) for i in range(100)]
time_values = [t.strftime("%Y-%m-%d %H:%M:%S") for t in time_steps]

print(f"Plotting a sine wave starting at {start_time} in 100 steps of 10 minutes")

# Create the sine wave data using numpy
x_values = np.linspace(0, 10 * np.pi, 100)  # 100 points from 0 to 10*pi
y_values = np.sin(x_values)

# Plot the data
plt.figure(figsize=(10, 6))
plt.plot(time_values, y_values, label="Sine Wave")
tick_step = 10
plt.xticks(range(0, len(time_values), tick_step), time_values[::tick_step], rotation=45)

plt.xlabel("Time")
plt.ylabel("Sine Value")
plt.title("Sine Wave Over Time")
plt.grid(True)
plt.tight_layout()
plt.legend()
plt.show()
On your system, create a new directory sine_wave, and copy the above code in a file plot_sine_wave.py. We want to see what happens if we try to run this program on a system where Python has just been installed, and for this, we will create a new Python virtual environment.
Creating Virtual Environments Using venv
Creating a virtual environment with venv is done by
executing the following command:
In Windows (GitBash), you can do the same with the following command:
where /path/to/new/virtual/environment is a path to a
directory where you want to place it - conventionally within your
software project so they are co-located. This will create the target
directory for the virtual environment (and any parent directories that
don’t exist already).
What is -m Flag in
python Command?
The Python -m flag means “module” and tells the Python
interpreter to treat what follows -m as the name of a
module and not as a single, executable program with the same name. Some
modules (such as venv or pip) have main entry
points and the -m flag can be used to invoke them on the
command line via the python command. The main difference
between running such modules as standalone programs (e.g. executing
“venv” by running the venv command directly) versus using
python -m command is that with the latter you are in full
control of which Python module will be invoked (the one that came with
your environment’s Python interpreter vs. some other version you may
have on your system). This makes it a more reliable way to set things up
correctly and avoid issues that could prove difficult to trace and
debug.
For our project let us create a virtual environment called “venv”. First, ensure you are within the project root directory (sine_wave), then:
If you list the contents of the newly created directory “venv”, on a Mac or Linux system (slightly different on Windows as explained below) you should see something like:
OUTPUT
total 8
drwxr-xr-x  12 alex  staff  384  5 Oct 11:47 bin
drwxr-xr-x   2 alex  staff   64  5 Oct 11:47 include
drwxr-xr-x   3 alex  staff   96  5 Oct 11:47 lib
-rw-r--r--   1 alex  staff   90  5 Oct 11:47 pyvenv.cfg
So, running the python -m venv venv command created the
target directory called “venv” containing:
-
pyvenv.cfgconfiguration file with a home key pointing to the Python installation from which the command was run, -
binsubdirectory (calledScriptson Windows) containing a symlink of the Python interpreter binary used to create the environment and the standard Python library, -
lib/pythonX.Y/site-packagessubdirectory (calledLib\site-packageson Windows) to contain its own independent set of installed Python packages isolated from other projects, and - various other configuration and supporting files and subdirectories.
Naming Virtual Environments
What is a good name to use for a virtual environment?
Using “venv” or “.venv” as the name for an environment and storing it within the project’s directory seems to be the recommended way - this way when you come across such a subdirectory within a software project, by convention you know it contains its virtual environment details.
A slight downside is that all different virtual environments on your machine then use the same name and the current one is determined by the context of the path you are currently located in. A (non-conventional) alternative is to use your project name for the name of the virtual environment, with the downside that there is nothing to indicate that such a directory contains a virtual environment.
For this episode we will use the name “venv” instead of “.venv” since it is not a hidden directory and we want it to be displayed by the command line when listing directory contents. In the future, you should decide what naming convention works best for you. Here are some references for each of the naming conventions:
- The Hitchhiker’s Guide to Python notes that “venv” is the general convention used globally
- The Python Documentation indicates that “.venv” is common
- “venv” vs “.venv” discussion
Once you’ve created a virtual environment, you will need to activate it.
On Mac or Linux, it is done as:
On Windows, recall that we have Scripts directory
instead of bin and activating a virtual environment is done
as:
Activating the virtual environment will change your command line’s prompt to show what virtual environment you are currently using (indicated by its name in round brackets at the start of the prompt), and modify the environment so that running Python will get you the particular version of Python configured in your virtual environment.
You can now verify you are using your virtual environment’s version of Python:
OUTPUT
Python 3.12.9When you’re done working on your project, you can exit the environment with:
If you have just done the deactivate, ensure you
reactivate the environment ready for the next part:
Python Within A Virtual Environment
Within an active virtual environment, commands like
python3 and python should both refer to the
version of Python 3 you created the environment with (note you may have
multiple Python 3 versions installed).
However, on some machines with Python 2 installed,
python command may still be hardwired to the copy of Python
2 installed outside of the virtual environment - this can cause errors
and confusion.
To make it even more confusing, python3 may also not
work on newer versions of Windows (where Python 2 is deemed obsolete -
hence python deemed to be sufficient)
You can always check which version of Python you are using in your
virtual environment with the command which python to be
absolutely sure. We will be using python in this material
since this should work on most modern systems, but if this points to
Python 2 on your system you may have to use python3.
Installing External Packages Using pip
Now that we have a virtual environment, let us try to run the plot_sine_wave.py program:
OUTPUT
Traceback (most recent call last):
  File "C:\projects\programming_course\sine_wave\plot_sine_wave.py", line 1, in <module>
    import numpy as np
ModuleNotFoundError: No module named 'numpy'
As we can see in the code (‘includes’), our code depends on a number
of external libraries - numpy, matplotlib, and
python-dateutil. In order for the code to run on your
machine, you need to install these three dependencies into your virtual
environment.
To install the latest version of a package with pip you
use pip’s install command and specify the package’s name,
e.g.:
BASH
(venv) $ python -m pip install numpy
(venv) $ python -m pip install matplotlib
(venv) $ python -m pip install python-dateutil
or like this to install multiple packages at once for short:
How About
pip install <package-name> Command?
You may have seen or used the
pip install <package-name> command in the past, which
is shorter and perhaps more intuitive than
python -m pip install. However, the official
Pip documentation recommends python -m pip install and
core Python developer Brett Cannon offers a more detailed
explanation of edge cases when the two commands may produce
different results and why python -m pip install is
recommended. In this material, we will use python -m
whenever we have to invoke a Python module from command line.
If you run the python -m pip install command on a
package that is already installed, pip will notice this and
do nothing.
To display information about a particular installed package do:
OUTPUT
Name: numpy
Version: 2.2.3
Summary: Fundamental package for array computing in Python
Home-page:
Author: Travis E. Oliphant et al.
Author-email:
License: Copyright (c) 2005-2024, NumPy Developers.
 All rights reserved.
...
pip install Flags
pip install allows you to precisely control the version
of the library it will install through its command flags. Some of the
most commonly-used flags are shown here:
- To install a specific version of a Python package give the package
name followed by
==and the version number, e.g.python -m pip install numpy==2.2.3. - To specify a minimum version of a Python package, you can do
python -m pip install numpy>=1.20. - To upgrade a package to the latest version,
e.g.
python3 -m pip install --upgrade numpy.
Once packages have been installed, it is often useful to get an
overview of everything present in a virtual environment. For this,
pip provides a handy command called list:
OUTPUT
Package         Version
--------------- -----------
contourpy       1.3.1
cycler          0.12.1
fonttools       4.55.3
kiwisolver      1.4.8
matplotlib      3.10.0
numpy           2.2.1
packaging       24.2
pillow          11.1.0
pip             23.2.1
pyparsing       3.2.1
python-dateutil 2.9.0.post0
six             1.17.0
Finally, installed packages can be un-installed using the
uninstall command:
python -m pip uninstall <package-name>. You can also
supply a list of packages to uninstall at the same time.
Practice various pip
operations
For this challenge create a new virtual environment
venv-scratch on your working directory
- Activate the new virtual environment
- Install numpy version 1.0.3
- Upgrade numpy to version 1.6.1
- Upgrade numpy to version 1.26.1
- Upgrade numpy to version 1.26.3
- Upgrade numpy to the latest version
- Uninstall numpy from
venv-scratch - Remove the
venv-scratchvirtual environment
- Numpy version 1.0.3 does not exist - when you try to install it
pipwill give an error message This shows you thatpipis robust - it will not mess up if you try to uninstall non-existing package versions. - Numpy version 1.6.1 does exist, but it will not install
with the Python 3.12 version that you are using.
pipwill attempt the installation, and fail in the process. This again shows thatpipis robust even when it fails in the middle of an installation it is able to successfully rollback. -
python -m pip install numpy==1.26.1- should succeed -
python -m pip install numpy==1.26.3- should succeed -
python -m pip install --upgrade numpy- should succeed - and upgrade numpy to its latest version (2.2.3) -
python -m pip uninstall numpy- should succeed - removing a Python virtual environment is as easy as removing its root folder, so:
Exporting/Importing Virtual Environments Using pip
You are collaborating on a project with a team so, naturally, you
will want to share your environment with your collaborators so they can
easily ‘clone’ your software project with all of its dependencies and
everyone can replicate equivalent virtual environments on their
machines. pip has a handy way of exporting, saving and
sharing virtual environments.
To export your active environment - use
python3 -m pip freeze command to produce a list of packages
installed in the virtual environment. A common convention is to put this
list in a requirements.txt file:
OUTPUT
contourpy==1.3.1
cycler==0.12.1
fonttools==4.55.3
kiwisolver==1.4.8
matplotlib==3.10.0
numpy==2.2.1
packaging==24.2
pillow==11.1.0
pyparsing==3.2.1
python-dateutil==2.9.0.post0
six==1.17.0
The first of the above commands will create a
requirements.txt file in your current directory. Yours may
look a little different, depending on the version of the packages you
have installed, as well as any differences in the packages that they
themselves use.
The requirements.txt file can then be added/committed to
the Git repo for your project and get shipped as part of your software
and shared with collaborators and/or users.
To see how this requirements.txt can be used to
re-create a virtual environment, let us practice creating an identical
copy of our first virtual environment in a different directory. Let us
first create a new virtual environment - venv_copy - like
this:
BASH
$ deactivate
$ cd ..
$ mkdir venv_copy
$ cd venv_copy
$ python -m venv venv_copy
$ source venv_copy/bin/activate
(venv_copy) $
They can then replicate your original environment and install all the
original packages by first copying the requirements.txt to
the new virtual environment root directory, and then running a version
of the pip install command:
As your project grows - you may need to update your environment for a
variety of reasons. For example, one of your project’s dependencies has
just released a new version (dependency version number update), you need
an additional package for data analysis (adding a new dependency) or you
have found a better package and no longer need the older package (adding
a new and removing an old dependency). What you need to do in this case
(apart from installing the new and removing the packages that are no
longer needed from your virtual environment) is update the contents of
the requirements.txt file accordingly by re-issuing
pip freeze command and propagate the updated
requirements.txt file to your collaborators via your code
sharing platform (e.g. GitLab).
Official Documentation
For a full list of options and commands, consult the official
venv documentation and the Installing
Python Modules with pip guide. Also check out the guide
“Installing
packages using pip and virtual environments”.
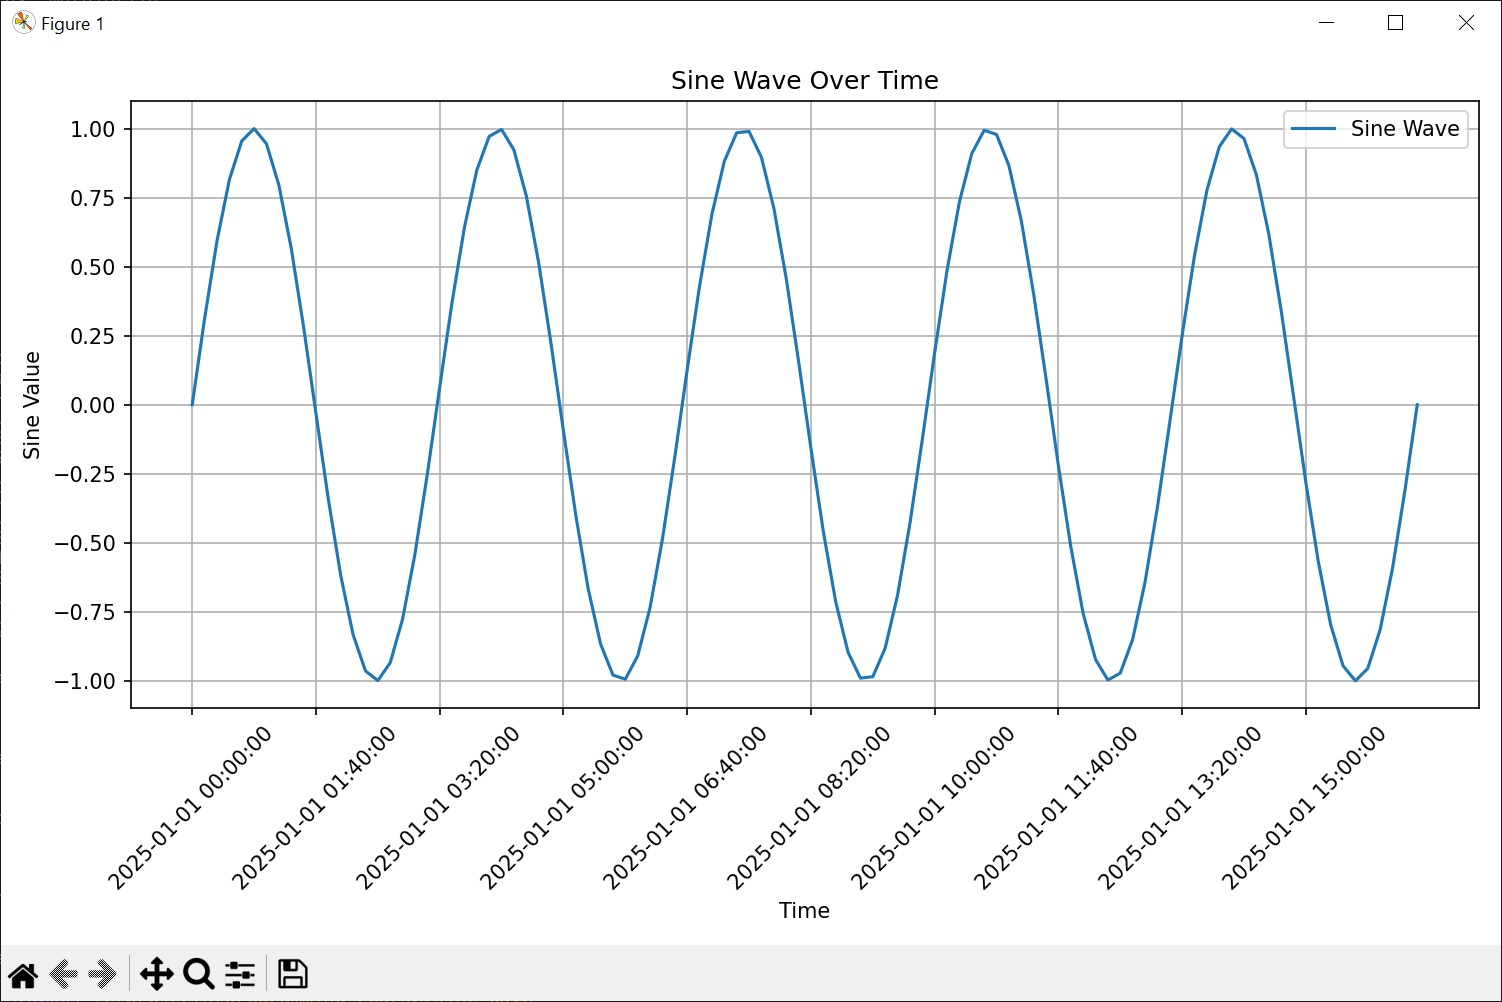
Putting it All Together
Congratulations! Your environment is now activated and set up to run
our plot_sine_wave.py program from the command line.
You should already be located in the root of the
sine_wave directory (if not, please navigate to it from the
command line now). When you run this program from the command line:
You should now see the following plot:
Multiple Python versions on the same machine
Using virtual environments it is very easy to manage multiple Python versions on the same machine. As a challenge, install Python 3.5 on your system, and create a virtual environment specifically for it. Then try to run plot_sine_wave.py in this new environment. Does it work? Modify the program so it does.
- “Virtual environments keep Python versions and dependencies required by different projects separate.”
- “A virtual environment is itself a directory structure.”
- “Use
venvto create and manage Python virtual environments.” - “Use
pipto install and manage Python external (third-party) libraries.” - “
pipallows you to declare all dependencies for a project in a separate file (by convention calledrequirements.txt) which can be shared with collaborators/users and used to replicate a virtual environment.” - “Use
python -m pip freeze > requirements.txtto take snapshot of your project’s dependencies.” - “Use
python -m pip install -r requirements.txtto replicate someone else’s virtual environment on your machine from therequirements.txtfile.”